Coconut Snowballs: ‘Snowcone’ Homemade Christmas Candy Gift
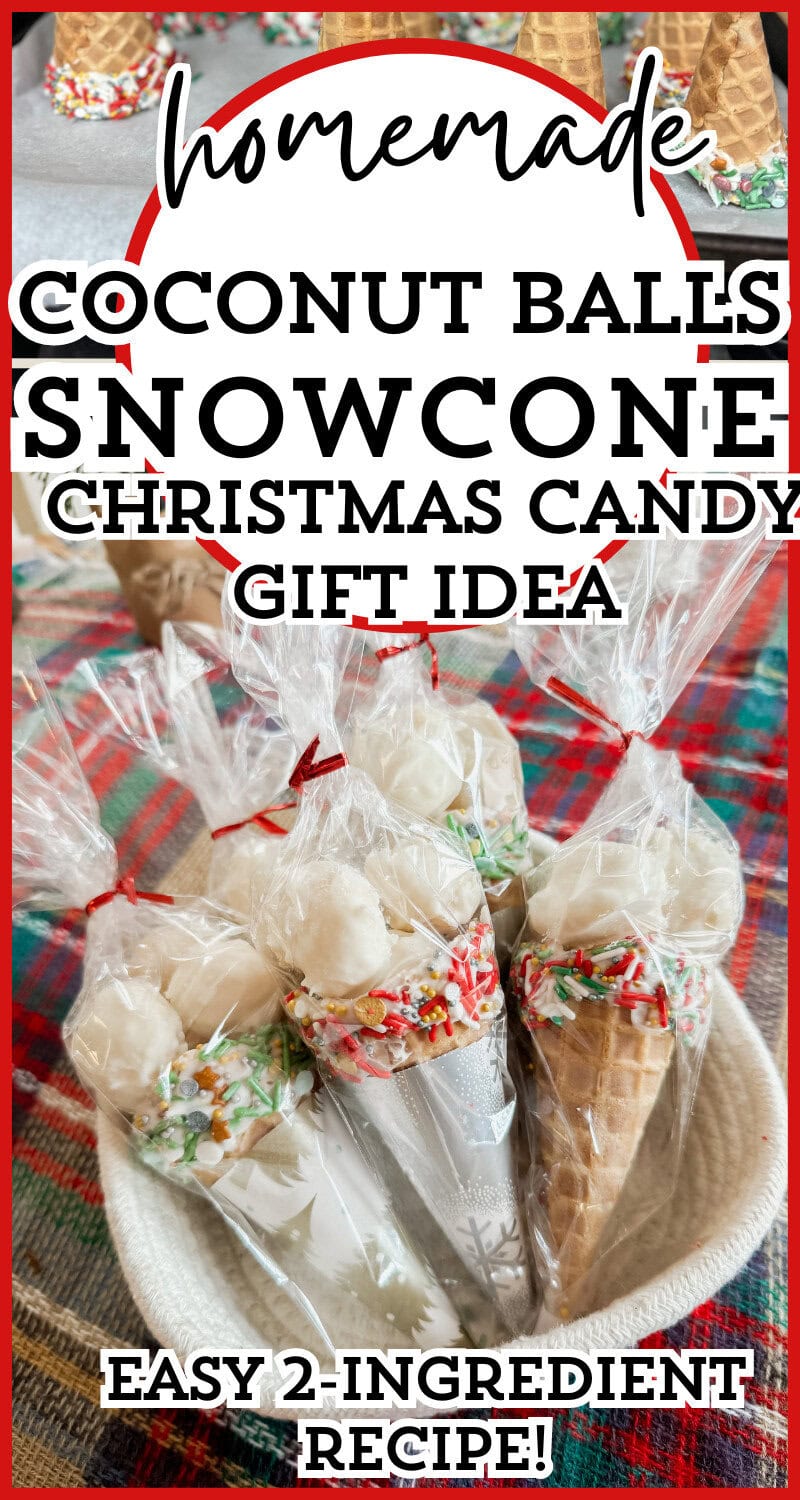
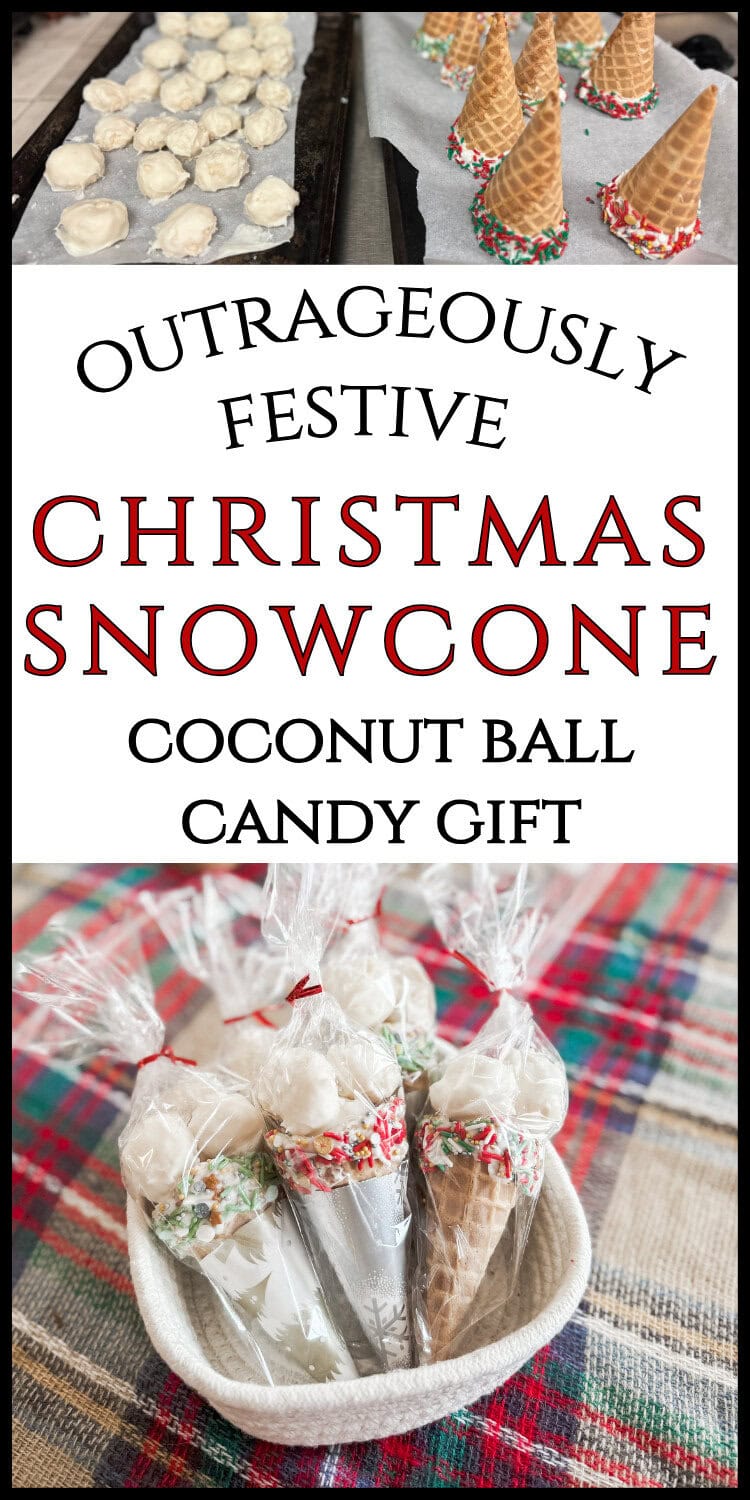
Are you looking for a creative homemade Christmas candy gift? Not only does this one taste amazing, but it looks so festive! Learn how to make these delicious 2-ingredient coconut ‘snowballs’ for a wonderful snowcone Christmas candy gift as well as grab free printable coordinating gift tags!
A Thoughtful, Homemade Christmas Gift Idea
It can be hard to come up with just the right gifts for those important people… teachers, co-workers, neighbors, service workers. You know, the gifts you need to come up with in bulk.
How do you land on something that will appeal to most?
It’s tough, and I’ve had that struggle for many years!
For past Christmas seasons, I’ve tried many different ideas. I’ve gifted DIY Christmas stovetop potpourri in a jar, Christmas Nativity Trail Mix, Christmas Luminary Jars…
You want it to be something thoughtful, to show you put effort into it – and that’s where I think homemade gifts are still something special and very appreciated.
I generally like the idea of consumable gifts because I feel like the last thing people want is just more stuff that they don’t have use for, but will feel guilty for wanting to move along – either through re-gifting, donating – or, let’s be honest.
Sometimes they end up in the trash.
Today, I’m sharing a gift that I think will be a real crowd-pleaser – and you can get a lot of bang for your buck: these adorable Christmas ‘snowcones’ – filled with coconut snowball candy.

Homemade Coconut Snowballs to Create Christmas Snowcone DIY Candy Gift
This post contains affiliate links. See Disclosures for details.
Let’s talk through what you need for this gift.
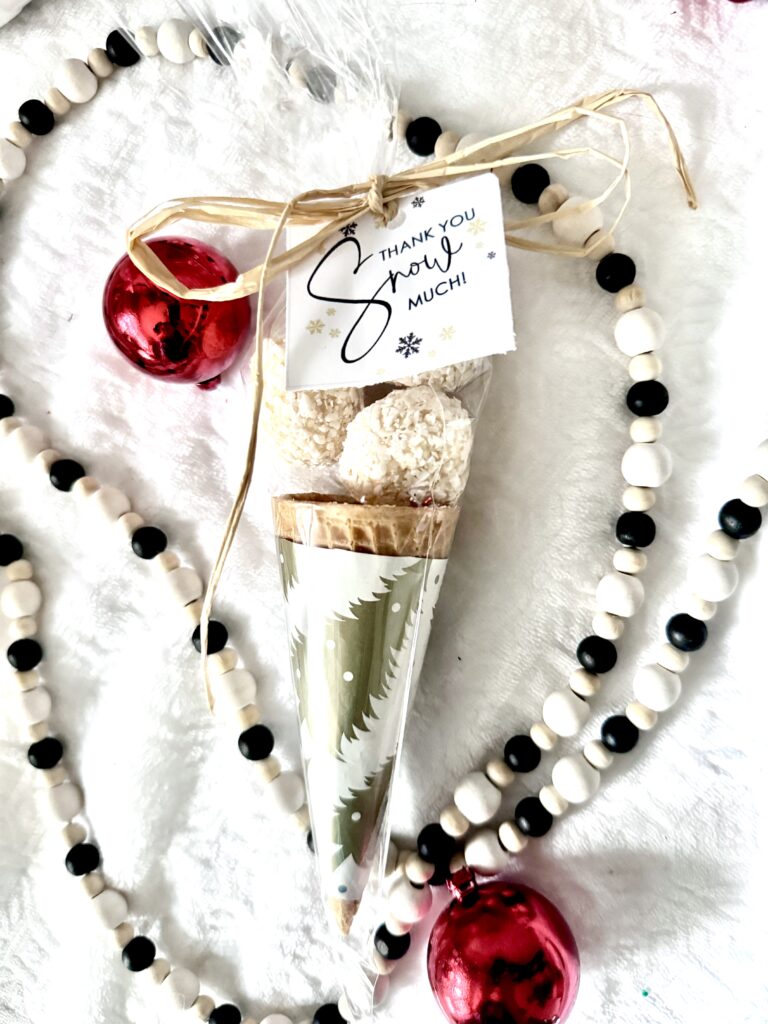
The idea is that you are going to stack coconut snowballs inside an ice cream cone, to make it look like a snow cone.
I admit, I’m a sucker for Christmas themed treats and candy.
I especially like this idea because not only it is aesthetically adorable, but it’s something different than the standard Christmas fudge or Christmas cookies (although there’s nothing wrong with those either!).
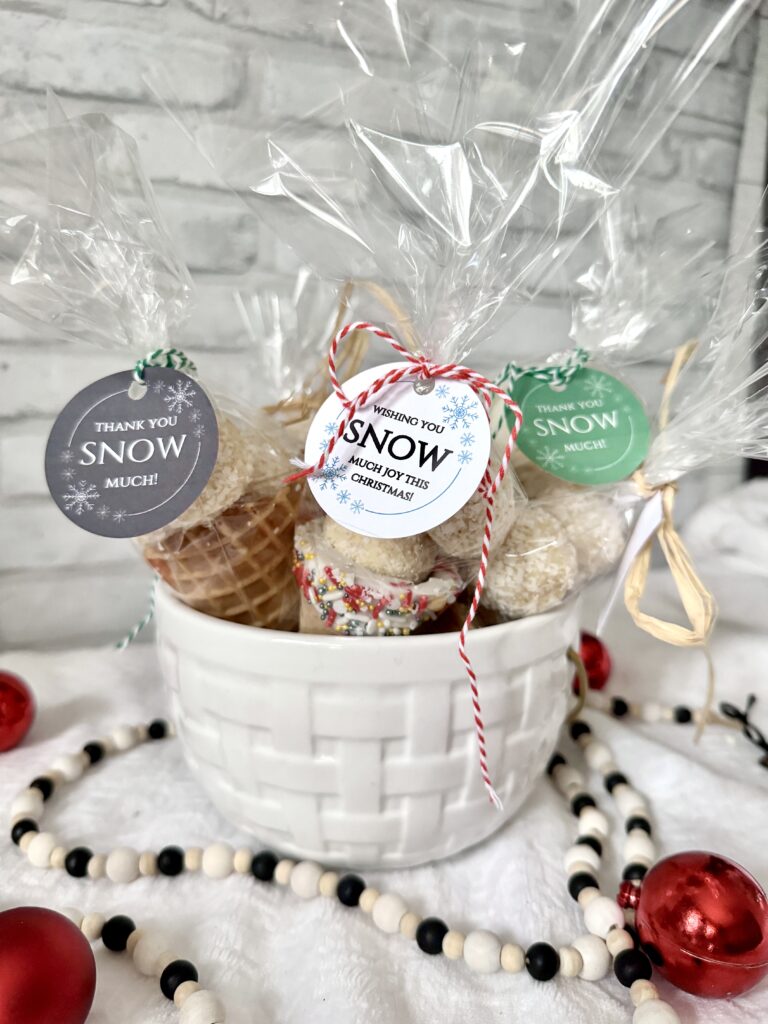
Various Ways to Create Snowcones
There are 3 parts to creating this gift: the coconut balls, the cones, and then the gift wrapping & tags. And there are various ways you can do this. You can do this very simple, which is especially good for a last-minute gift. Or you can really put in a little extra time and effort.
As you can see, this gift consists of an ice cream cone dipped in almond bark and drizzled with sprinkles, the coconut balls themselves (with or without an almond bark coating), and the cone wrapper.
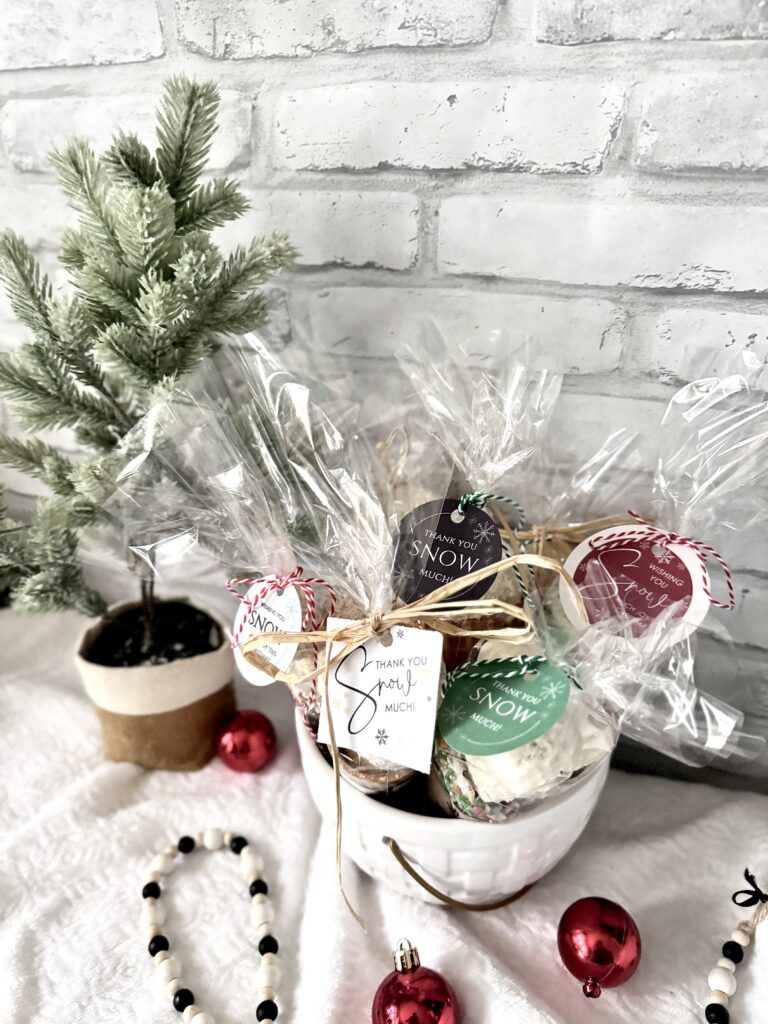
If you are in a hurry, you can keep this simple and entirely skip the almond bark. Just create the coconut ball with 2 ingredients, place them in an ice cream cone (no bark and no wrapper), and then place in cellophane cone. That’s the simplest.
The most involved process would include the almond bark on the cones, the almond bark on top of the coconut balls, and a cone wrapper.
You can also do anything in between – skip the almond bark but use the cone wrapper; use the almond bark on the cone only and skip the wrapper.
It’s really up to you. But I’ll talk you through each of the variations after we go through the process.
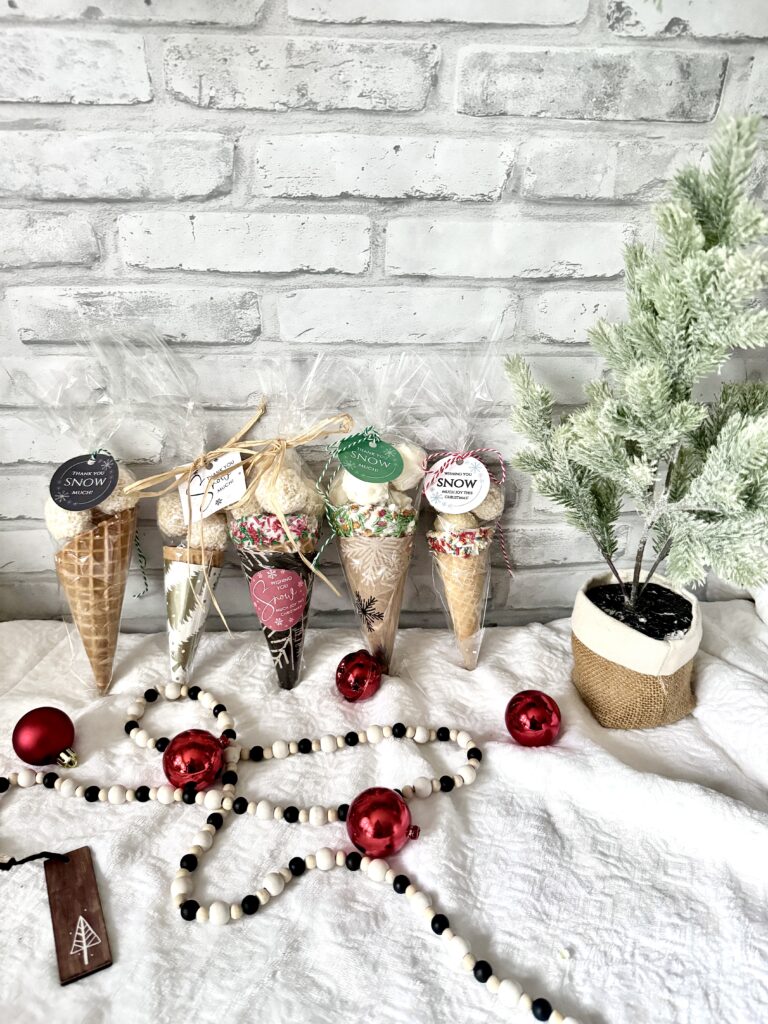
Instructions to Create Coconut Snowball Snowcones
Here’s everything you need to create this gift:
Coconut balls:
- 14 oz desiccated coconut or 14 oz. unsweetened coconut flakes in the food processor (+ extra for rolling – about 3-4 oz.)
- 1 14 oz. can sweetened condensed milk
- almond bark, 24 oz, bar (optional for this part)
Cones:
- Box of ice cream cones** (waffle or standard sugar cones)
- Almond bark, melted (you can use the same bark as you did for the coconut balls)
- Christmas colored sprinkles
Wrapping:
- Christmas paper (wrapping paper, kraft paper, scrapbook paper)
- Cellophane cone bags
- Sharpie or pencil
- Scotch tape
- Cone template
- Baker’s twine, ribbon, or raffia
- Circle punch
- Avery Labels, 22612 (optional)
Other Items
- Plastic service gloves
- Melon baller (1 TBS size)
- Parchment paper
**If you need to create lots of gifts, you can use standard size sugar ice cream cones; the coconut balls will go much further that way. If you only have a handful of gifts to make, you may want to use waffle cones and really fill them up good! Note – if using standard sugar cones, you may want to roll the snowballs a little smaller.
Coconut Snowballs Recipe
So let’s first start with the coconut snowballs.
This generally is a very easy recipe, though it can be a little messy.
1| First, spread a piece of parchment paper on a cookie sheet.
2| Then, empty the contents of the bag of coconut into a medium- large bowl. If your coconut isn’t desiccated, you can pulse it in a food processor, so it is more finely ground.
3| Then, pour the sweetened condensed milk into the bowl.
4| Mix both ingredients together until fully combined.
5| Using a melon ball scooper (about a tablespoon), scoop a ball of the coconut mixture and roll into balls (using plastic gloves can help!). Make the balls a little smaller if you’re filling standard size sugar cones rather than waffle cones.
***This will yield approximately 36-40 coconut balls.
At this point, you have two options.
Option 1
Place extra coconut on a plate or in a shallow bowl. Take your coconut balls, roll them in the extra coconut, place balls on a parchment paper on a baking sheet and refrigerate for about 1/2 hour.
***However, if you want a really white-colored ‘snowball’, you can also coat your coconut ball in melted almond bark. This will give it a more ‘pure white’ snowball color, where the snowballs coated in coconut can have more of a yellowy-creamy color, due to being able to see the sweetened condensed milk through the coating.
If you want to coat your coconut balls in almond bark, continue to the next step. That’s option 2.
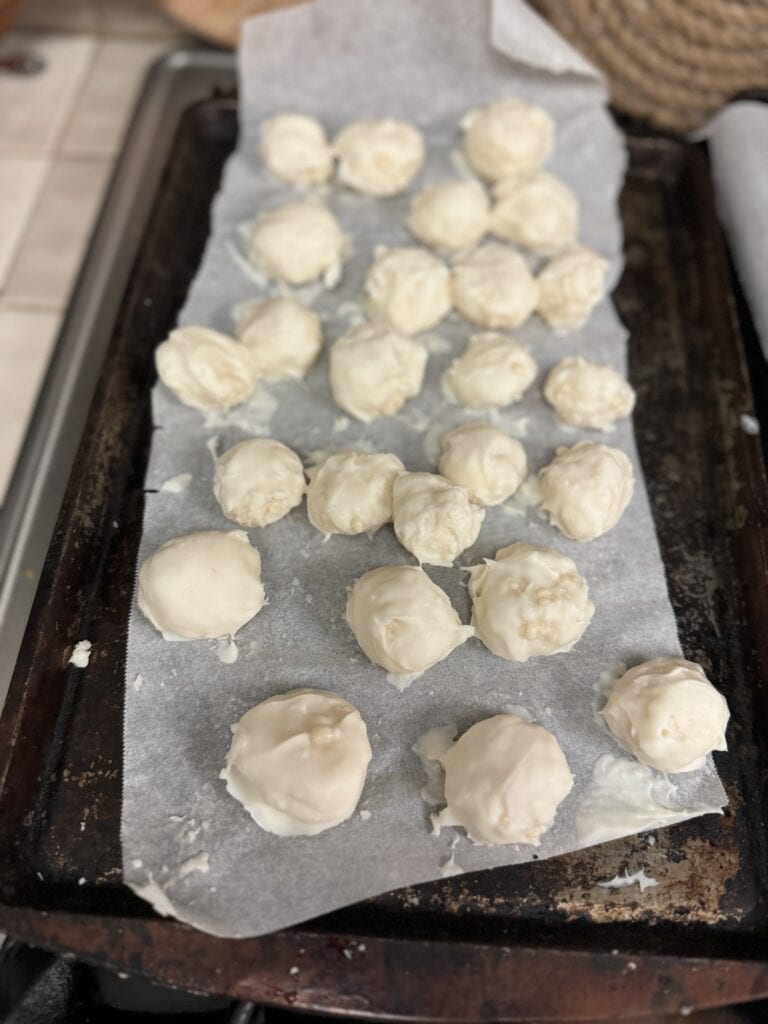
Option 2
Once you create your coconut balls, place on the parchment paper and refrigerate while you prepare the next step.
While the coconut balls are chilling, break off 3 chunks of almond bark and melt in the microwave in 30-60 second increments, stirring in between. You may need more almond bark, depending on how many cones & balls you’re coating.
As you are getting to the point where it is almost melted, shorten the increments to about 10-15 seconds. Keep an eye on it so it doesn’t burn.
A lot of times, as you get toward the point where it’s almost fully melted, just by stirring, you can get rid of the solid pieces.
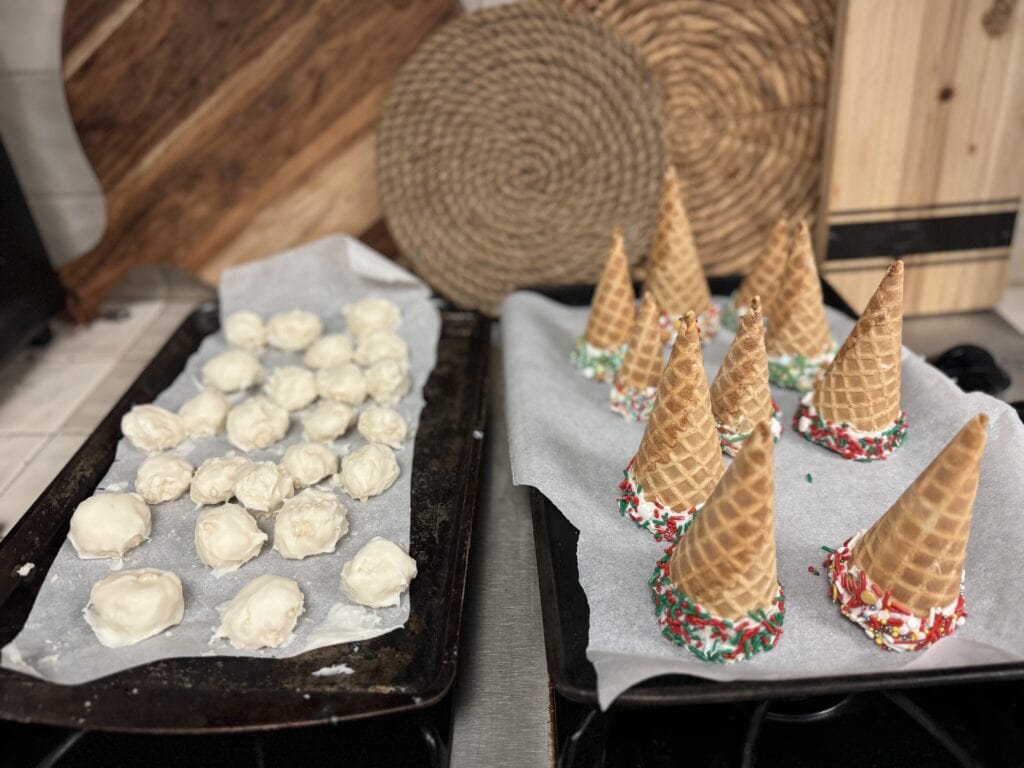
Once the almond bark is melted, take the coconut balls from the refrigerator and roll them in the almond bark. Return the balls to the parchment paper and let dry.
If the almond bark starts to harden while you are rolling your coconut balls, you can microwave it again for a few seconds to melt again.
If the almond bark is too thick to roll the balls, add a little bit of vegetable oil or other shortening until it’s to your desired consistency.
Creating the Cones
***If you need more melted almond bark for the cones or if you didn’t melt almond bark for the coconut balls but you want it for the cones, see above process.
Once you are done with the coconut balls, stand your cone up in the dish or bowl, and with a spoon helping the process, spin your cone in the almond bark to create a white edge to the cone. The spoon will help fully coat the top and create an even line.
This process is a little trickier with waffle cones as it has an angled edge.
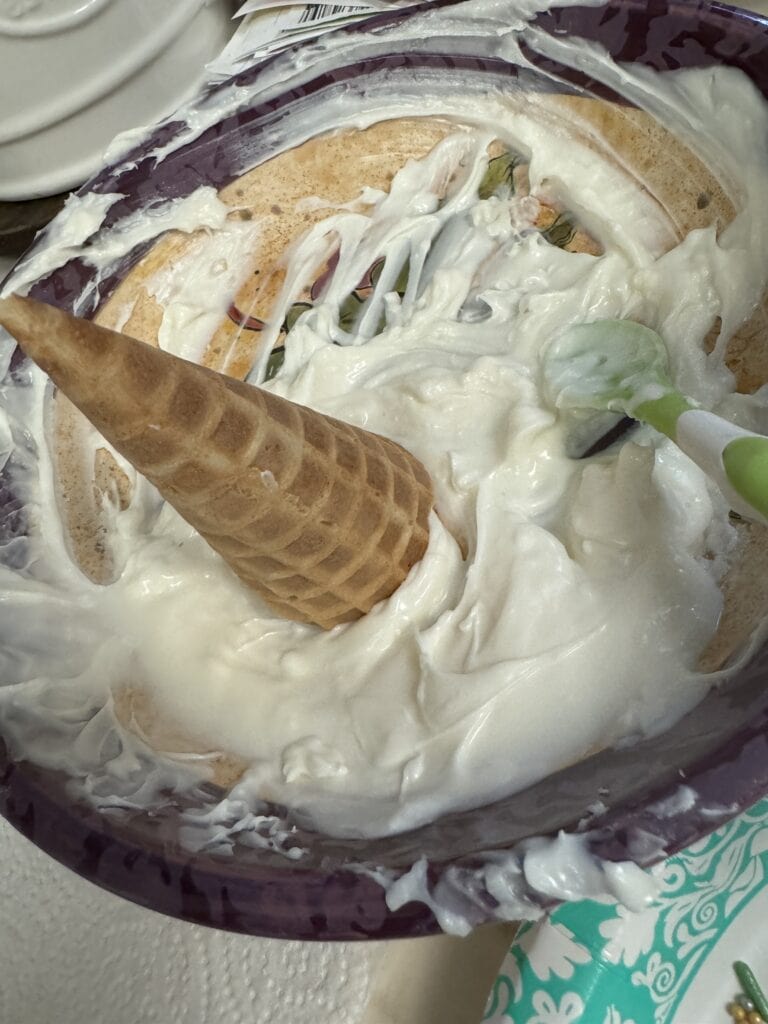
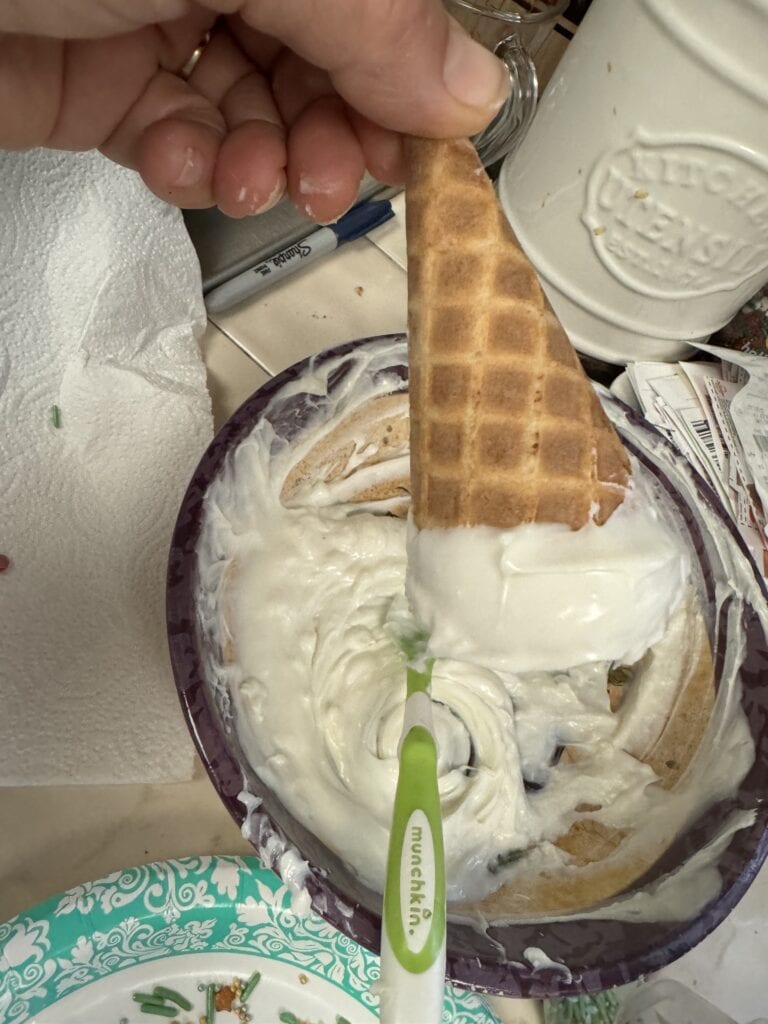
Once coated in almond bark, drizzle Christmas sprinkles over the bark while turning it and then set upside down to dry.
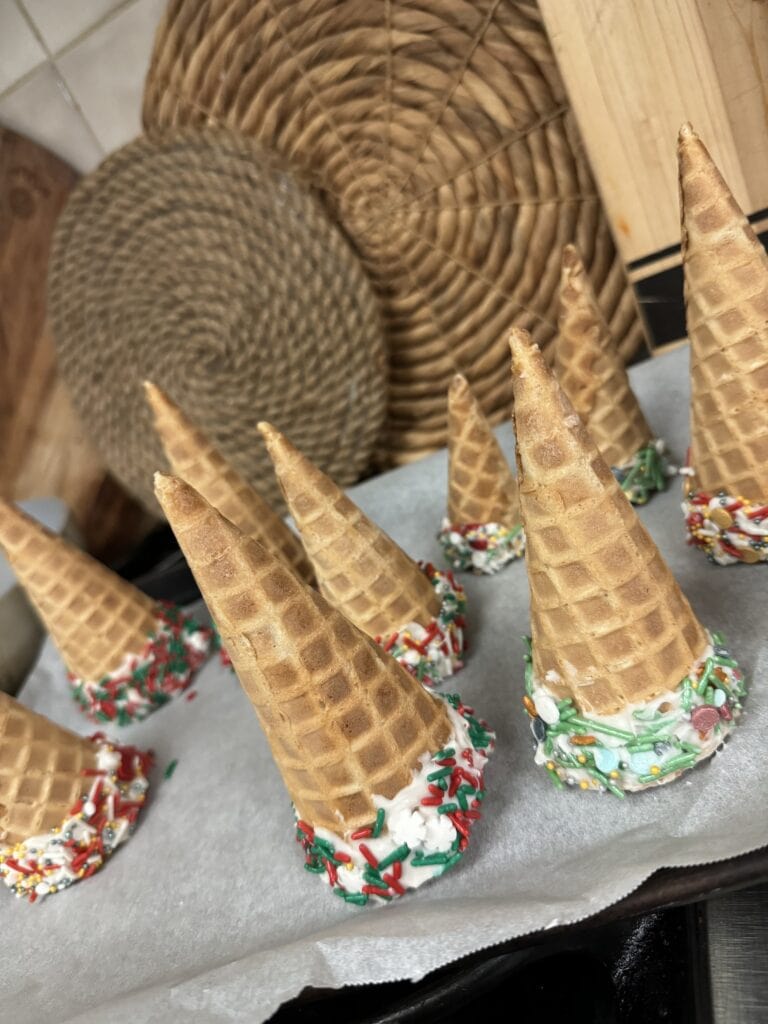
Creating the Wrapping
While the candy and cones are drying, you can work on the wrapping.
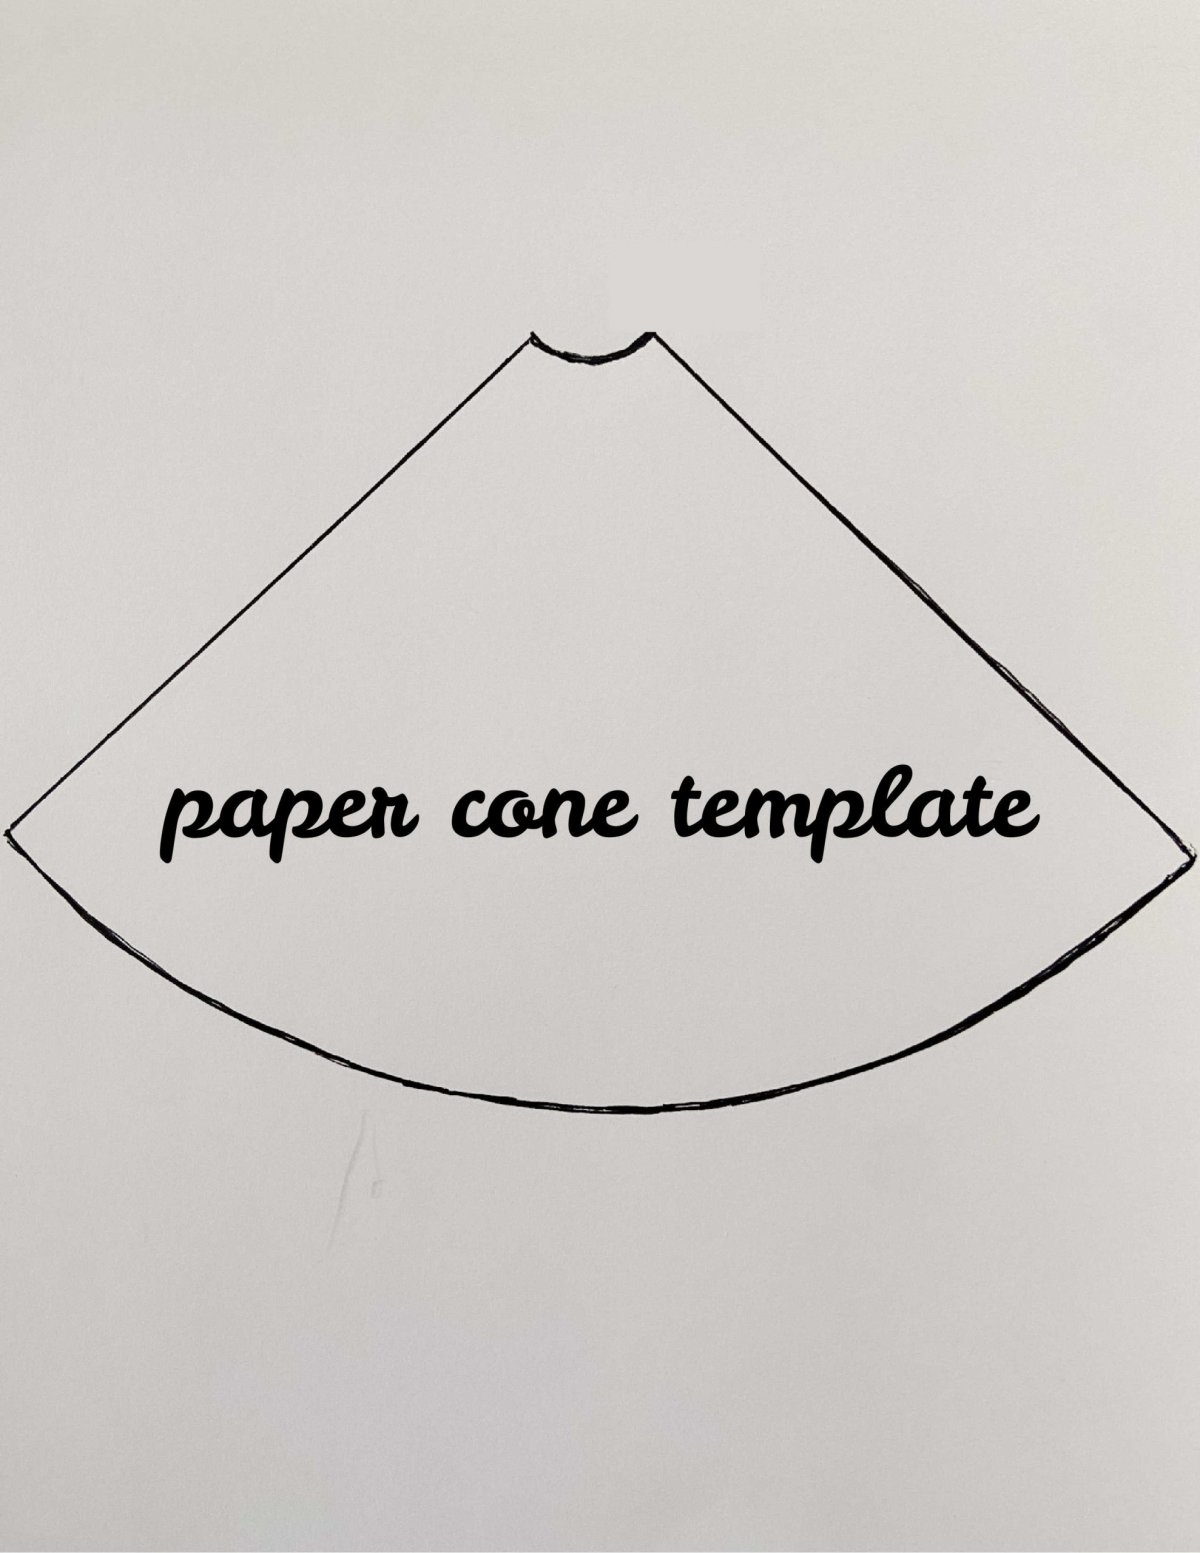
You can either create a cone template freehand or print out a cone template like this one (courtesy of Tatertots and Jello).
Be sure to measure the first one and fit it to your cone. You may need to trim it a little bit, so it fits the cone but leaves the top of the cone exposed.
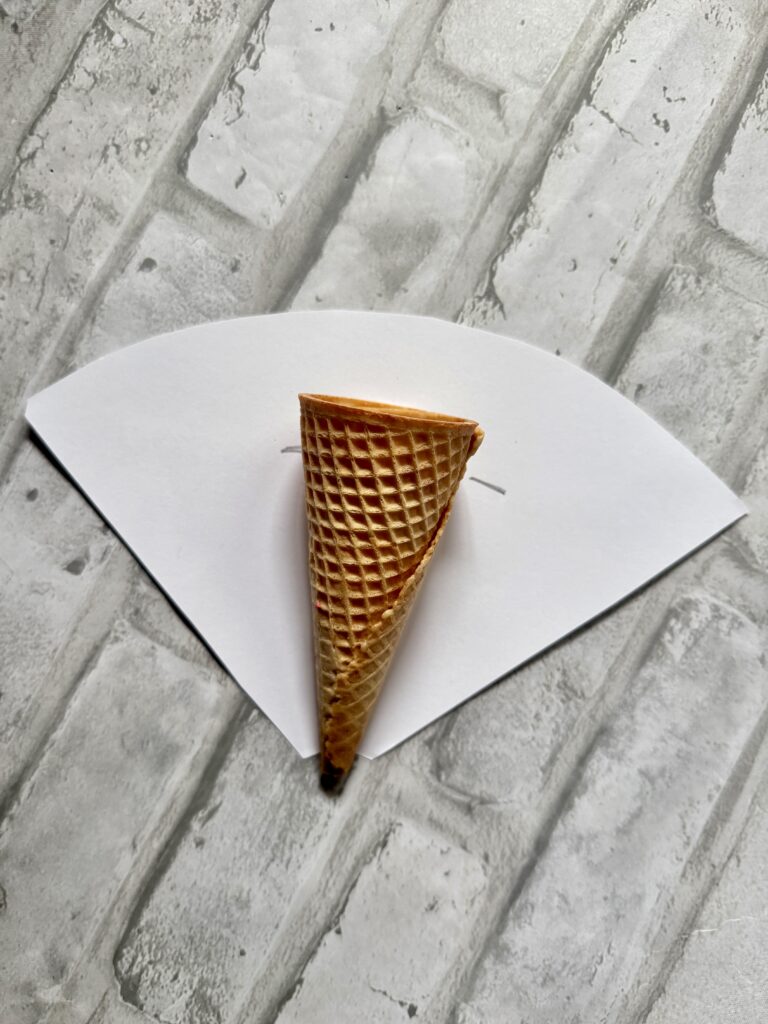
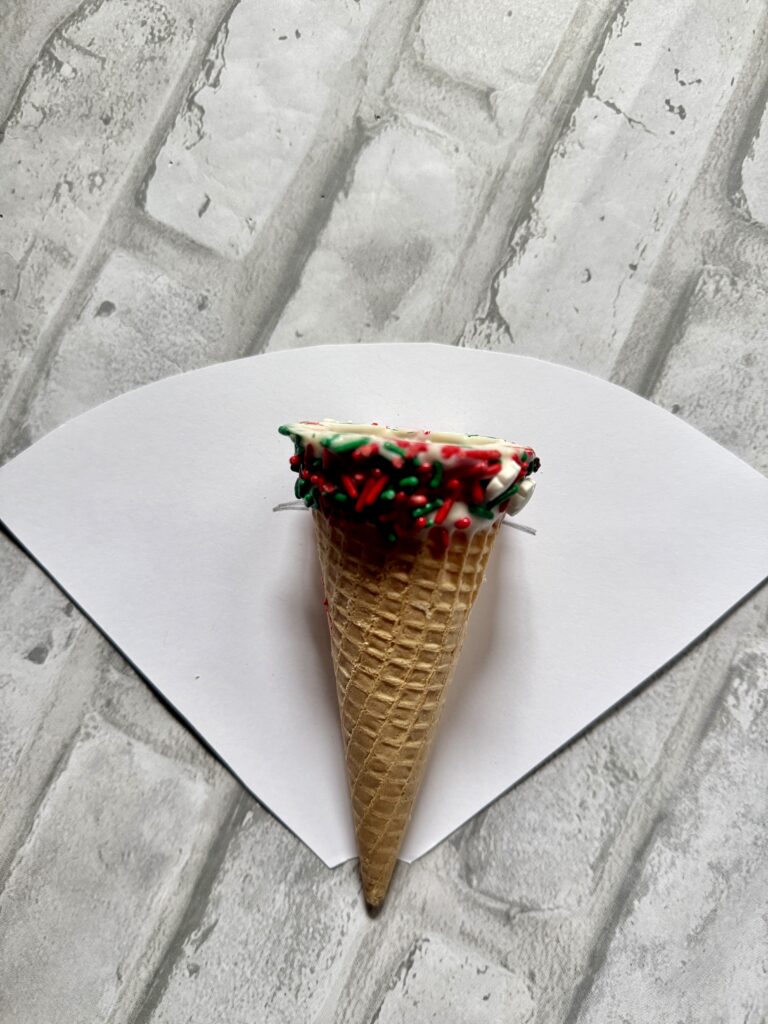
Once you’ve found the right size for your cone, use THAT as your template for all the cones.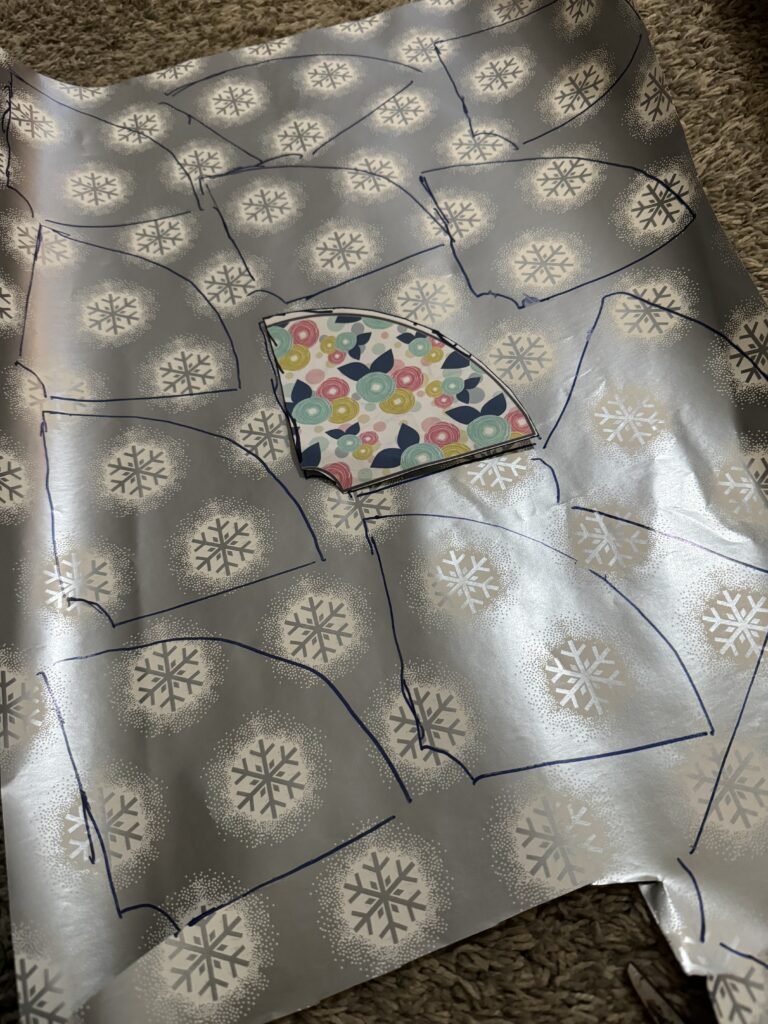
Trace the template on the paper and cut out your cone wrappers.
After your cones dry, wrap them in the Christmas paper and tape closed.
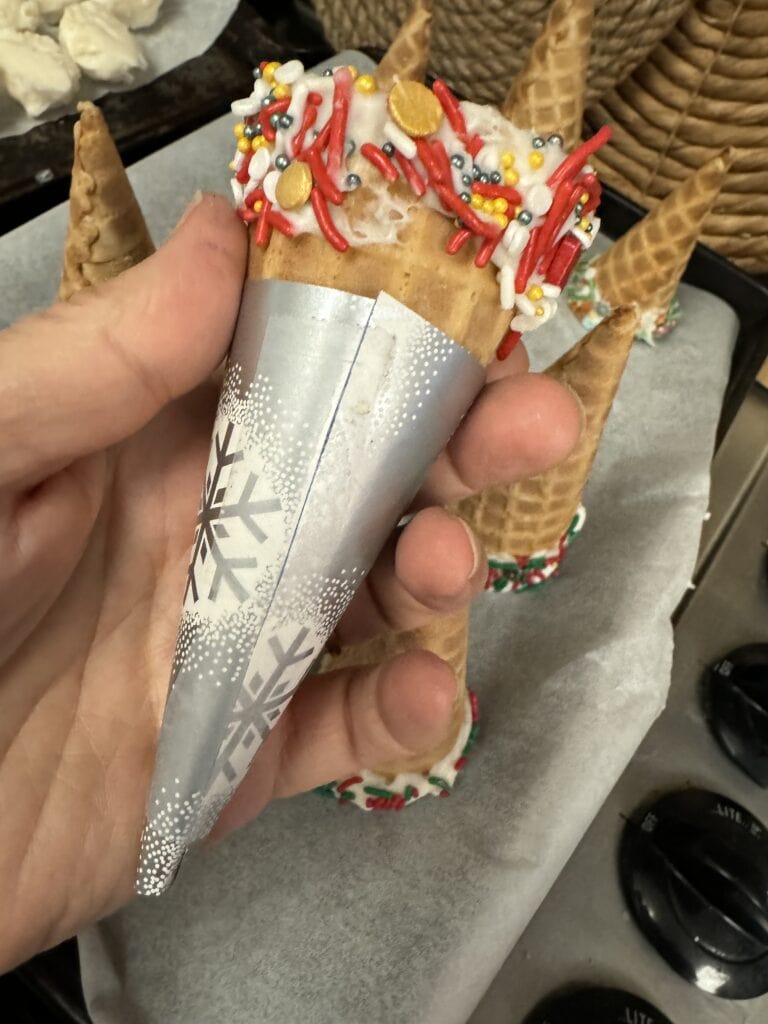
Place the cones in the cellophane bags first, and then fill the cones with the snowballs.
The regular sugar size cones will take about 4 snowballs, depending on the size. Waffle cones will take about 5-7 snowballs.
**This recipe should allow you to fill anywhere 6-10 cones, depending on if you use waffle cones or small cones, and how big or small you make the snowballs.
Once they are filled, use a twist tie, baker’s twine, ribbon, or raffia to secure the top along with a cute, coordinating gift tag (keep reading until the end to see how you can get the whole gift tag bundle for free!).
Various Versions of the Coconut Snowball Snowcone
OK, as promised, let me break down the various ways you can create it, from simplest to most complex.
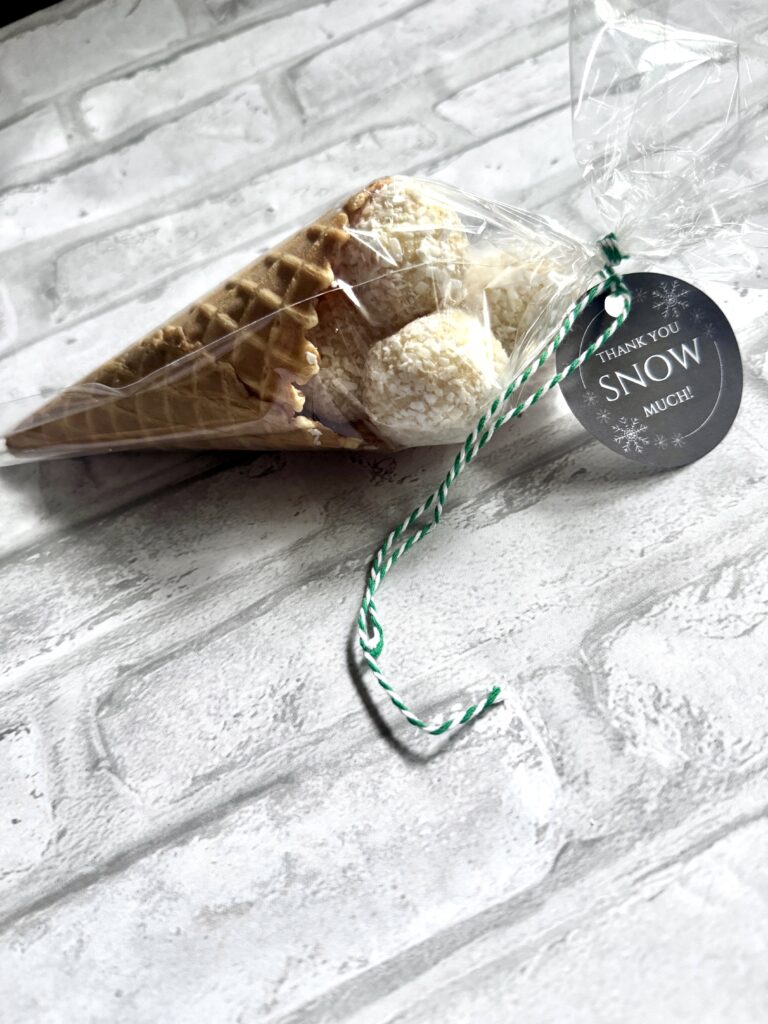
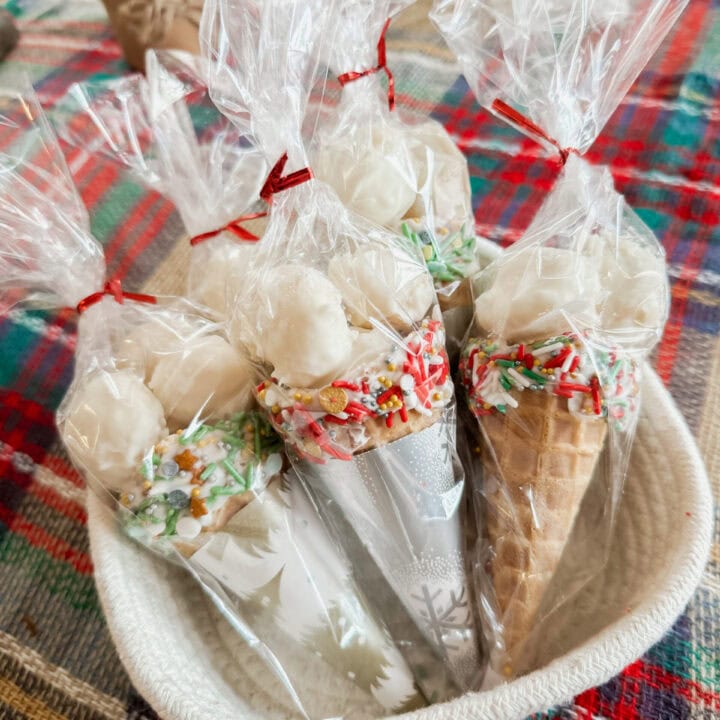
1| Super Simple Snowcone
In this version, it’s just the ice cream cone with the coconut snowballs. No almond bark, no cone wrapper. Simple and still very cute!

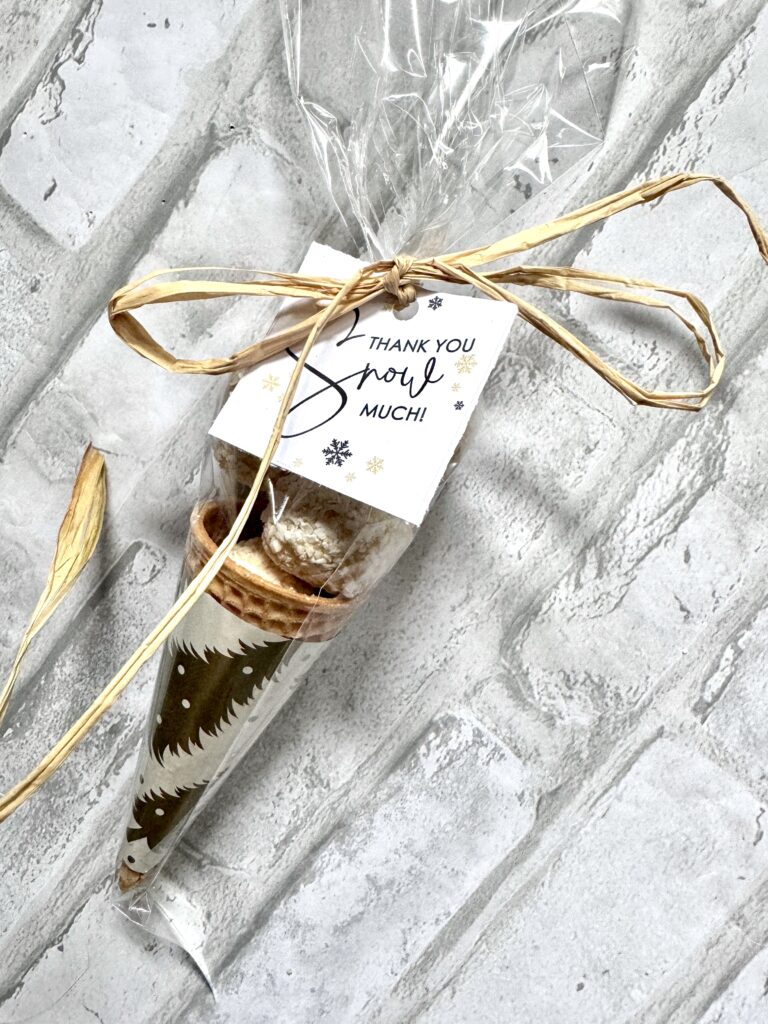
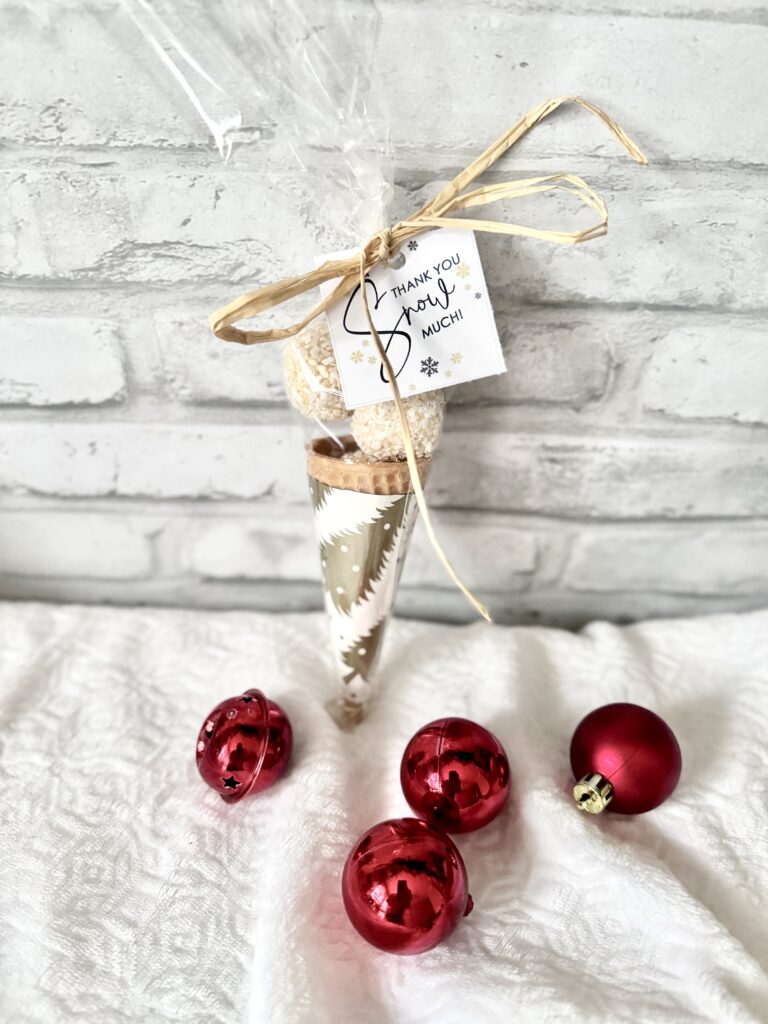
2| Snowcone with Wrapper, No Almond Bark
In this cone, a wrapper is added, but there’s no almond bark coating on the top of the cone or over the coconut balls.
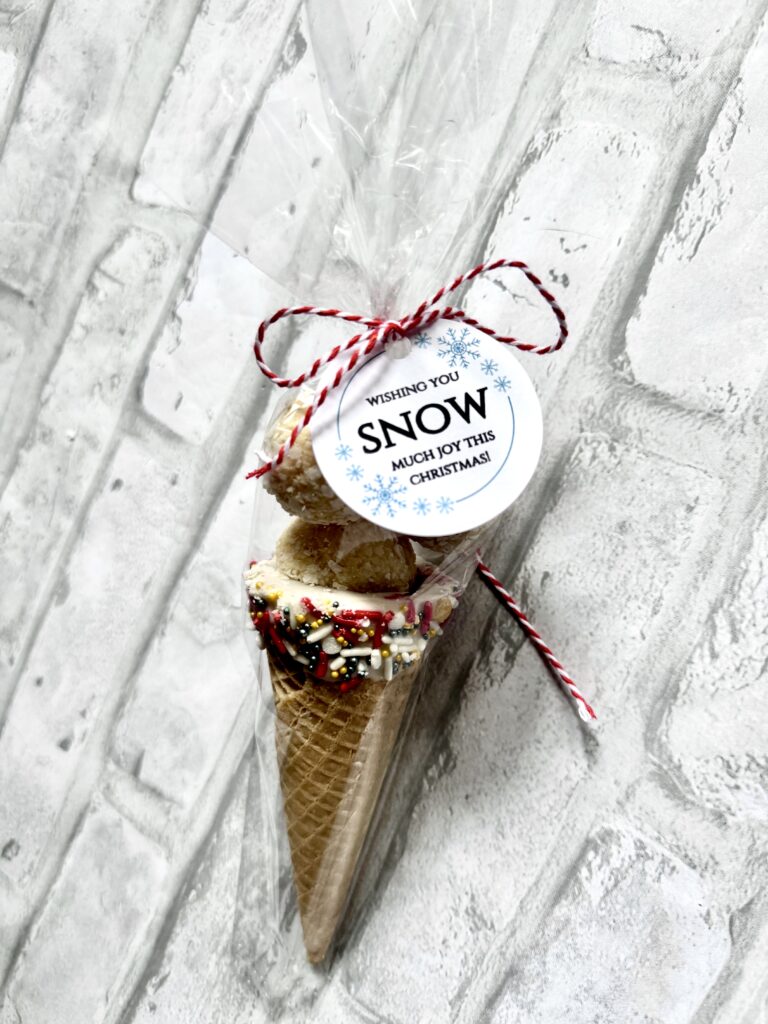
3| Snowcone with Almond Bark on Cone but No Wrapper
If you wanted to skip the wrapper, but just use a cone with almond bark, that’s fine! In this example, the almond bark is on the cone only, not on the coconut balls.
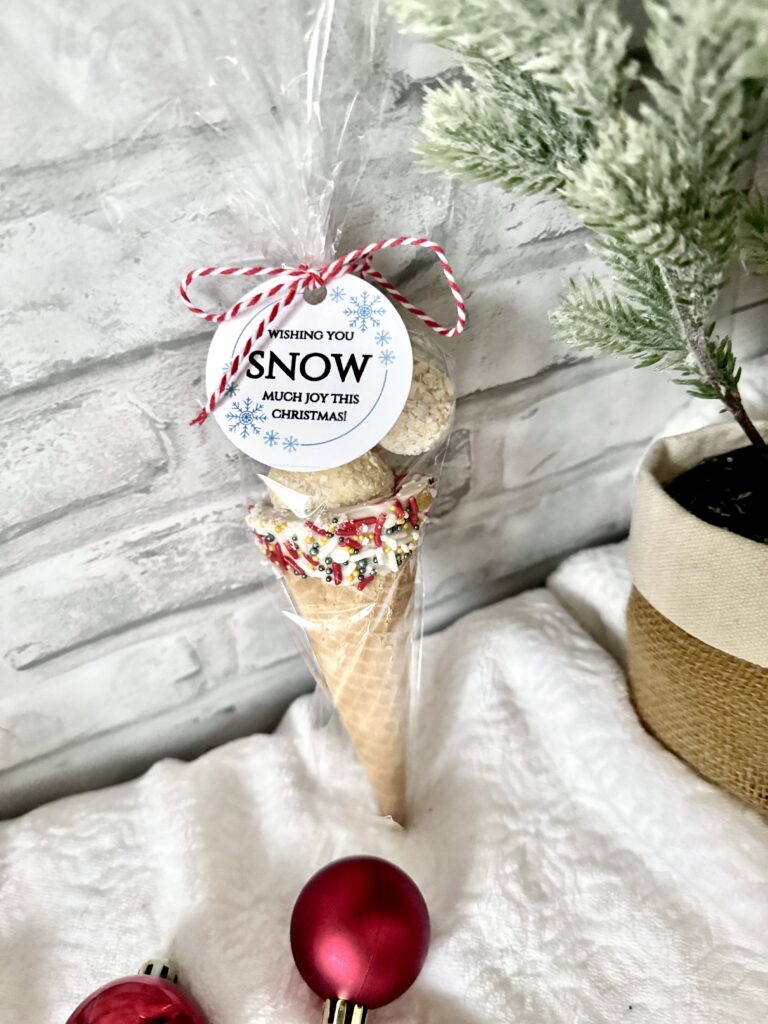
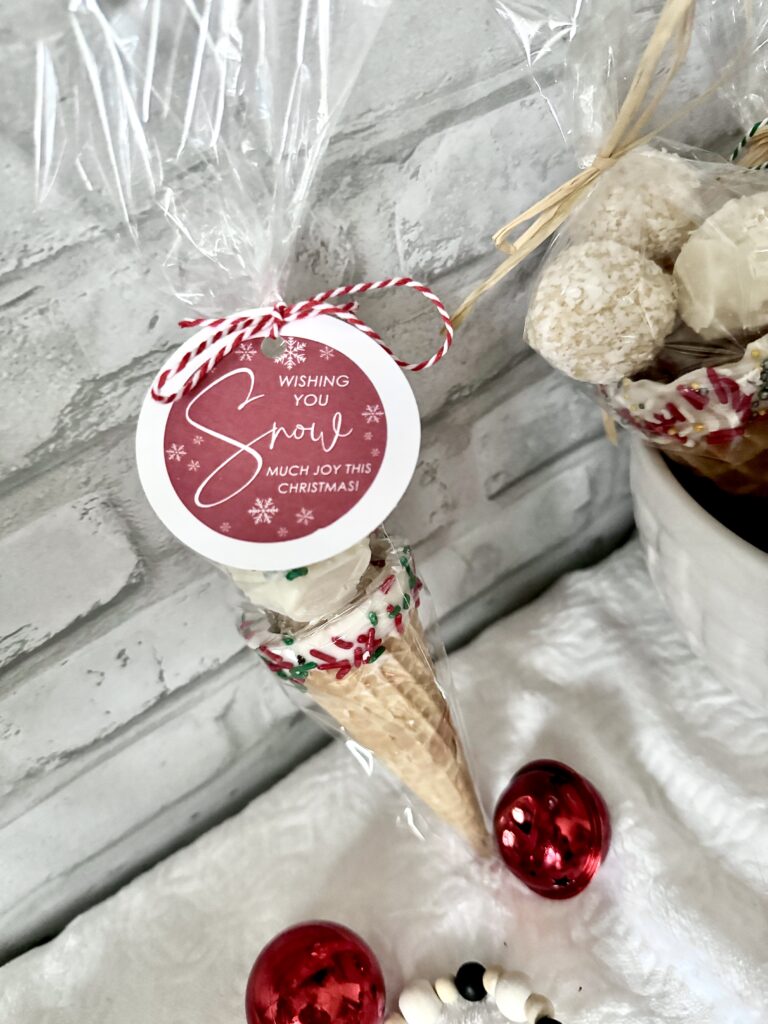
4| Snowcone with Almond Bark on Cone and Cone Wrapper
This cone has a really pretty look with a cone wrapper and almond bark on the cone. The coconut balls do not have almond bark on them.

You can also see in this version how you can use a label sticker instead of a tag.
5| Snowcone with All The Things
This is the most complex version – a snowcone with almond bark on the cone, a cone wrapper, and almond bark on the coconut balls.
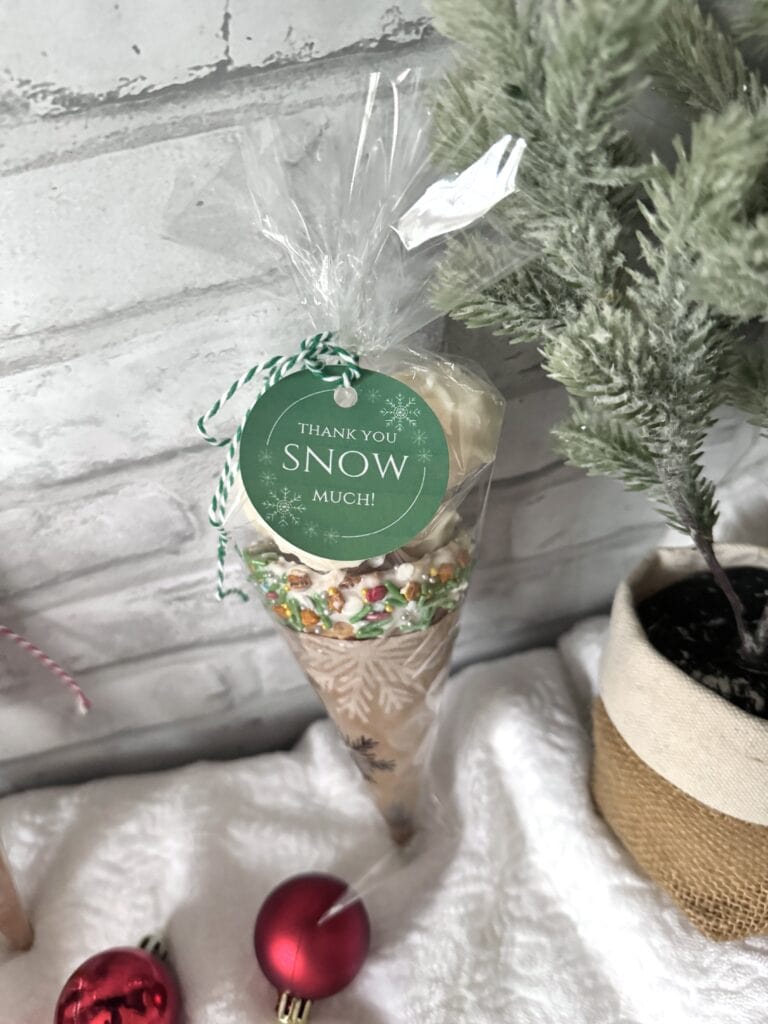
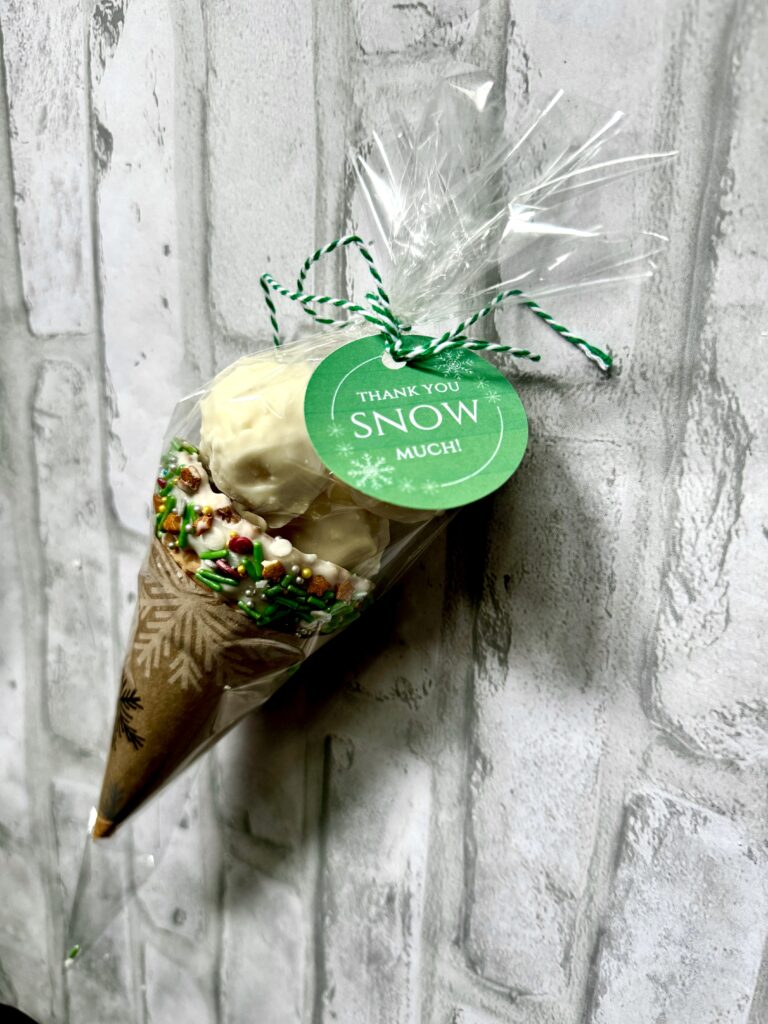
Below, you can see all the versions lined up and choose what you like best! Or maybe how much time and energy you have will make the choice for you.
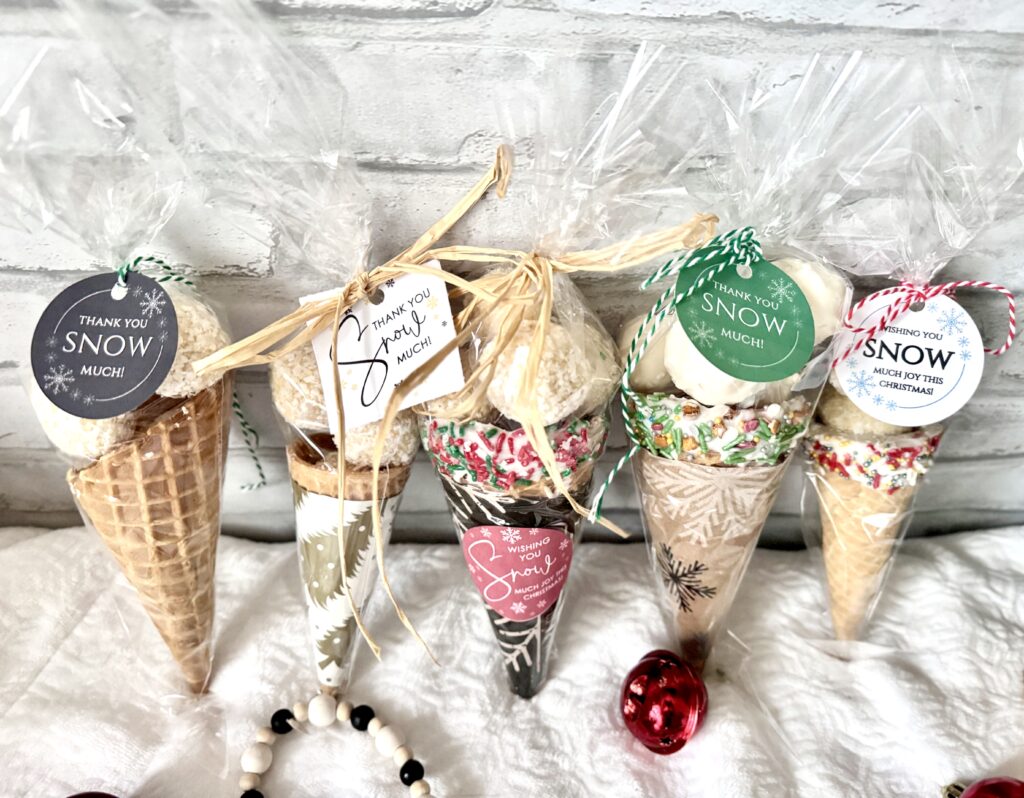
I’ve also included free printable gift tags that you can include!
Free Printable Snow Themed Gift Tags for Snowcone Christmas Gift
Let me share what you’ll get with this coordinating gift tag bundle.
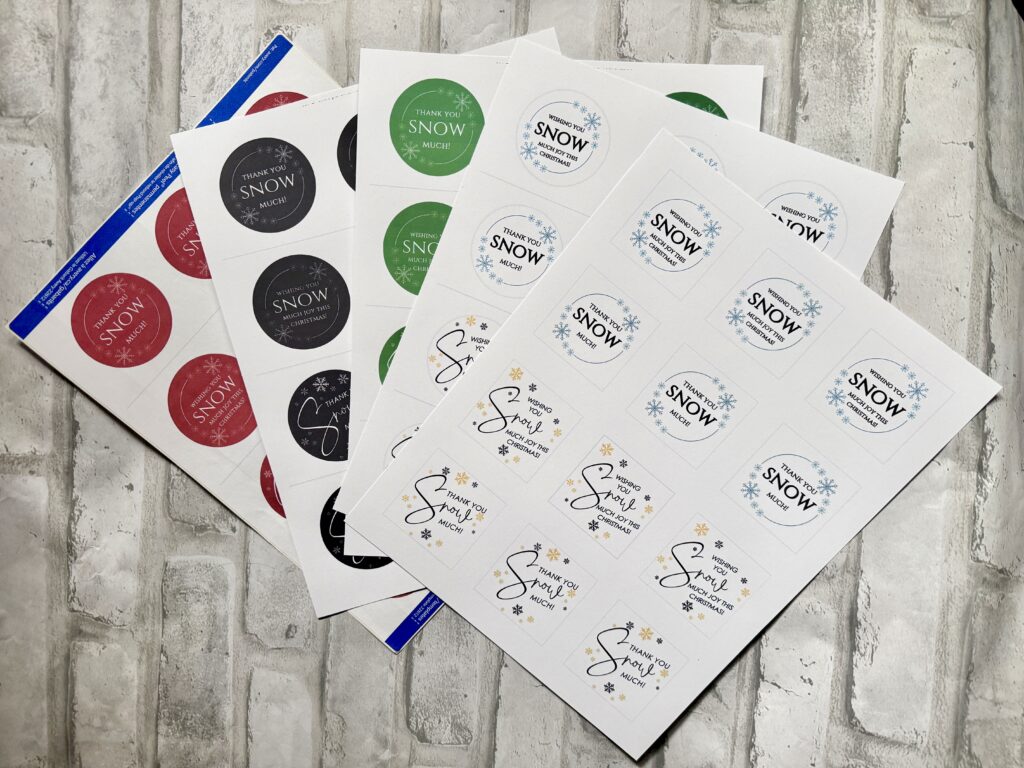
First, these tags come with 2 different messages:
Thank You Snow Much: This is a great choice for teachers, service workers, bus drivers – anyone you’d like to thank or show appreciation to!
Wishing You Snow Much Joy This Christmas: This works great for neighbors, co-workers, Christmas party favors… a gift for someone you don’t necessarily need to thank.

Next, these tags come in 3 different colors – red, green, and black – as well as a white version, if you don’t want to use a lot of printer ink!
The tags are 2″ round circles that coordinate with a 2″ circle punch as well as Avery Labels, 22612, if you wanted to stick them directly to the cone.
I also included the white version of the tags in 2″ squares, in case you don’t have a circle punch (it’s very hard to cut a clean circle by hand! Ask me how I know!)
There are 5 pages in this bundle, and you’ll get the best results printing on cardstock. Be sure when printing to print ‘actual size’ to make sure the dimensions are correct!
Another fun idea is to print the tags on the round labels, and then punch a white or a different color cardstock with a 2.5″ circle punch. Stick the label on and you have a larger tag! Just something a little extra!
To grab these tags, just fill out the box at the very end of the post!
For succinct and printable instructions, see right below!
Coconut Snowballs Homemade Christmas Candy Gift
Ingredients
- 14 oz. desiccated coconut (or unsweetened coconut flakes in the food processor) + extra for rolling (3-4 oz, optional)
- 14 oz. can, sweetened condensed milk
- almond bark, 24 oz.
- Christmas sprinkles
- ALSO NEEDED:
- Parchment paper
- Cookie sheet
- Melon baller
- Plastic service gloves
- Wrapping paper
- Cone template
- Cone-shaped cellophane bags
- Scotch tape
Instructions
FOR COCONUT BALLS
- Empty coconut into med-large bowl. If using coconut flakes, pulse in food processor until finely ground.
- Add sweetened condensed milk to bowl and mix until combined.
- Using a melon baller, scoop mixture and roll balls in hands (plastic gloves help here!).
- Take extra coconut and place on plate/shallow bowl. Roll coconut balls in extra coconut.
- For option 1, place on parchment paper and refrigerate for 1/2 hour.
- For option 2, take 3 almond bark chunks and melt in microwave in 30-60 second increments. Be sure to check often so it doesn't burn. Roll coconut balls in almond bark and set on parchment paper to dry.
FOR CONES:
- Melt almond bark as per above instructions.
- Stand cones in melted bark and twirl cone, using a spoon to help coat and create a straight edge on the top portion .
- Drizzle sprinkles on top of melted bark or roll cone in sprinkles.
- Set upside down to dry
FOR GIFT WRAPPING:
- Print out cone template or create your own.
- Cut out and measure around cone. Trim as needed and use that as your template for the rest of the cones.
- Wrap cone in paper and secure with Scotch tape.
- Place wrapped cone inside cone-shaped cellophane bag. Then add the coconut balls.
- Secure top with twist-tie or ribbon.
Grab Your Free Printable Snowcone Gift Tag Set Here!
Just fill out the box below to get the free 5 page bundle! Be sure to hang on for a few seconds after you submit, and you’ll be immediately redirected to the download!
If you are interested in more Christmas candy gifts, here are 50+ you can try!
Other thoughts? I’d love to hear them! Leave a comment below!
And if you enjoyed this post, I’d be so grateful if you pinned or shared!