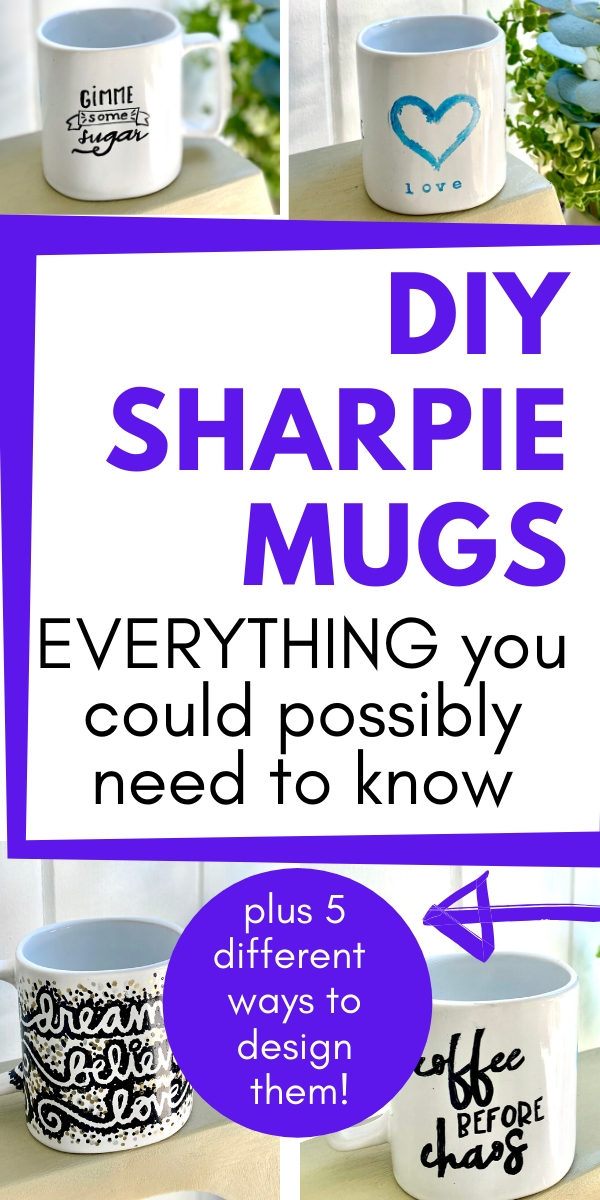
DIY Sharpie Mugs: EVERYTHING You Could Possibly Want to Know
If you’ve been itching to try making a DIY Sharpie mug, here’s EVERYTHING you need to know – the full guide! Includes preparation, best tools and mugs to use, baking times as well as 5 different techniques you can use to decorate! They make fun DIY gifts for Mother’s Day, Father’s Day, Teacher Appreciation, birthdays – any occasion! Come see how to make this fun, old-school DIY project!
This post contains affiliate links. See Disclosures for details.
Old School DIY Projects – I’m Cool With That
More than once, my sister (another blogger) has told me I’m bringing old school blogging back. Maybe because I didn’t get on the bandwagon when she did, but for whatever reason, I’m probably a little behind the curve.
Now, there are lots of fancy blog projects using Cricuts and Silhouettes and other fancy equipment.
Well, not here. I’m proudly all about DIY and crafts for the average mom – stuff you can get your hands on easily, cheap, easy…
If that’s you too, keep reading for this oldie but goodie.

DIY Sharpie Mugs
If you’ve looked for craft or gift ideas that kids (or adults) can make, you might have landed on DIY Sharpie mugs. This is not a novel idea or something new that I made up. To give a nod in my sister’s direction, it has been around for a while.
Today, I want to give a thorough post about everything you need to know about DIY Sharpie mugs, what you’ll need, and different options for designing them.
I’ve done a lot of reading and researching (yes, I know. About Sharpie mugs. I’m shaking my head, too). There are some conflicting tips, so I’m going to share what I’ve learned, what I’ve experienced, and hopefully give you something that will help you make the best mugs.
Full Disclosure – Perfectionists, Beware!
Before you begin this project, you need to know – if you’re a perfectionist, this might be tough! As with any DIY project, there’s a certain element of imperfection that just goes along with it. I think that’s part of the charm of DIY, personally. It gives these projects some character.
This project will probably not look like a professional product; it will probably not look like you did it with a Cricut or Silhouette. And because a mug is an up-close visual, imperfections are more obvious, compared to something like a sign, where you typically view it at a distance.
This is not to say you shouldn’t do it! I love DIY mugs! But if you are looking for a perfect result….well, you might have to adjust your expectations. However, I’ll give you the best tips to get the best results.
Considerations for What Mugs to Use
1| Mug Glaze
There are differing opinions about which mugs are best to use. Some have said to just use the cheap Dollar Tree mugs because there’s a cheap glaze on it, which will help the paint adhere better.
Others say to use a mug that’s more of a matte glaze – less shiny, so the paint doesn’t bubble up in the heat. I’ve used the Dollar Tree mugs and they seem to hold up just fine if taken care of properly (handwashing vs. dishwasher).
The consensus seems to be with cheap mugs with cheap glaze. So, Dollar Tree cheapos are probably your best bet!
2| Mug Shape
The shape is another factor. Most mugs are round and for some designs, that works just fine. However, for different decorating techniques, a round surface can be a little difficult. If you can find a square-ish mug with flat sides, that definitely will work better for certain designing. They’re just easier to hold.

Types of Paint Pens
If you’ve looked this up at all, you’ve probably seen that you can’t really use just a regular Sharpie; the design will wash off eventually, even if you hand wash. It’s recommended to use an oil-based Sharpie paint pen. You can tell the difference by the hot pink band at the bottom.
This is true, but I definitely found a brand I liked a lot better. I did get oil-based pens, but I got this Posca Premium Paint Pens instead, and I found them to work much better. The flow of paint was more smooth, more robust, so I’d definitely recommend those!
If you are doing lettering, you definitely want to get extra fine paint pens, like these.
You can even use paint if you want – just be sure it’s an acrylic enamel.
Preparations of the Mugs
You want to give yourself time for this project. I’ve done it quick in a pinch, but you’ll get the best results if you space it out.
First, you want to clean the mug with soap and water. Then, you want to use a cotton ball and clean with rubbing alcohol. This will remove any grease or grime, so you have the best surface to work with.
To get the best results, let the mug sit. Some people say for at least 24 hours. Some say wait 3 days. So, if you can at least wait a day or 2 before decorating or writing on it, you’ll have the best results.
5 Different Ways to Design a DIY Mug
There are a few different ways you can get your designs on a mug.
***For all designs, be sure to avoid putting the paint inside the mug or at the rim where the lips will touch, as it’s not labeled food safe. Covering it with painter’s tape while you work can help!
1| Freehand
Yes, if you are skilled at art and lettering and feel confident, go for freehand! I recommend using a pencil first so you can have lines to trace in permanent paint! Here are a few ideas you can look at for inspiration.
To help this really have a long life, try to go over your designs a second time after it dries.
You can create a design, kids can put their drawings on. No rules on this one. Have at it!
These are ones my son made, which he is really proud of!

You can also something simple like using paint pens and fingerprints to make a cute mug like this!

My Recommendation: This is great for people that have a steady hand or like personal creativity and expression!
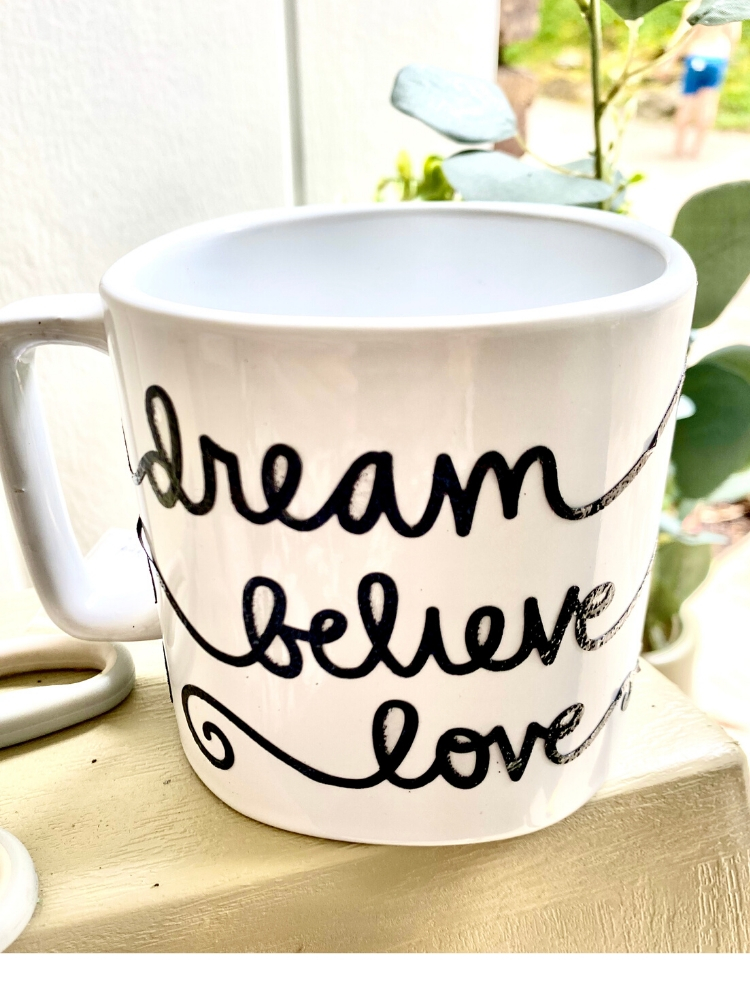
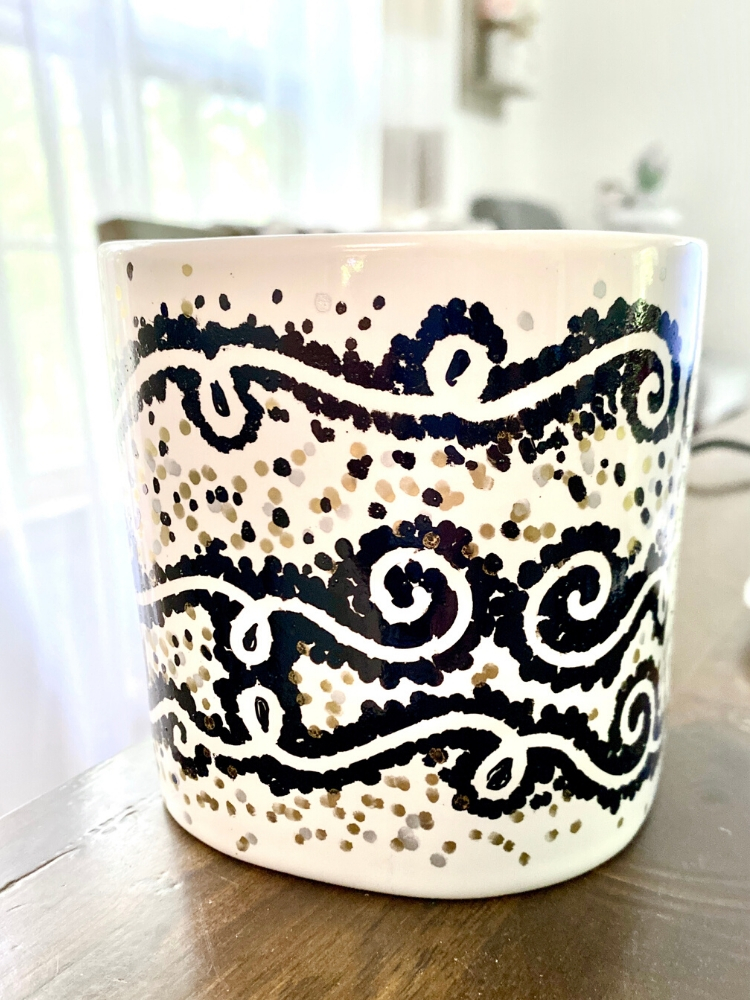
2| Stickers Dot Method
This is a popular and easy method, one that kids can even do.
For words, you get letter stickers to write out the phrase you want. I used painter’s tape to give me a straight line.
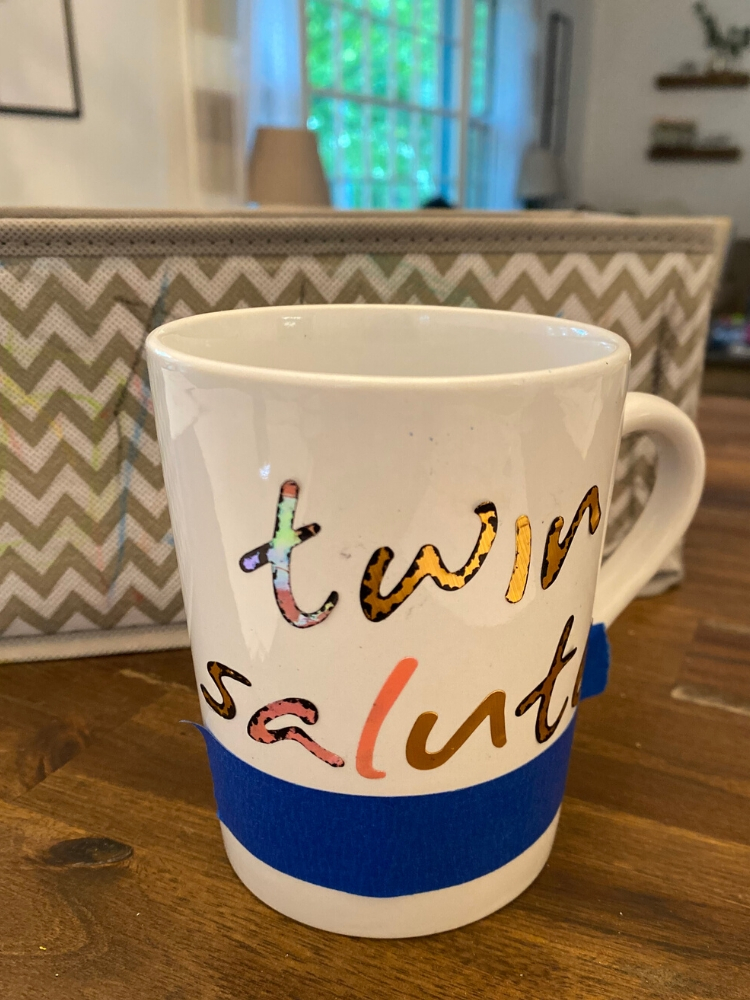
Then, you just make dots (go slow, or they will look like dashes!) on the edges of the letters, working your way out.
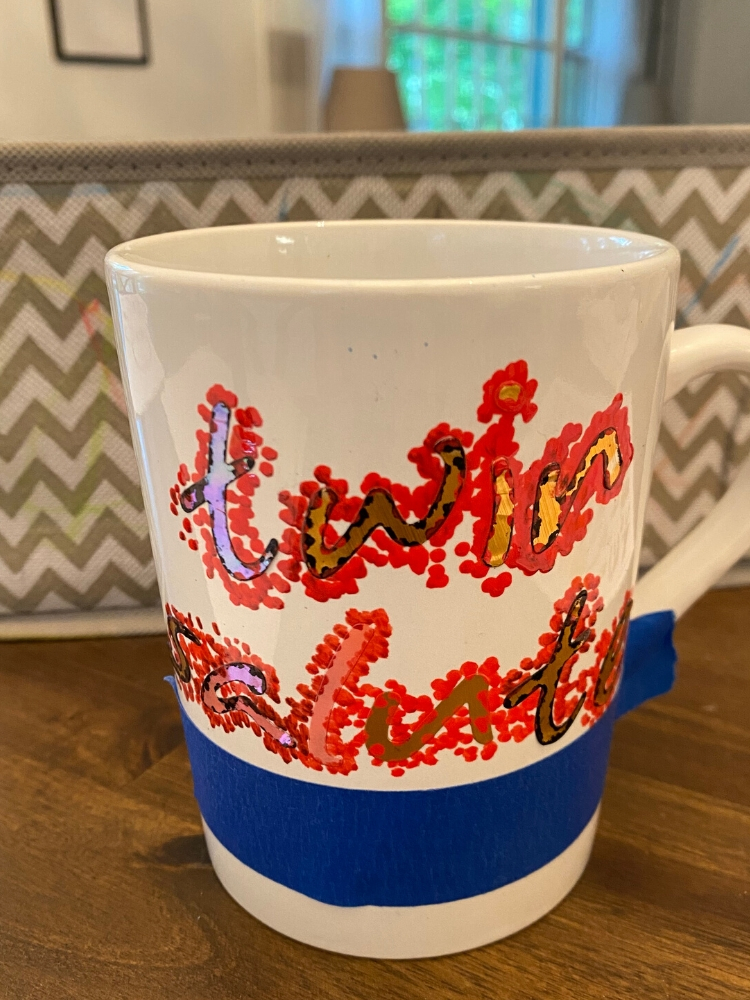
Be sure to get the paint on the edges of the letters so they will be clearly defined once you remove the stickers. I suggest black or a dark color to border the letters.
You can do this will designs, words, or create your own words – or even just a big letter monogram. You can add colors, you can fade out as you reach the borders of your words… it’s pretty easy and foolproof.
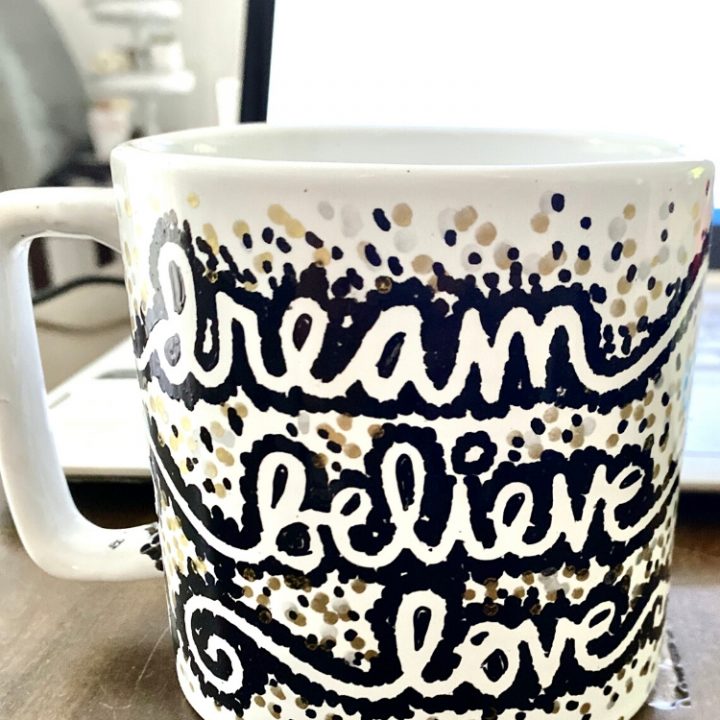
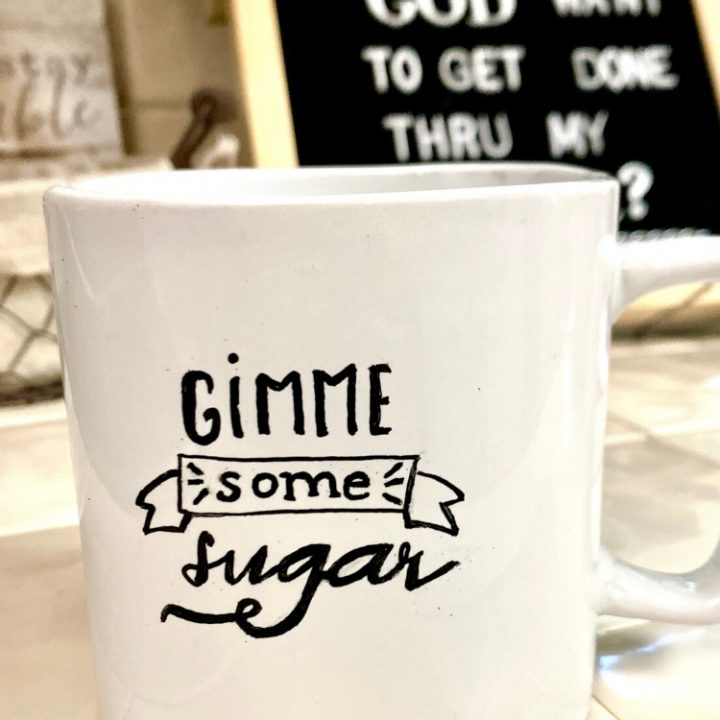
Here are a few I’ve done. You can see I started out with the big letters that wrapped around, then I went to smaller ones on just the face of the mug.

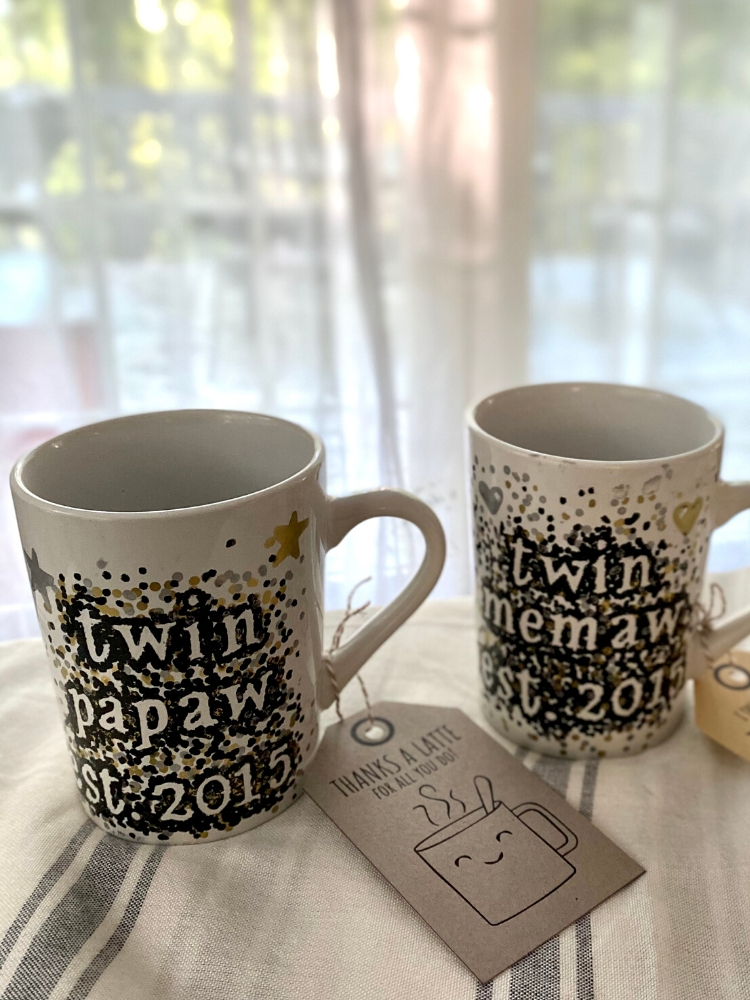
{You can get those “Thanks a Latte” gift tags here, as a free printable!}
I found these stickers that had pretty script words from Hobby Lobby – and I loved the swirls that go with them! This gives it a little bling, I think!

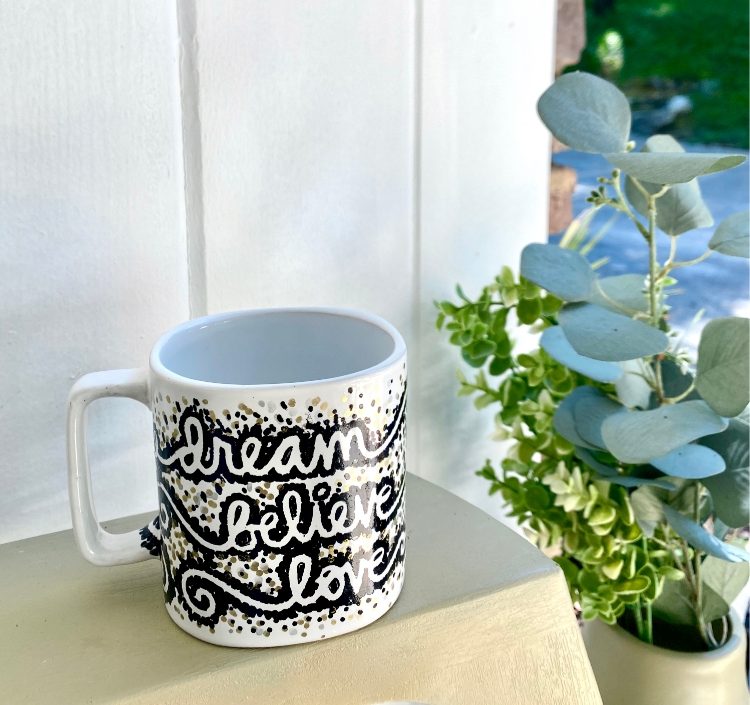
My Recommendation: This is probably my favorite method. It’s super easy, and the results are great! Just be sure your letters can fit on the side of a mug. It’s fine if it wraps around – there are no rules.
Also, when you pick letter stickers, make sure those insides of the letters (A, B, D, O, etc.) are cut out. If not, you can either cut that part out with a craft knife or just draw it in later.

Sticker Dot Method
Materials
- Mug
- Stickers (letters, words, or designs)
- Oil-based paint pen or Sharpie
- Painter's tape
Instructions
- Place sticker as you want them to appear on mug. Use painter's tape as a straight edge if using individual letters.
- Using a paint pen or oil-based Sharpie, make dots outlining the stickers with a dark color, right up against the sticker edge.
- With a different color, make dots going out from the word or design, fading as you go.
- Let paint dry. Carefully remove sticker
- Clean any edges with a paper-clip or Q-tip with rubbing alcohol.
- Continue on to baking (see below).
3| Stencil Method
This is another method that works best on a flattish surface or with adhesive stencils. You just stick the stencil design where you want it, color in the area, and then remove! If you have a stencil that doesn’t stick, just secure it in place with painter’s tape.
You can use a paint pen to fill in the stencil area – or you can also use acrylic enamel paint with a foam brush or a make-up foam.
I tested both methods (adhesive stencil and sticking on a stencil with tape) and both worked out pretty well!
Here is a test run I did using an adhesive stencil. Note: it’s just a test. I didn’t clean it up or keep the mug; I was just trying out the method and assessing the results!

This is a test I did using a cheap Dollar Tree stencil that you had to tape on.

My Recommendations: I liked this method. It gives you a lot of possibilities for designs, especially not just words. Adhesive stencils are definitely easier, but it’s definitely doable to cut a stencil and tape it on. Using a paint pen can be tricky getting in tight corners, so an extra-fine point paint pen would be easier to use. You could also use acrylic enamel and a foam brush or make- applicator!
Martha Stewart stencil line at Michael’s has some excellent self-adhesive laser-cut stencils, which is what I used!
Stencil Method
Materials
- Mug
- Adhesive stencils (or stencils with painter's tape)
- Oil-based paint pens (or acrylic enamel and foam brush)
Instructions
1. Place stencil on mug where you want design. If you're not using an adhesive stencil, cut stencil and place with painter's tape.
2. Dip foam brush in paint and fill in stencil area. You can also use a make-up foam as well or a paint pen.
3. Fill in any missed areas with a paint pen.
4. Once dry, remove stencil and clean any areas with rubbing alcohol on a Q-tip or with a paper clip.
5. Continue on to baking step!
4| Stamps
This one can be a little tricky, but it’s definitely an option. If you use a cheap Dollar Tree mug that’s shiny, it can be a slippery surface. A matte mug may work better, as well as a squarish one.
To do this, you’ll need to use Stazon Ink Pads. This is meant for all kinds of surfaces and will stay on. It will also give you the cleanest imprint of the stamps.
There are two schools of thought with stamping mugs: keeping the mug still and placing the stamp on top or rolling the stamp from right to left (or left to right).
Also, you can lay the stamp on a table and roll the mug over it. Most like the second method better, but maybe I’m clumsy! I had trouble with it! I seemed to get the best results if I sat in a comfy chair and held the mug still between my legs. It might be trial and error for you.
Another issue with stamping mugs is that there’s sometimes the issue of slipping or not getting the full image.
If you’re using individual letters, unless you’re very experienced at stamping, it can be hard to get a straight line with the letters, even with painter’s tape as a guide. That can give a cute and whimsical look, which I kinda like, but if that would frustrate you, you may want to try a different way to letter – maybe purchasing a stamp that has the word or phrase you want already printed out.
You want to also be aware of your word or phrase and the letter size. Ideally, your message should fit on a front view of a mug, where you don’t need to spin the mug to see the whole message. That’s fine if you don’t mind doing that – we aren’t about perfection here – but just wanted to throw that out there. And there are some larger stamps that are really fun and look great going around the whole mug!
If you make a mistake, you can just use rubbing alcohol to remove it.
For the best tutorial, take a look at this YouTube video. This is a great place to start if you want to stamp a mug.
My Recommendation: This method is tricky, but if you can get it down, this is your best bet for a professional-looking mug. At first, I tried using acrylic enamel paint and paint pens with the stamps because I didn’t have the right ink; I didn’t have much luck.
I was ready to give up, but I found a Stazon Ink Pad my mom had given me and decided to give it a go.
I was very impressed with how clean the image was. I did a quick try with some stamps I had, and this just may make me cross over. And, you can use the oil-based paint pens to fill in any areas that need to be colored!
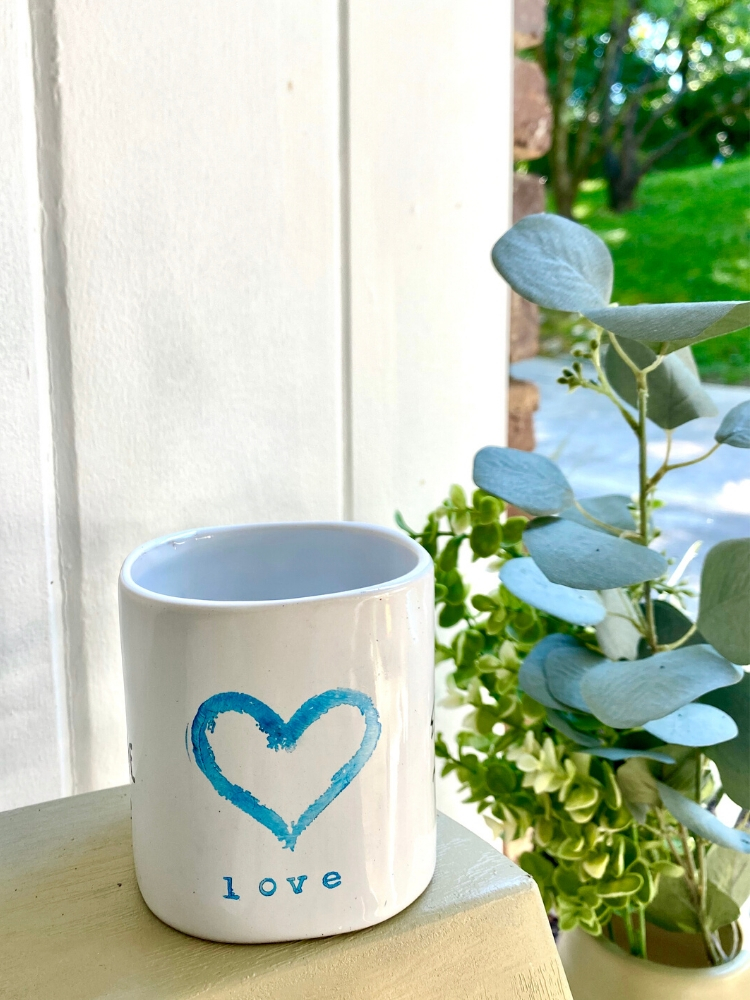
Here’s an up-close test with Stazon. I know the heart looks fuzzy, but that’s actually the design on the stamp, not a smudge! The word ‘love’ was done with individual letter stamps.

Sticker or stencil methods a little easier to do, though – much more forgiving – but this can really give you amazing results if you’re committed to the technique!
5| Pencil Tracing
Another way you can get your design or lettering is to print it out on the computer and trace it on.
I typically use this method on signs (like this sign I made here for my summer porch and another sign I made for my spring porch); I’ve even done it on a drink container centerpiece (which you can see here)!
Here, you would measure out the size of your mug and design something accordingly. Usually, it should fit inside a 2.5″ square, maybe 3″. You can get also free SVG files in a JPG and resize to wallet (2″ x 3″).
Then, on the back of your printout, color over the design heavily with a pencil.
After that, pencil-side down, lay your printout on your mug where you want it. Tape it down and then with firm pressure, trace over the outline with a pen. This should leave a pencil imprint on the mug that you can trace over with a paint pen! You will definitely need an extra fine paint pen for this.
I found it easiest to sit semi-reclined in a comfy chair and squeeze the mug between my legs so it wouldn’t move or roll while I was tracing it. I was able to get real close to the design to see the outline as well as keep the mug from moving.
It’s also recommended to go over your designs a second time so it will last longer!
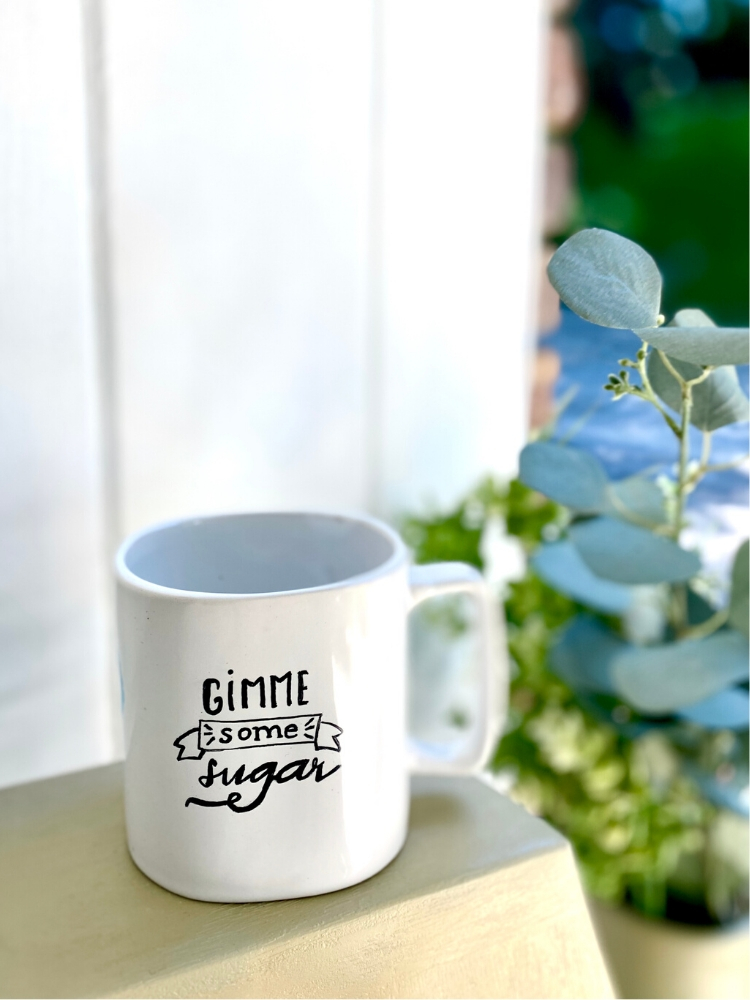
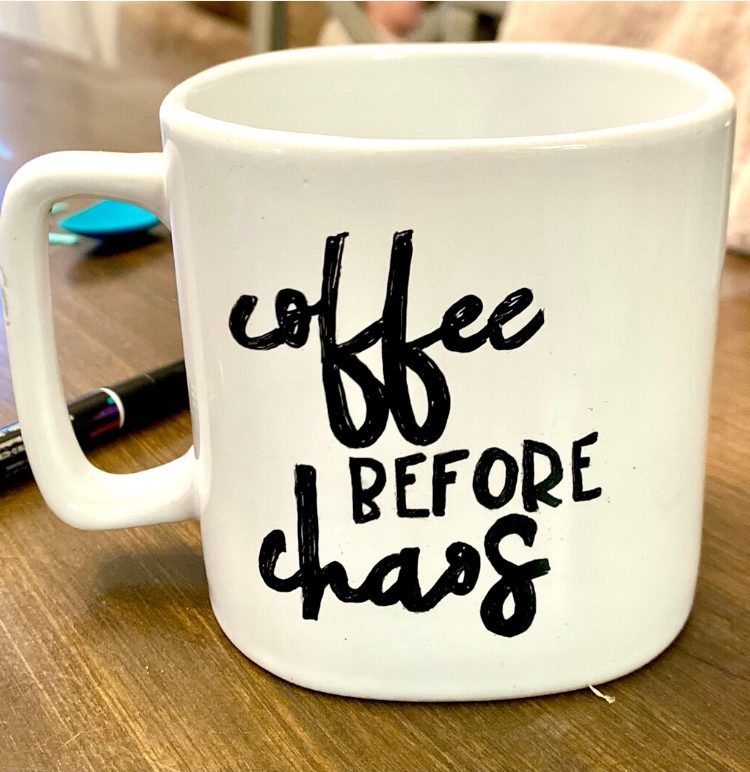
Here are 2 designs that I did using the tracing method – one from this SVG file and the other I just created myself.
Here’s the one using this SVG file from The Girl Creative:


Here’s another with one I designed myself, using Bellamy and Jelly Cream font:

Either way, if you’re choosing a pre-made file or making your own, I suggest a design with script text rather than print – it’s much more forgiving. Also, choose a thick text rather than a thin; those are easier to fix because those straight lines can be brutal!
To fix these designs, I found it easiest to scrape with a paperclip to straighten the lines and remove the mistakes. You can use the other methods I outline below to clean up, but the paper clip I found to be key here.
My Recommendations: This was a bit frustrating for me. Because you need a steady hand and because imperfections are seen up close, it takes a lot of patience to get it right. It can be done, but it’s not going to look like you used a Cricut or Silhouette. I don’t recommend this as my favorite method, although with a lot of patience, you can get a beautiful mug.
Pencil Tracing Methods
Materials
- Mug
- Print-out of design
- Pencil
- Ball point pen
- Painter's tape
- Extra fine point oil-based paint pen
- Q-tip with rubbing alcohol
- Paper clip
Instructions
- Print out design for mug or create your own, size approximately 2.5" x 2.5".
- Trim down print-out and firmly color with pencil on the back of your design or phrase.
- Position phrase on mug, pencil-side down, and tape in place.
- Trace letters on top of paper with a ball-point pen, so pencil outline will be left on mug. Remove paper.
- Trace pencil outline on mug with an extra-fine point paint pen. Color in.
- Clean as needed with a paperclip and Q-tip with rubbing alcohol.
- Continue with baking as instructed below!
Fixing Your Mistakes
There are a few ways you can fix them. Try a little soap and water on a Q-tip. Rubbing alcohol also works well, too.
If you REALLY need to remove paint, nail polish remover is great, but it works very fast and will not leave much behind. So, make sure it’s something you really need to remove versus clean up.
Have a napkin or paper towel to dry the spots you clean, especially with nail polish remover, as it can be smudgy once you do it.
You can also use something sharp to scrape the paint – a small screwdriver, a paper clip, even your fingernail would work.
I had the best luck using a paper clip. Sometimes I would put a little rubbing alcohol on a napkin and wrap it around the paper clip. Then, I would use a damp napkin to just lightly brush the paint dust off.
Baking the Mug
Once you create your design, wait 1-2 days before baking it, so the paint can set, as per directions below.
Again, time differs here, depending on who you read. Some say you’ll get better color retention with lower temperatures, for a longer time. Others say you want it hot, hot, hot, so the paint really bakes in.
Again, somewhere in the middle is probably your best bet.
Here are the guidelines I’ve seen:
250 degrees for 1.5-2 hours
300 for 1.5 – 2 hours
350 degrees for 30 minutes
425 for 30-60 minutes
My recommendation is that if you don’t have a lot of colors, or if you aren’t worried about the colors staying the exact shade, go hotter. Keep it in there for at least 60 minutes. I’ve tried the coolest temperature for the longer time, and after a while, the paint started coming off, even with hand-washing. So I definitely lean towards hotter – at least 350 for 30 minutes.
Another IMPORTANT factor is to put the mug in the oven BEFORE you turn it on. You want the mug to get hot along with the oven. If you put it in the over after the oven is preheated, it could crack the mug.
On the other side, you want to leave it in the oven as it is cooling off. Once the oven is cool, you can take the mug out.
You can do this baking process more than once to really seal it in!
Sealing the Mug
If you choose, you can apply a light sealant spray, such as Mod Podge Clear Acrylic Sealer or Modge Podge Clear Acrylic Sealer Use painter’s tape to cover the top rim at 1/2 “. Put the mug upside down and lightly spray. Allow it to dry according to instructions.
Then, repeat steps for a second coat.
Care for the Mug
Although theoretically, it should be able to withstand the top shelf dishwasher, hand washing is recommended.
I Told You It was Everything You Wanted to Know
I hope this was thorough enough for you and answered all of your questions! This is a really fun project and can be easy and fun and give you results you love! A fantastic gift!

If you are looking for more DIY projects or gifts to make (for you or the kids), take a look here!
Easy DIY Clay Thumbprint Keychain
50 Outstanding Gifts Kids Can Make for Every Occasion
Mother’s Day Crafts for Grandma
Homemade Gifts for Father’s Day from the Kids
Christmas Stovetop Potpourri Gift
25 No Fail Teacher Gift Ideas with Free Printables
If you make a mug (or any of the above projects), I’d love to see them! Please tag me on Instagram @100affections or leave a comment on Pinterest!
Thoughts? I’d love to hear them! Leave a comment below!


It’s a wonderful holiday present idea! Your loved ones will undoubtedly appreciate the inspiring sentiments on the mug that you created yourself.
Thank you so much! We had so much fun making them!
I love this idea! I looked up the paint pens, but I can’t find oil based fine tip. Will water based work as well?
Hi Margaret! Thanks for reaching out! I’ve never used water-based so I can’t say for sure – but I found a set of oil-based fine tip paint pens! Check these out! https://amzn.to/3Bjy4Qp (affiliate link).
i just started making these cups i went to amazon and found acrylic based pens/ markers. as long as they say on the box or whatever they come in that they work on ceramics, glass, wood, rocks etc then they will work for this project
That is great to know! Let me know how they turn out, Lisa! I’d love to see them!