Upcycled Patriotic DIY Farmhouse Centerpiece {Easy & Cheap!}
Today I’m sharing a super-easy, cheap (free!) upcycled DIY patriotic centerpiece. A perfect Memorial Day or 4th of July craft, you can make this from a cardboard drink holder, in farmhouse, faux shiplap style – plus 3 ways you can use it! Come see how!

Minimalist Patriotic Decor
When it comes to patriotic decor, I’m more of ‘a little here, a little there’ kinda girl. Having kids makes seasonal decor fun, but because my color scheme isn’t red, white, and blue, I don’t like it taking over the place.
So, I’ll do a few pieces here and there, and maybe throw out a little more right around Memorial Day or 4th of July itself.
That being the case, I don’t like to spend a lot of money on red, white, and blue decorations. If it’s cheap, fantastic. Free? Even better.
If you’re like me, well, today, you’re in luck.
An Upcycled Red, White, and Blue Centerpiece Craft
My husband was getting ready to toss out the holder that his 6-pack of Yuengling came in, and the wheels in my brain started turning. I knew I could use that for …something.
I let it roll around in my head for a few days and decided to make a table centerpiece. I didn’t have a design to base it off, so it took a few tries to get it right.
The first go-around… I realized that this wasn’t the best medium for stamping – it looks smudgy and sloppy. And I also discovered that red and blue ribbon on a white background is strikingly similar to a mail truck.
So, that was my first fail, as you can see below. (Just keepin’ it real around here!)

I usually go with minimalist decor designs, so I decided to go with something tried and true that I knew I’d like – faux Sharpie shiplap and simple script lettering. It’s simple, but what goes inside makes all the difference.
Patriotic Decorations for the Inside of the Centerpiece
You can see at least 3 ways you can use this:
With bottles to hold flowers
(Those are Starbucks Frappuccino bottles!)

As a napkin and utensil holder
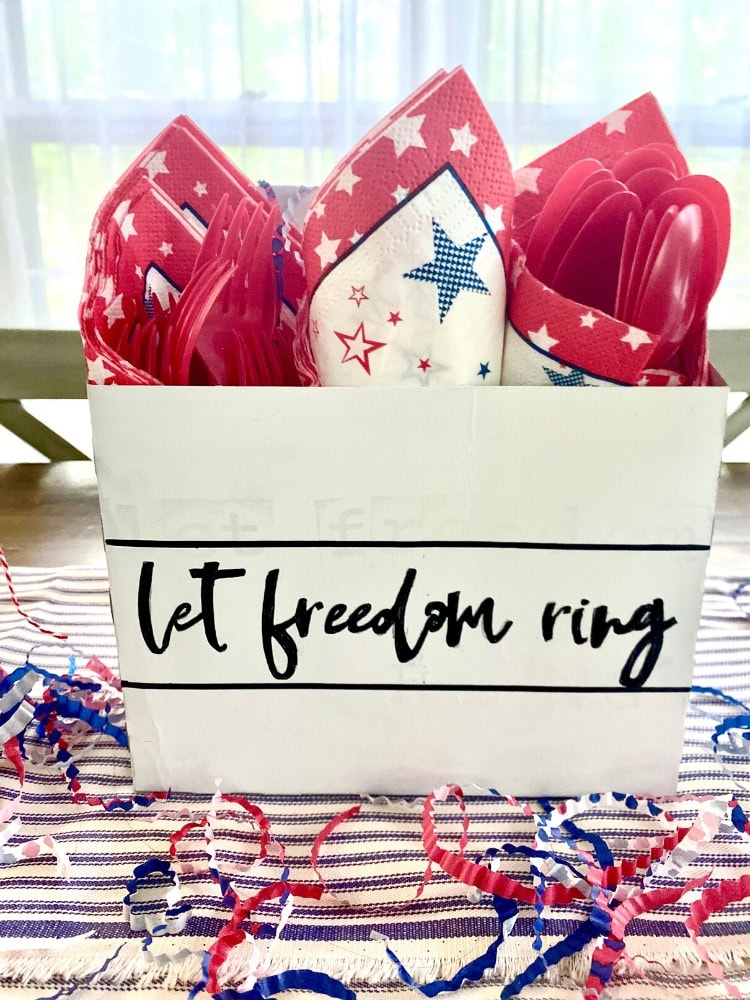
Decorative table centerpiece

It’s up to you how you want to fill it.
If you decide to put patriotic decorations, you can find inexpensive wands and fillers at Dollar Tree or Hobby Lobby. The ones in mine are all homemade crafts taken from this post of Easy Patriotic DIY Decorations.

Here’s where you can find them in the post referenced above:
Popsicle sticks stars (#7)
Yarn stars (#16)
Cupcake holder blossoms (#28)
Pom Poms (tutorial from The Craft Train)
The crafts in the posts are a little different; they are spin-offs of the crafts in the post. I just took the main craft item and hot-glued it to the black-and-white paper straw.
This tutorial below is just going to be for the box. You can see the other links if you want to make your own red, white, and blue crafts.
Pro Tips for an Upcycled DIY Drink Container Centerpiece
Patriotic Saying
If you’re handy on the computer, you can design any phrase you like, as long as you measure the space you’re using on the box. You are welcome to grab my “let freedom ring PDF” right here!
I used a fine point paint pen but a fine point Sharpie would work just as well.
If you’re designing your own saying, just be aware of how thick or thin the lettering is, as you’ll be using a tracing method. If you use a thin font, you’ll probably just trace the letters; if it’s a thicker font (like the one I did), you’ll outline the letters and fill them in.
Be sure you know the size of your saying before you draw the faux shiplap lines.
For fun, you can throw in cupcake liner confetti. It’s just thin strips cut from the outside edge of the cupcake liner, in half-circle lengths. Instructions for those are in the directions below.
Options for Lettering
There are a few ways to do the lettering. First, my disclaimer is that any time you are DIYing your letter and not using a Cricut or Silhouette, there will be some imperfections. I’ve made peace with this as this piece of equipment isn’t in my budget at the moment!
If you like to stamp and you’re good at it, you can definitely do that. I found it to be a little too smudgy for this project, but feel free to give it a go! You can also use stencils or letter stickers.
If used the tracing method as I did, here are the instructions for that:
1| First, print out the phrase or saying that you want, in the size that you want. Here’s my “let freedom ring PDF“ if you want to use it.
2| Then, color the back of the page with the phrase with a pencil, pressing down pretty hard.
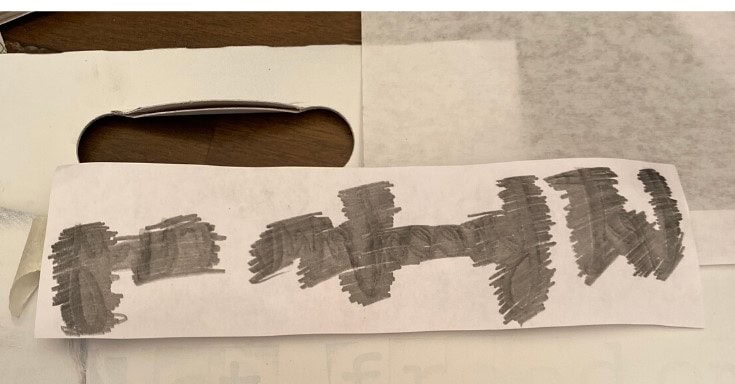
3| After that cut down your paper if you need to and place in the exact position you want it on the box, pencil-side down. Use masking tape or painter’s tape to hold in place.
4| Using a ballpoint pen, trace the outline of the saying if you’re using a thick font or just trace the letters themselves if using a thin font (mine was a thick font).
Be sure to press pretty hard and check early on to make sure the pencil outline is transferring to the box. You don’t want to get to the end and realize it didn’t leave an outline for you to trace.
You should have an outline that looks something like this when you’re finished:
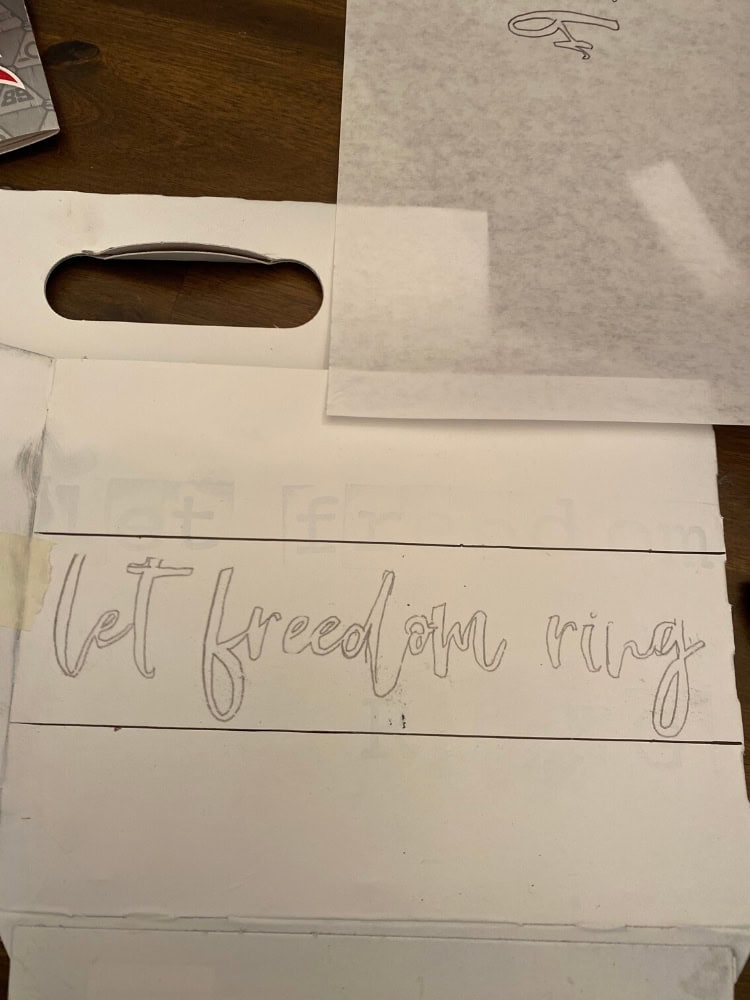
5| Once you’re done, remove the paper and use a Sharpie or paint pen to go over the pencil outline. I usually use a fine point Sharpie or paint pen, even for a thicker font.
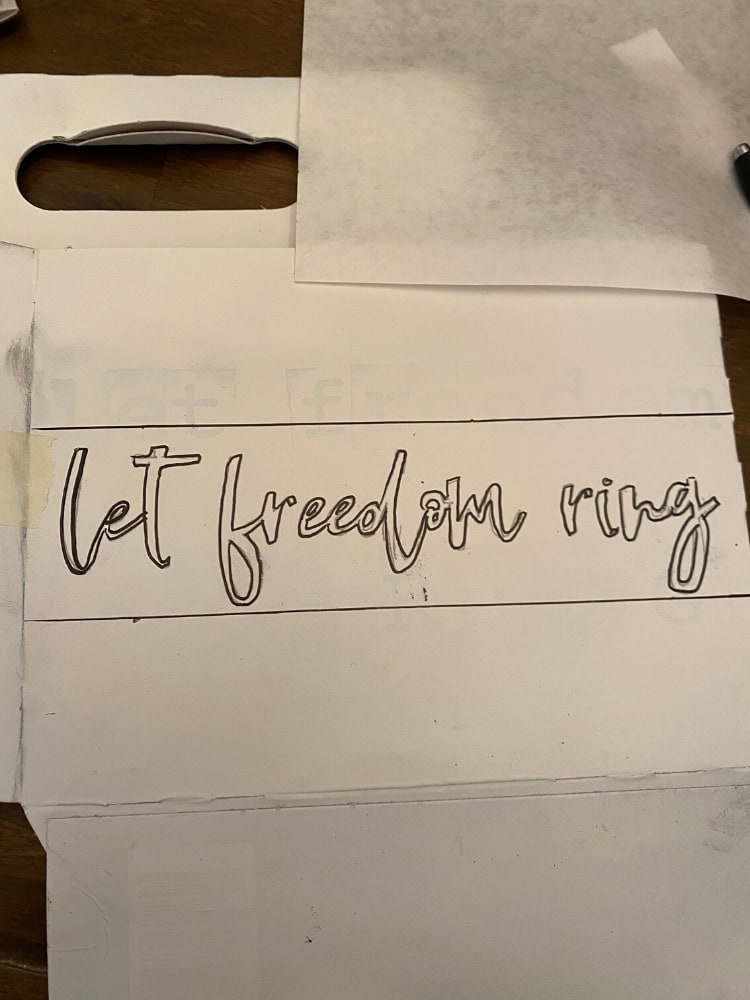
Then, just color it in after.
If you use a thicker point marker or paint pen, you may just need to trace over the letters and not color at all.
Extra Decorations and Distressing
As you can see, I went with a minimalist design. You can embellish yours with a little more bling if you’d like – stickers, decoupage using stars or other red, white, and blue graphics, tassels... you really can have your way with it!
Also, I did a little distressing on mine with black paint. You just need a make-up sponge and some black paint. Blot the black paint REAL good, like there’s only a smudge on it, a smokey gray almost. Then just go over the edges and add a few swipes here and there on the sides itself. I did that around some of the edges, but I kept the front mostly clean. It’s all about preference!

Ok, for the succinct steps, see below!
Upcycled DIY Patriotic Centerpiece

Drink Container DIY Centerpiece
Materials
- 4 or 6 pack Drink Container
- White Paint (spray paint makes this super-easy!)
- Printed-out patriotic saying (You can grab mine if you'd like!)
- Quality pencil (at least No. 2)
- Ballpoint pen
- Painter's tape
- Medium Point Sharpie
- Fine Point Sharpie or paint pen
- Red White Blue Cupcake Liners (optional)
Tools
- Ruler
- Computer/printer
Instructions
1| Paint all sides of drink container and let it dry.
2| Decide on the saying you want to put on your box. Create the saying on the computer or print out the one in the post. Be sure to measure the width and height of the saying for the next step.
3| Once you know how large your letters will be, decide on the width of the faux shiplap stripes. Mine are 2".
4| Using my example, make 2 dots, 2" down from the top of the box on the front, toward the side edges. Use that as your guide to make straight lines across, using your medium point Sharpie.
5| Repeat as needed on the front side of your box and on all sides going around.
6| To create the saying, on the back of your printed-out paper, use your pencil to color with a good amount of pressure over the areas where the letters are.
7| Arrange saying where you want it on the box (cut if needed) and use painter's tape to hold it in position.
8| Pressing firmly, trace the outline of letters with a pen. Check early on to make sure the pencil outline of letters is transferring to the box.
9| Using the fine-point Sharpie, outline letters of saying and fill in to blacken.
10| To make cupcake liner confetti, stack 2-3 cake liners at a time and cut them in half. Cut around the outside edges creating very thin strips of cupcake liner confetti.
11| Fill box with decorations of your choice and confetti!
I hope you had fun doing that project! I noticed that Kroger has a bunch of these containers on a rack, so you might just be able to snag a few, even if you don’t buy the drinks.

More Patriotic Celebrating Ideas
If you’re having a Memorial Day or 4th of July celebration, here are some more fun ideas! Be sure to check out this post with all kinds of easy Patriotic DIY decorations, including the ones inside my version of the centerpiece.
If you need some dessert ideas, here are 30 No-Bake Red White and Blue Desserts, including my favorite, this Patriotic Frozen Graham Cracker Treat – soooo easy to make! This Key Lime Coconut Trifle and Parfait is also another perfect summer dessert you can serve, along with these strawberry desserts. Every one of them is like a bite of summer!
If you want to look festive while celebrating, be sure to check out these 40 Best Patriotic T Shirts for the Whole Family!
If you make this project or try any of these ideas, I’d love to see it! Tag me on Instagram @100affections or leave a comment on Pinterest!
Thoughts? I’d love to hear them! Leave a comment below!


One Comment