How to Make an Easy, No-Sew Face Covering for Kids
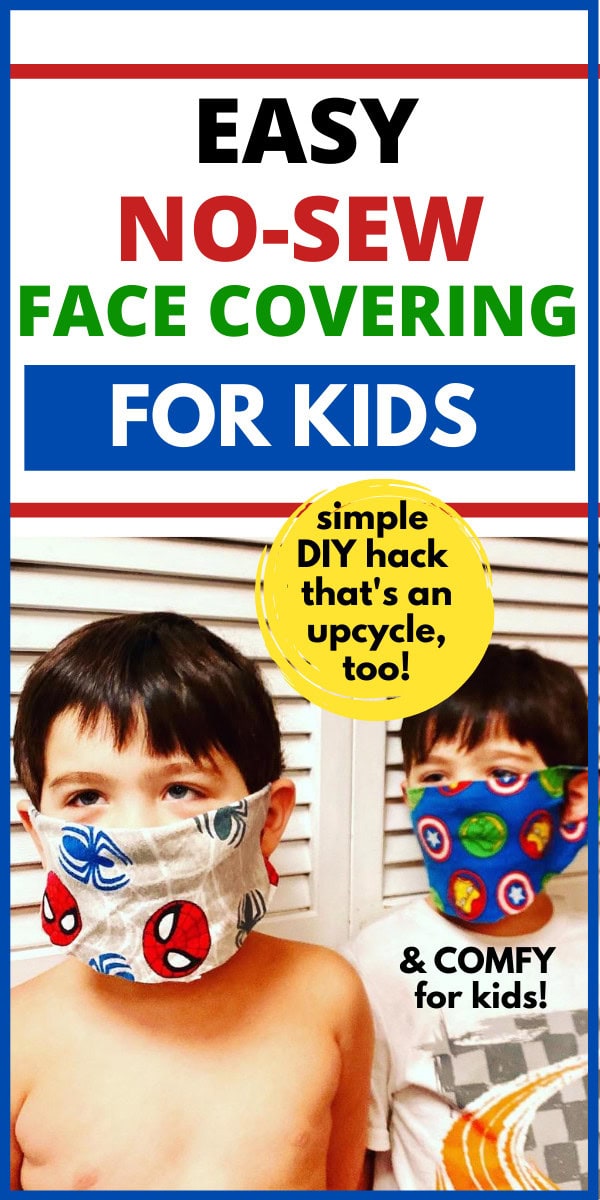
If you need a face mask for your kids, here’s a super-easy hack to make no-sew face coverings for kids! It’s a simple DIY upcycle with materials you already have! Comfortable and it won’t suffocate! And they are fine for adults as well! Template included below – come take a look!
2020: A Back to School Like No Other
Like every other mother on the planet, I’ve been all over the map trying to decide about my sons going to school. Not going ‘back to school.’ But ‘going to school.’ For the first time. As kindergarteners. In a pandemic.
As we’ve all done, my husband and I weighed the variables and made the choice to send them to live, in-person school. I won’t get into all of our reasons – this isn’t what this post is about and we all have reasons for the choice we’ve made this year for our kids.
Once our decision was firm, I was full-on got-my-act-together mom – answering emails from the school in nano-seconds, picking up school supplies every time I was in the store, even ordering neck gators for the boys weeks in advance, since our schools made the decision to require face masks for all the kids, even the little ones.
For us, school starts again the last week in July (now), and after an angsty week with a lot of back and forth over whether school should even open at all, it happened yesterday.
Now, my boys are kindergarteners, and here, we have a staggered start, splitting up the kids in 3 groups over the first 3 days. So, my sons’ first day is tomorrow.
And for now, school = face coverings.
The Face Covering Debacle
Now even though I was on top of ordering neck gators early in July, it was becoming questionable whether they would arrive in time. Happily, they came yesterday, but when we tried them on, they were a little too big and kept slipping off. So, here I am, I’m scrambling to figure out what we’re going to do about masks for kids who had never worn masks before.
And as my ideas usually do, an idea for a kid face-covering woke me up, and I thought it just might work.
Instacart Face Mask Inspiration
When the pandemic first started, Instacart was supplying masks for free for their shoppers. I hadn’t shopped for Instacarts in months, but that wasn’t to say I wasn’t going to in the future if we got into a financial bind. So, I ordered one, and I was a little surprised at what came. Basically, it was a cut T-shirt in the shape of a mask with ear slits sliced into them.
Honestly, I did end up using it when I had to go to a doctor’s appointment or something like that, and I’ll say that at least they were breathable and fairly comfortable. Definitely better than the disposable ones.
And this morning I thought, “This is probably easy to replicate, and I bet it would work for the boys.”
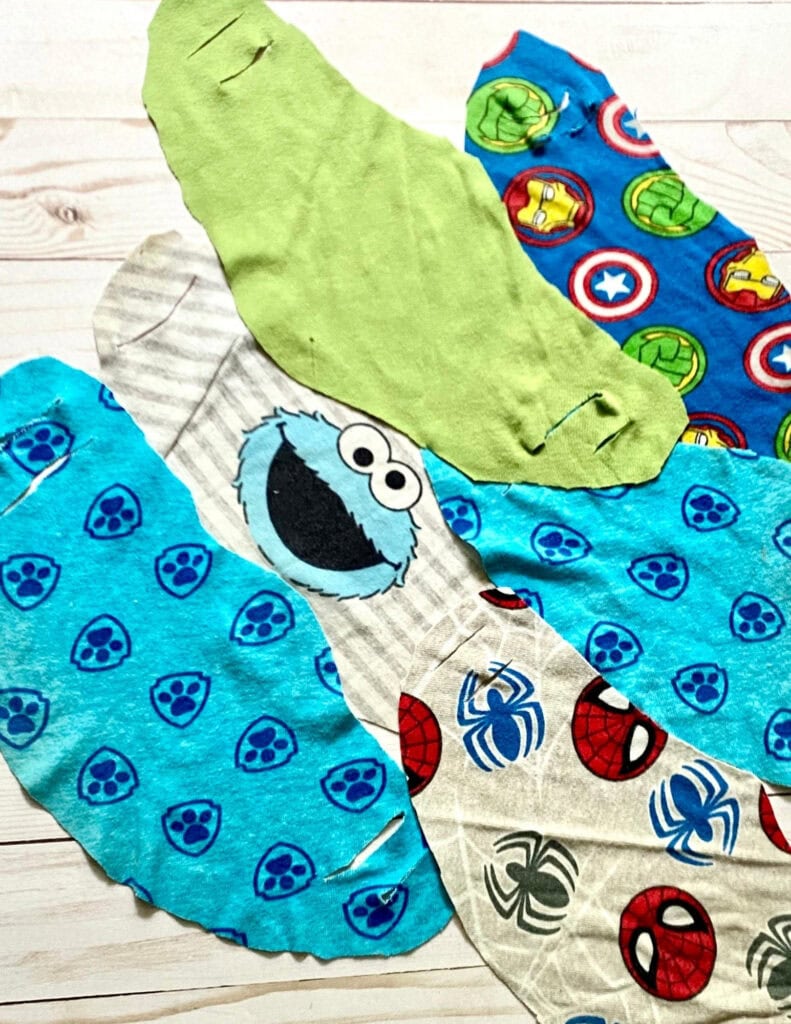
So, 6:30 a.m., I was fishing through their pajama drawer for old pajamas with fun patterns and gave it a go.
I grabbed my Instacart mask, laid it on the fabric, and did a test run.
It actually worked.
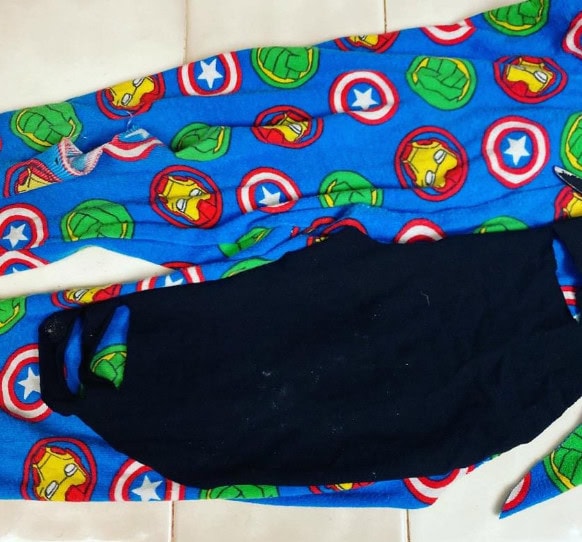
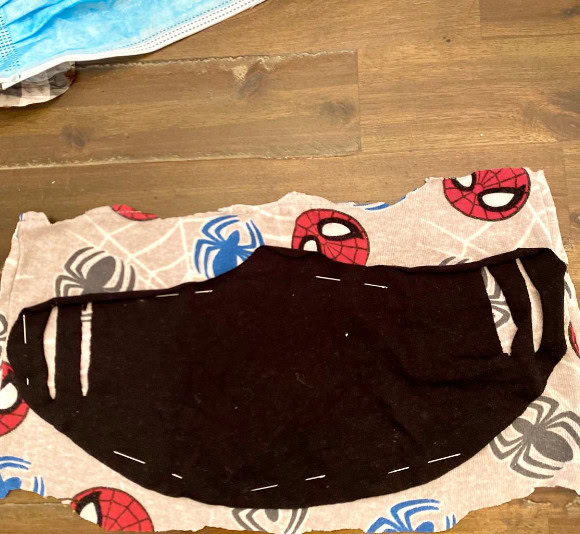

I made a few more after to try to nail down the process better, and that what I’m sharing today: a free, no-sew, breathable face-covering upcycle for kids
Face Covering DIY Upcycle
I wasn’t sure if this was a genius idea or kinda trashy, but if you like easy upcycles with minimal effort, maybe you’ll think this is genius. Maybe not. lol
You really just need a few materials, and you honestly could probably wing it if you wanted to. Depends on how much of a detail person you are.
Basically, you just need 100% cotton t-shirt material – old t-shirts, pajama pants or shirt, any kind of fabric that has a little stretch or give to it. Then, grab some scissors, pins (or needles), and a tape measure.

For the boys, I liked pajamas because they are pretty thin and less suffocating. And because there are such cute patterns.
This really is as simple as cutting out the template, which I’ve provided below, on a piece of fabric that’s about 5.5 x 12″, give or take. The mask itself is going to be about 12″ wide. For a template, you can also use a mask you have or a disposable mask for a template if you choose. Once your template is cut out on the fabric, slice some ear slits and you’re good to go.
You can grab your template in the link right below. Warning – I had to trace it by hand to create a template. And it looks like it was traced by hand, even after many, MANY attempts. It’s not perfect or pretty looking, but it will get the job done.
Click here to get your face covering template PDF.

You may need to adjust some measurements to fit your child, but it’s super-easy to do, even if you make a mistake. I suggest doing a trial run on a spare piece of fabric, just to test out, and adjust the measurements to fit.
Once you print out the template, cut it out and secure it to the fabric using straight pins (I actually used needles because that’s all I had).
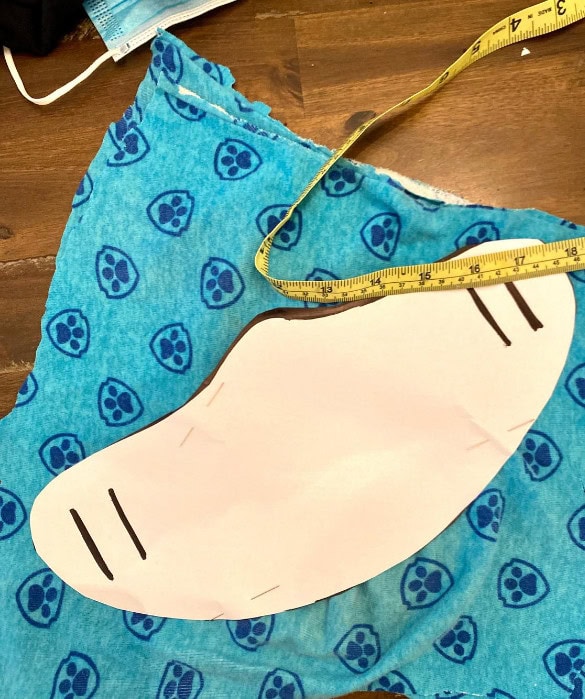
Once it’s secure, cut around it. It doesn’t need to be exact or even really; you’re going to trim it up after.
After you cut out the mask, fold it over top to bottom, so the little indent touches the other side, roughly. It doesn’t need to be folded exactly in half. More or less, you want the ear slits to be folded in half so you can cut them evenly along the lines.
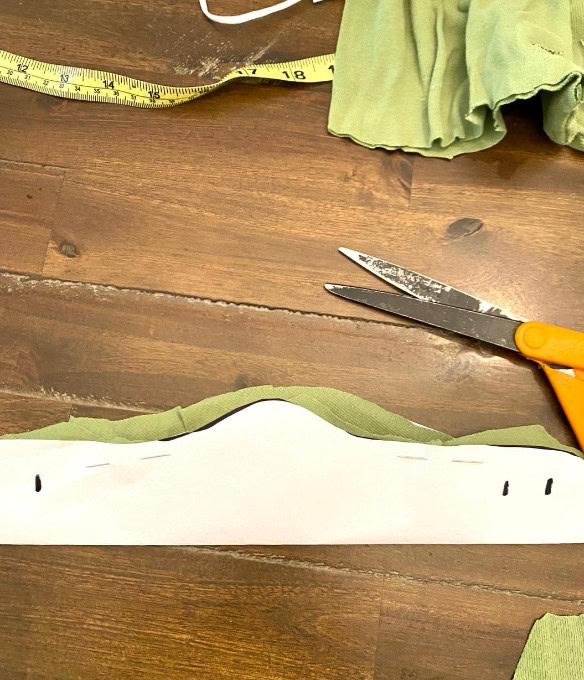
Then fold it again horizontally. This is so you can line up the ear slits. Make sure the slits are in half over the fold.
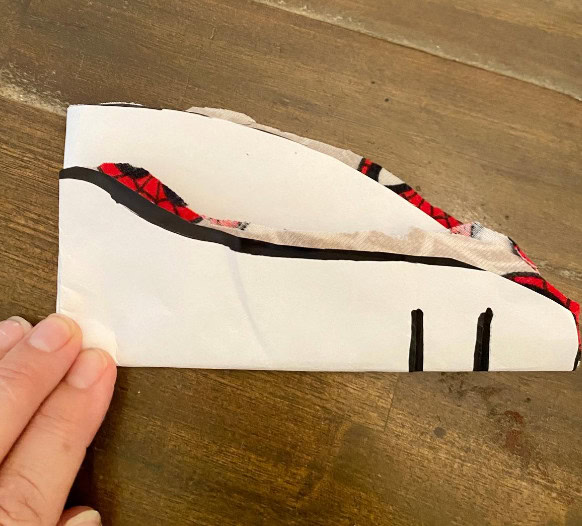
The outside ear slits are about 10″ apart, an inch from the edge. Then 2nd inner ear slits are about 8’5″ apart, or about an 1 3/4 ” from the edges. These are approximate numbers, and you might have to adjust a little for your child’s head.
Don’t worry about measuring if you’re using the template. Once the mask and template are folded twice, cut the ear slits. They should be about 1.5″ long. I like to cut on the shorter side first – maybe an 3/4 – 1″ – to make sure it will fit. If they are too long, they may stretch too wide and then slide off the ears. So, better to make it short at first, then the cut the slits longer once your child tries it on, if needed.
Once you cut the slits, unfold it and then refold it horizontally so you can trim around the edges so it’s symmetrical all around. Trim and clean up any rough edges.
After you have it neat and clean, let your child try it on. I usually fold the nose part under and had the mask just rest on top. You’ll be able to see if it’s too tight or too loose. You don’t want it to fall off, so it should sit snug. But you don’t want it tugging on the ears or pressed too tightly on the nose either. Likely, it will hang down loose over his or her chin, and that’s fine. I like that for breathability.
Caveats Concerning This Face Covering Hack
Please note that this is a face covering, not a technical mask. If places require a legit mask or something with multiple layers, liners, or filters, it’s not this covering. This is a low-level covering that meets base level requirements of most stores (and hopefully schools) when faces need to be covered.
And honestly, that’s why I like it. It’s more breathable. It’s not suffocating. And it will hopefully do what the experts are telling us it will do – one more layer between your child’s germs and others (we already know masks and coverings don’t protect the wearer but others from the wearer).
But if this satisfies Walmart and this is what Instacart gave to its employees, then, for me, it’s enough.
What I Like About This Face Covering Hack
First, I love that it’s free. I was very close to having to drive all over the county to first see if I could find kid masks and pray they weren’t sold out. And then likely, I’d be overpaying. This is free.
It’s easy. I mean, eassssssy. No special talent required here. Just scissors and fabric.
It’s no-sew. I’ve seen a lot of the face mask kits, but sister, that’s just not in my wheelhouse. I like that I can make my own without having to sew. (Although if you wanted to, you can sew edges for a clean seam. It’s just not that important to me.)
You can mass-produce these. I have zero fears about my kids losing these because we can just cut some more. Otherwise, I’m sure I’d be more uptight about the money we’re wasting on lost masks.
It’s an upcycle. There’s so much over-production and waste of clothing in our world today. I love that there’s a use for these old pajamas. Because my boys go through them so fast and they all have holes in the knees, there’s no way I could donate them. However, this is a practical way to upcycle them and put them to good use. Typically, I like to keep them for cleaning rags, so you can even do that with the leftover pieces.
They’re adorable. If a kid is resistant to wearing a mask, at least it’s in a familiar pattern and material, typically with cartoon characters they already love. That might help a little with comfortability and motivation to wear it.

They’re not suffocating. OK, so that alone might indicate that it’s not serving its purpose, but I’ll be real honest here: we are required to wear them for school, and we are being compliant. I’m not particularly interested in anything else. I want my boys to be comfortable, to be able to breathe and get oxygen, to be as comfortable as they can. This fits the bill.
Here are the succinct directions to follow:
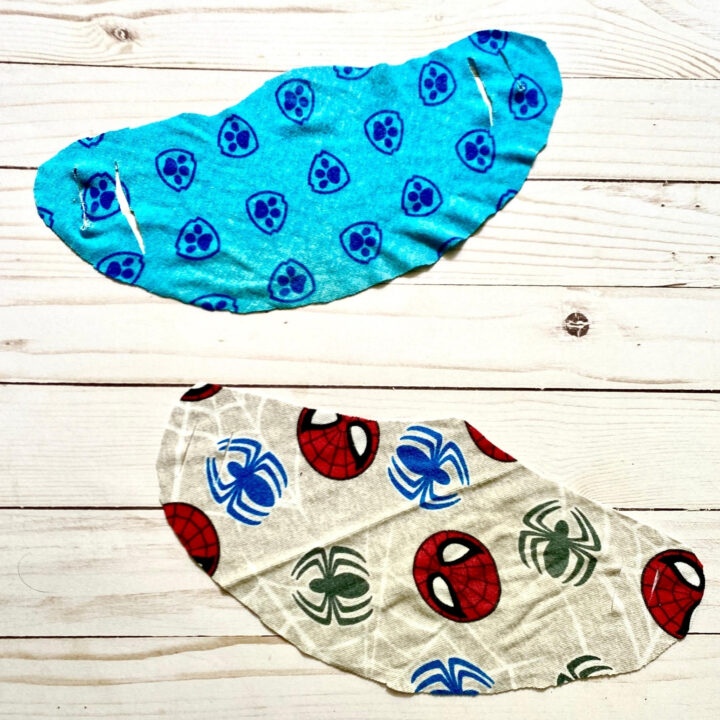
Easy, No-Sew Face Covering
Materials
- Cotton fabric (t-shirt, old pajamas), 5.5" x 12"
- Template (in post or you can use a face mask you have)
- Scissors
- Straight pins or needles
- Tape measure
Tools
Instructions
- Print out the template in the post and cut it out (you can use a face mask you already have as a template if you want).
- Secure template to 5.5" x 12" piece of fabric with pins or needles.
- Cut around the template on the piece of fabric. Keep it attached.
- Fold fabric and template with the template on the outside so top touches the bottom.
- Then, fold fabric and template in a half again horizontally.
- Cut 2 ear hole slits along the lines, about an inch long and 3/4" apart.
- Unfold fabric and template again and then refold horizontally. Trim outside edges and extra fabric so face covering is symmetrical and edges are neat.
- Have your child try on masks and make adjustments. You may need to make ear slits longer or add extra slits if mask is too big or little.
- If desired, you can sew the edges for a neat seam or use fabric glue (I didn't ).
- Make more masks as needed!
Not the Start We’d Hoped for But We’ll Get Through It
I’m pretty confident in saying nobody wanted this school year to start off like this: so much uncertainty, so much anxiety, so much different than normal. But we’ll get through it. I realize that my sons wearing a face covering is a necessary evil for them to socialize with their peers, have face-to-face (sort of – at least in person) interaction with their teachers, to experience all the benefits that traditional schooling offers them. And if a face-covering is what we need, we’ll do it. I pray it’s not something they’ll need all year, but at least we can be well-stocked without breaking the bank.
PS – and if you happen to like to sew, here’s a great tutorial for sewing a facemask!
More Back to School Resources
If you need other back to school resources (because there’s still actually school stuff we need to think about, right? lol), here are a few other posts that might be helpful:
Along the lines of healthy, kids come down with stuff all year, and I don’t just mean pandemic stuff. We still have the regular colds, stomach aches, upper respiratory things to deal with. Here is a post about natural home remedies for common ailments. You’ll want to have some of these supplies on hand as school gets rolling. Free printable for this as well.
Speaking about staying healthy, I’m all about preventative measures. Building up my kids’ immune systems is priority #1. It’s more effective than just wearing a mask – it stops the sickness before they become an issue. Food is a primary way to do it, in my opinion. Here are 20 immune-boosting foods for kids that they’ll actually eat – plus creative ideas & recipes to get them to eat (free printable included as well).
And while we’re talking about healthy foods, here are 65+ grab-and-go organic snacks you can feel good about putting in your kids’ lunches.
Finally, let’s talk about the back-to-school beast at home and how quickly the chaos spills all over our houses. If you need home organization hacks, here are 30 home organization ideas for back to school, including homework stations, backpack storage, and family command centers.
I know this is uncharted waters for all of us. Nobody gave us a pandemic playbook.
Hang in there, mamma. It’s a lot. I know. But I also know my boys will be fine. And your kids will be, too.
We’ve got this. And God’s got us.
Thoughts? I’d love to hear them! Leave a comment below!


