Beginner-Friendly Bible Doodles: Easy Christian Doodles Anyone Can Draw
Want to add Bible doodles to your pages but think you can’t draw? This is so common for those who want to try Bible journaling! The good news is that doodles aren’t art school drawings. They’re small, simple pictures that help a verse stick, and anyone can do it. Even you. 😉 And grab your free printable Bible doodle cheat sheet at the end of the post!
My Bible Journaling Backstory
I’m not a trained artist. My background is in words (former English teacher here👋🏻), not pictures. But life shifts, and as I’m in my ‘homeschool mom stage’ with my twin 11-year-old sons, creative parts of my brain I didn’t really have time for before are finding their way out.
I’ve only recently begun art journaling and Bible journaling – sort of by accident, but it has quickly become my favorite way to engage with the Bible and enhance my time with God.
I still use words and take lots of notes in my Bible, but gone are the days of my long journal entries filling notebooks with lots of words.
Pictures help me process truth and let me engage those creative parts as well. And while I’m the first to admit they aren’t perfect – that’s kind of the point! We bring our messy, imperfect selves to God without hiding or shame, and just enjoy creating with the Lord.
A lot of these doodles are personal markers of what God is teaching me – and it’s a very simple way to recall truths without sifting through lots of words.
In this post I’ll show you the simple Christian doodles I use most, how I pair doodles with words and verses, and the simple hacks that make doodling doable even if you’ve never considered yourself creative.
Are you ready? Let’s go!
What Are Bible Doodles?
Bible doodles are small, simple drawings that anchor, highlight, or illustrate a verse or a Scriptural truth. They might be drawn in the margin next to a passage that spoke to you, frame a verse you want to memorize, or mark a point you don’t want to forget.
They also might be symbols you add to illustrate a verse. You can also use Bible doodling in a separate notebook to draw out Bible verses or even prayers.
Typically, doodles are a little different from full Bible art journaling, though I don’t think labels matter much. You aren’t painting an entire page or covering the text. You’re adding a small visual cue, like a cross, a sprig of wheat, or a little candle, that brings you right back to what you were reading.
But if you have the space, you might want to make a large doodle in your Bible, too! And that’s totally fine.
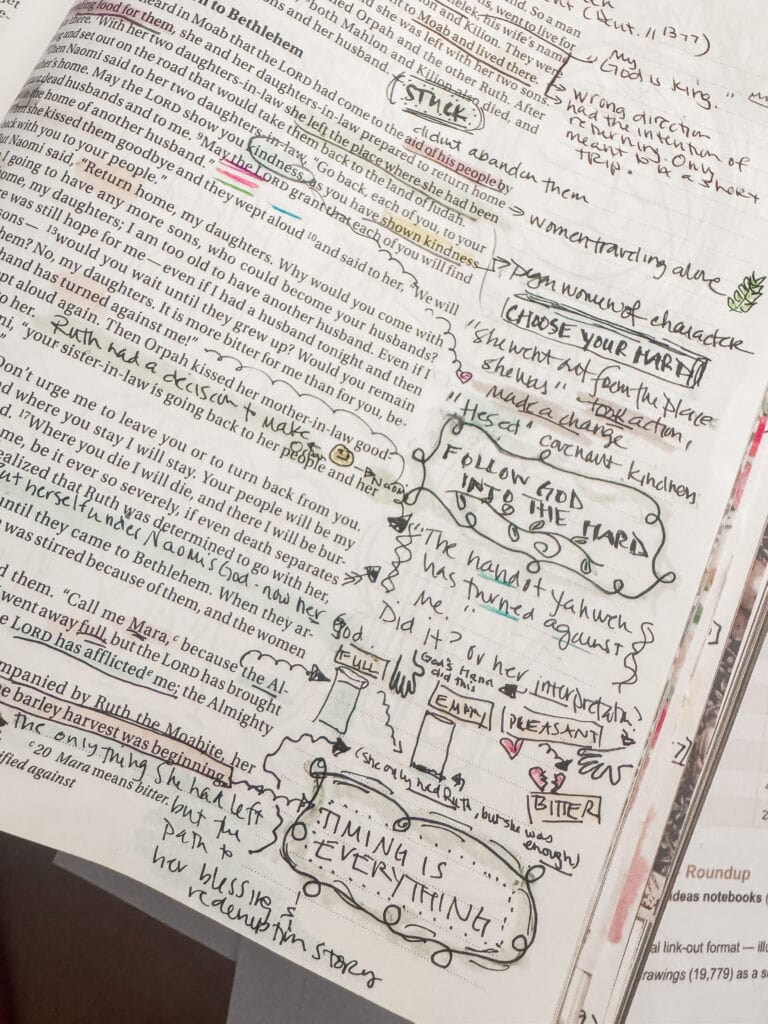
Personally, I use them to enhance my Bible study time and make visual notes (you can see more of how I do that in my Bible right here!).
But let’s get into the basics of Bible doodling.
Bible Doodling Supplies
This post contains affiliate links. See Disclosures for details.
You don’t need a whole lot. Here’s what I keep on hand:
- A pencil and eraser. I always sketch lightly first, especially in my Bible. I like mechanical pencils because they erase easily and have a very fine point.
- A fine-tip micron pen. Thin Bible pages need a pen that won’t bleed. A 01 or 03 tip gives you clean lines without heavy ink. These are my favorite and are waterproof if you decide you want to add watercolors at some point.
- Translucent highlighters. These are for when I want to add some color highlights to the pages without overwhelming it. A gel set like this is fantastic – unlike other ones that are more opaque. It’s my go-to.
- Colored pencils. These are the safest way to add color on thin Bible pages. A set like this has a convenient portable tube and sharpener, which makes it great for art-on-the-go.
Quick bleed-through test: Before you draw on a page you love, test your pen on the blank pages at the front or back of your Bible. Draw a few lines, color a small square, and flip the page. If you see bleed-through, switch to a finer tip or colored pencils.
If you like to keep your Bible pages clean, doodling in a notebook works beautifully too. Later in this post, I’ll share the notebook I use specifically for doodling.
To see all of the supplies I use for Bible journaling – both in my Bible and in art journals, head to my Amazon storefront!
Basic Bible Doodles to Start With (That Anyone Can Do!)
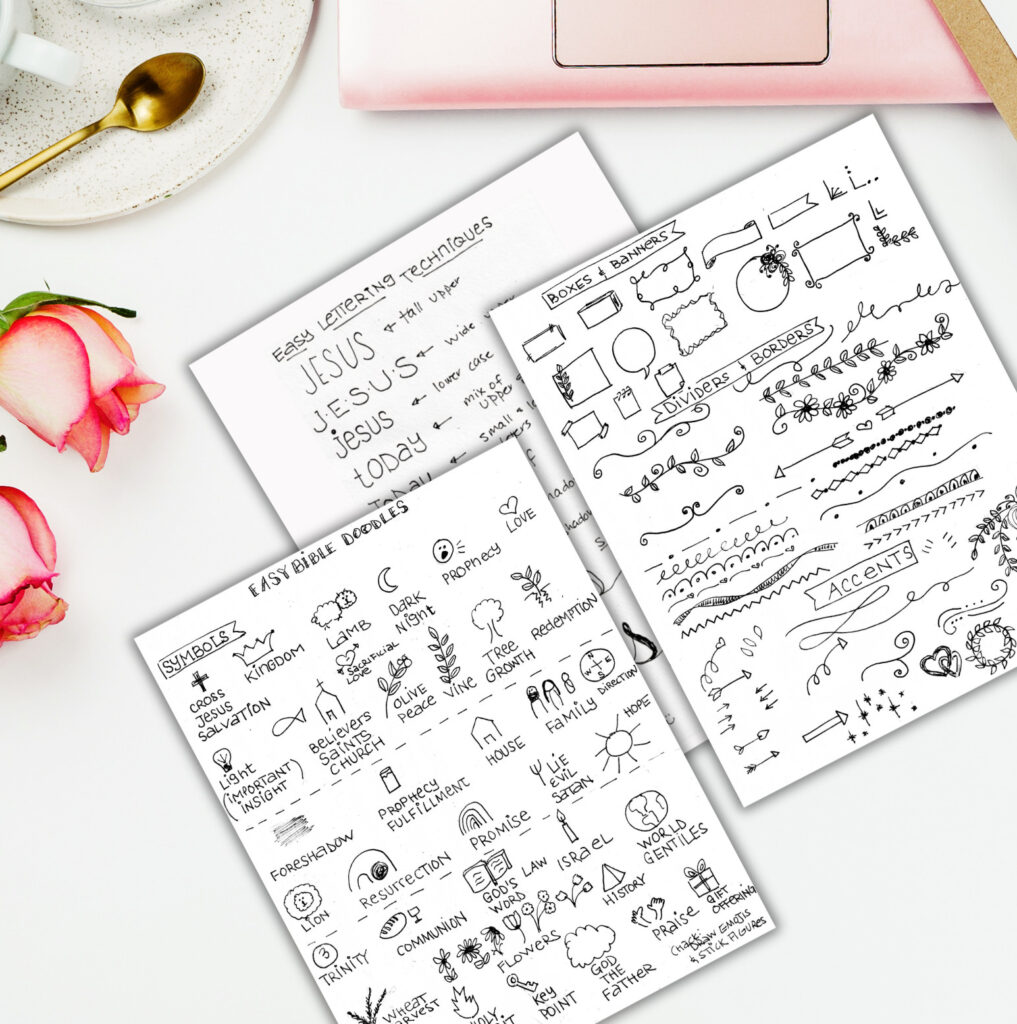
There are all different kinds of doodles I like to use in both my Bible and my faith art journal. All of the sample pages you see above are included in a printable I created for you, which you can grab at the end of the post!
Symbols
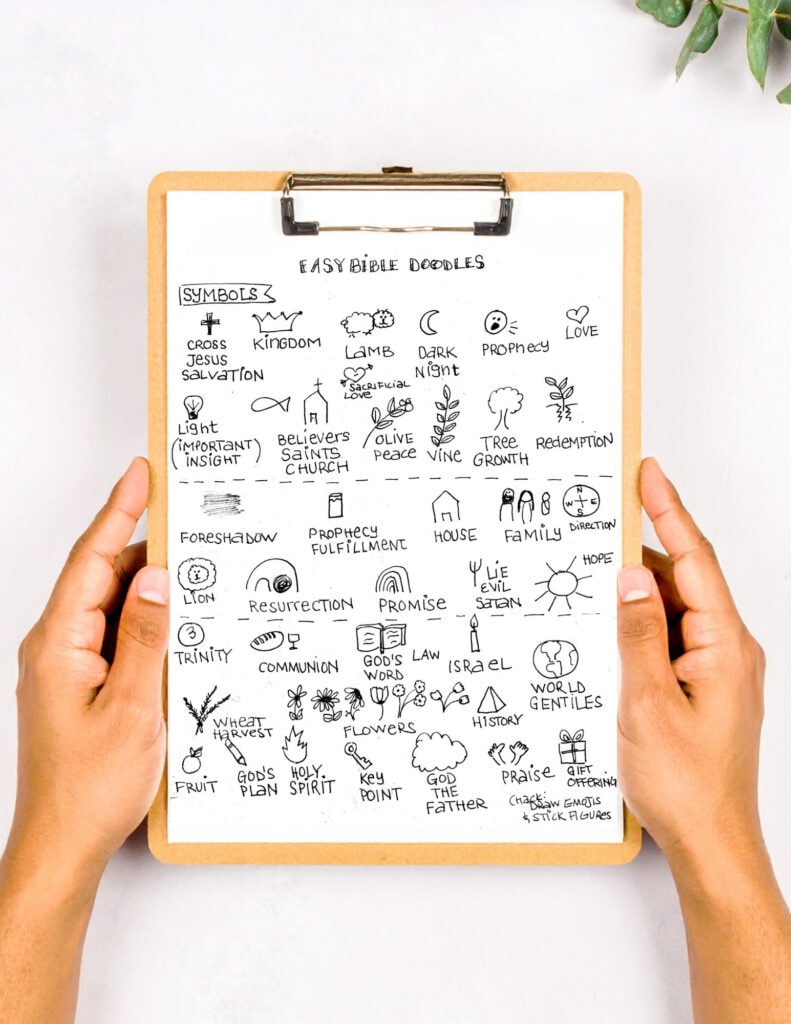
The first page contains different symbols you can add to your Bible as you’re reading. Some are just artistic embellishments, but others can also help you in tracking what you’re studying.
For example, you can put a symbol every time you see a ‘prophecy’ or read a ‘prophecy fulfilled’.
You can mark ‘history’ passages to show they’re descriptive rather than prescriptive
There are symbols for key points, important insights, verses that bring hope. And of course, you can make your own – no need to follow this sheet. But it’s there to get you started!
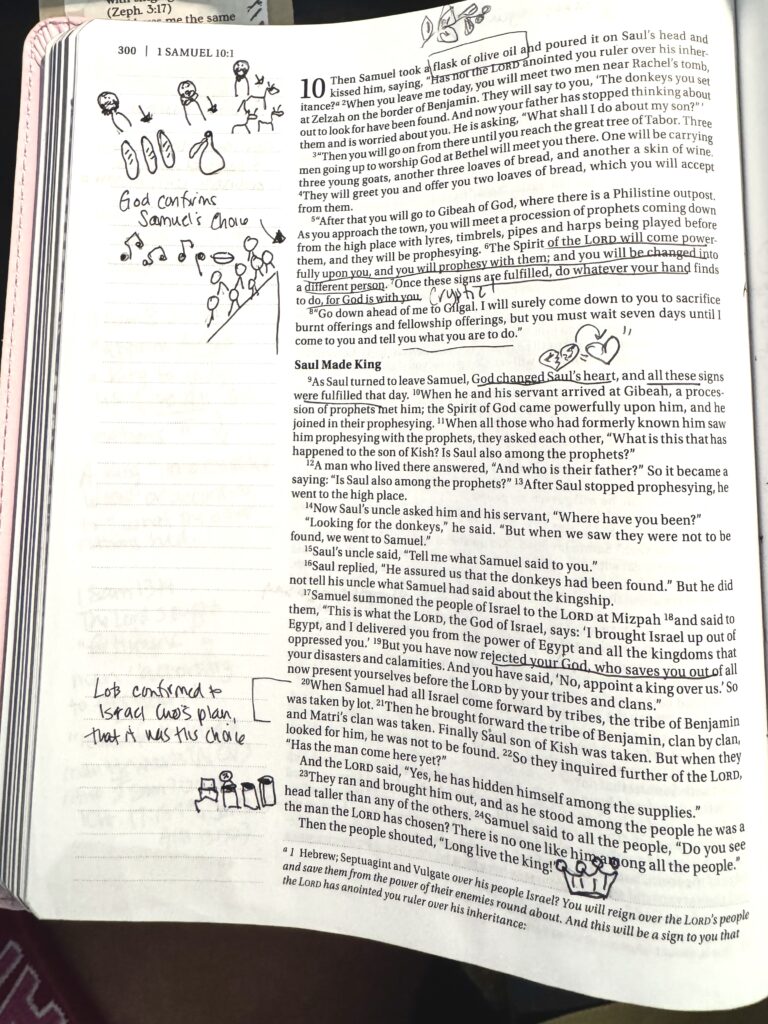
Decorative Elements
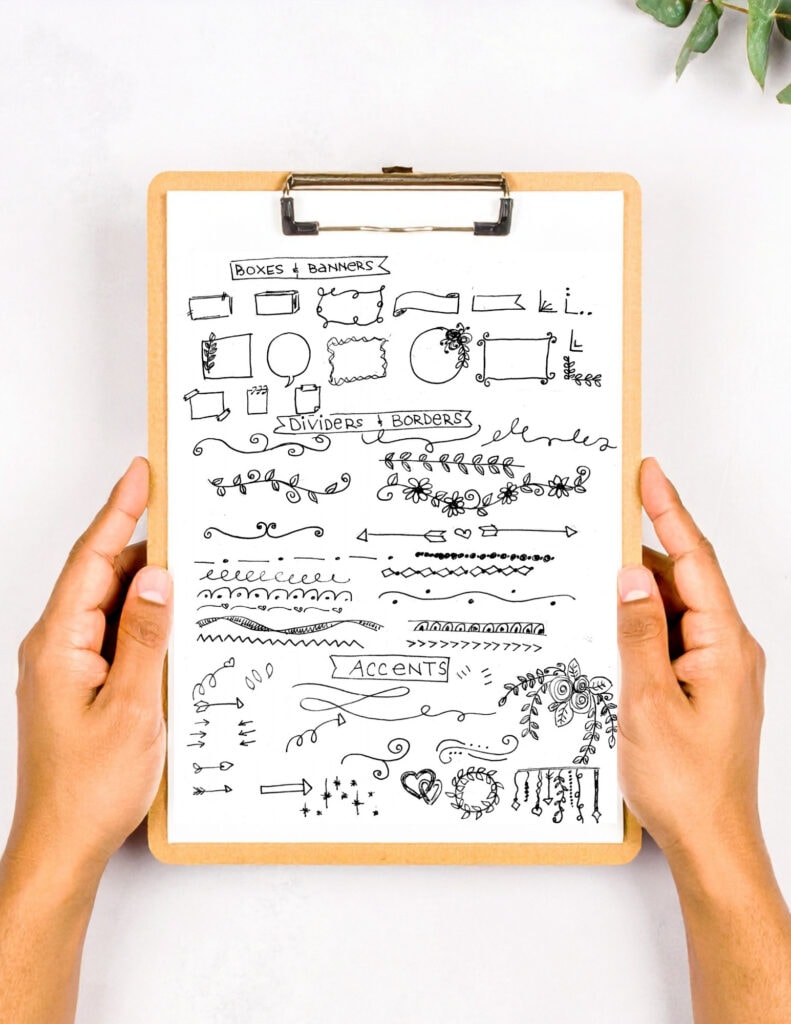
There are lots of ways to add decorations to your text or drawings. I’ve narrowed down several of my favorites, the ones I use all the time! It can be overwhelming with so many options, so it feels easier to me to just have a curated set that I always come back to (until I’m ready for some new ones).
Boxes and Banners
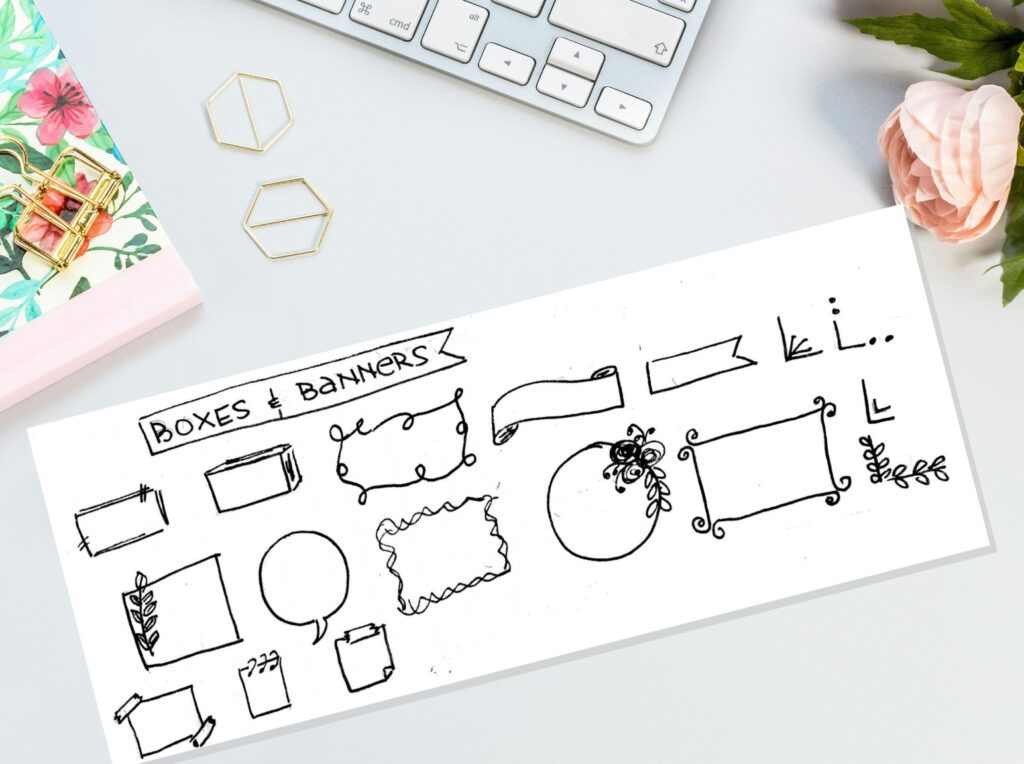
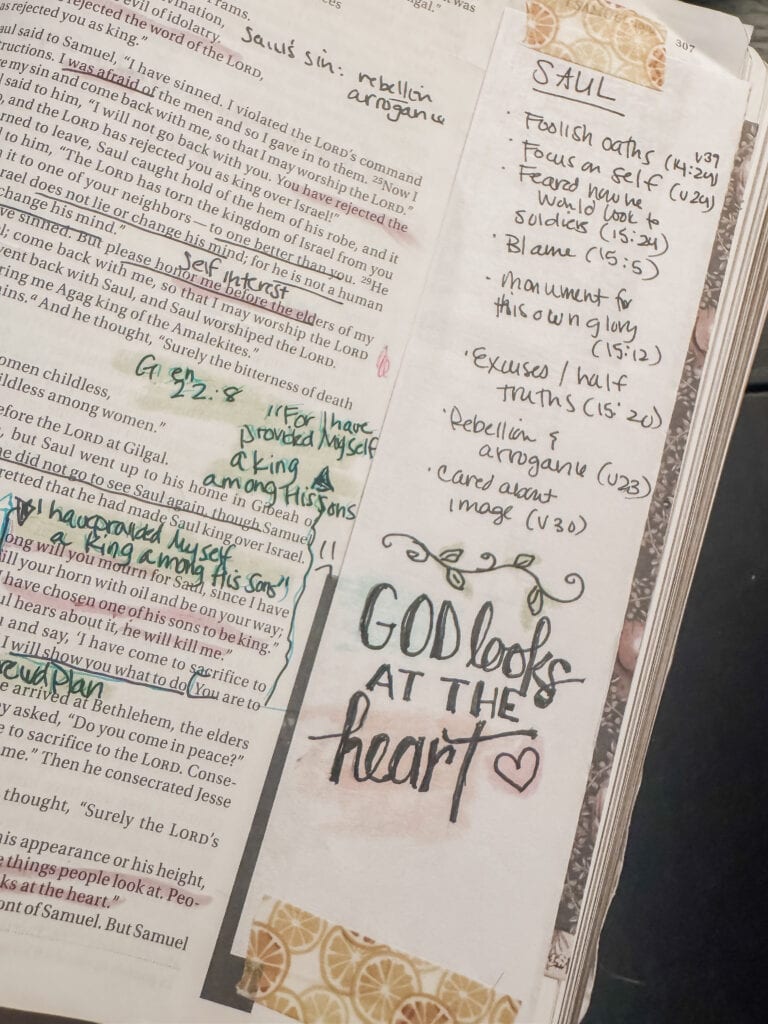
I like to use these both in my Bible and in a Bible journaling notebook. Inside my Bible, these kinds of doodles help my notes or important points really stand out. I’ll use a box or banner and then a translucent highlighter to outline it, so it’s really visible.
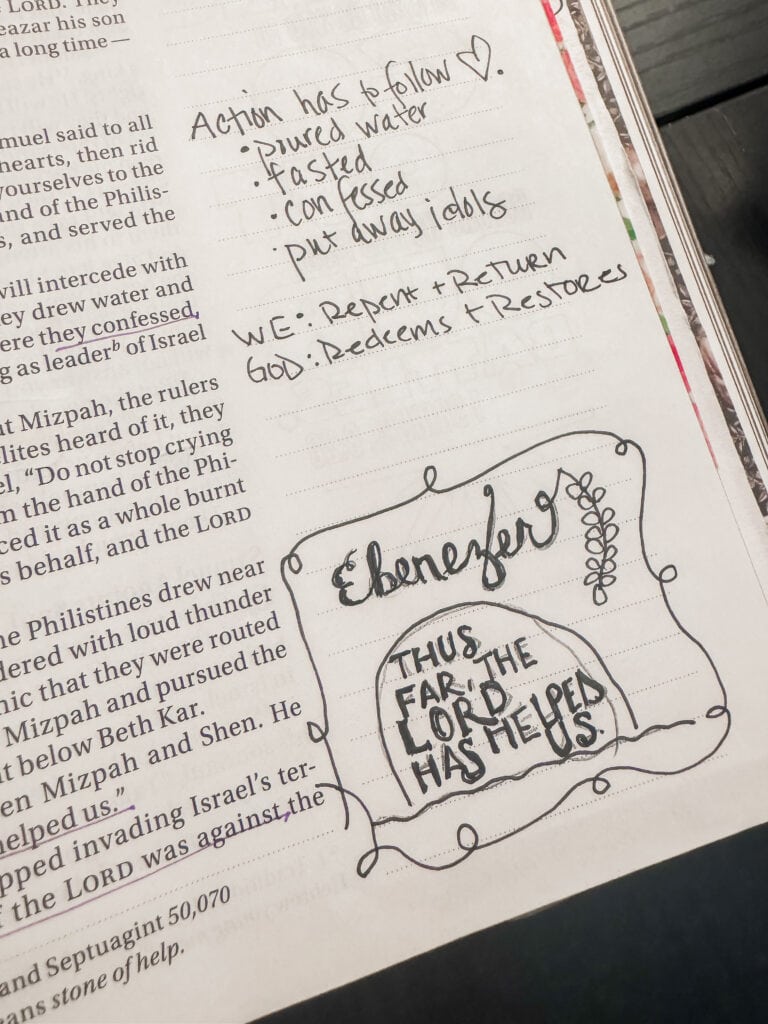
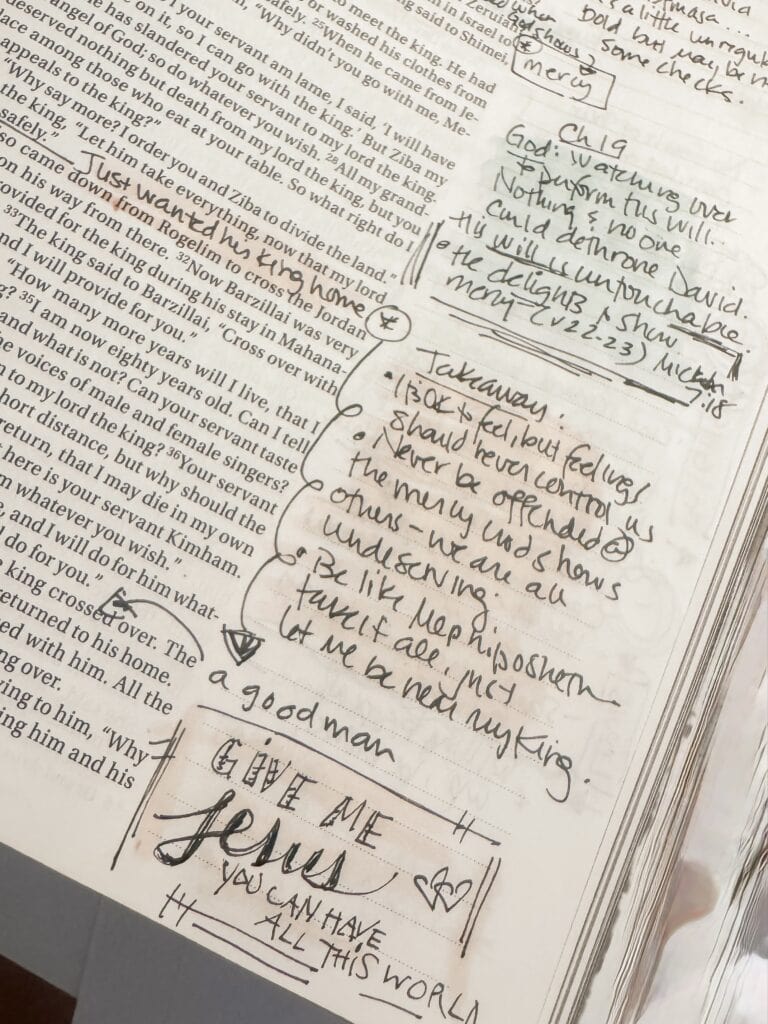
I also will use boxes and banners in my Bible art doodle journal to pretty up a Bible verse or song lyric I’m lettering.

Borders and Dividers
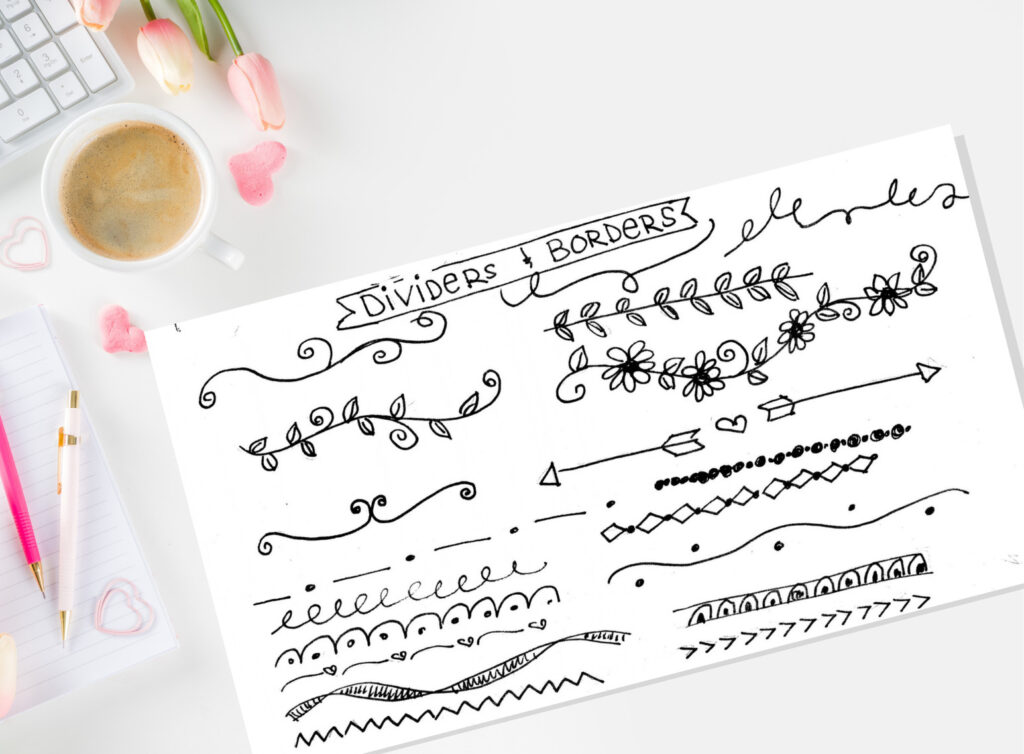
These work really well if you’re taking notes – either in church or your own Bible study – and you just want to add some artistic separation to ideas.
These show up mostly in my notebooks, when I’m working with a full page rather than a margin.
Accents
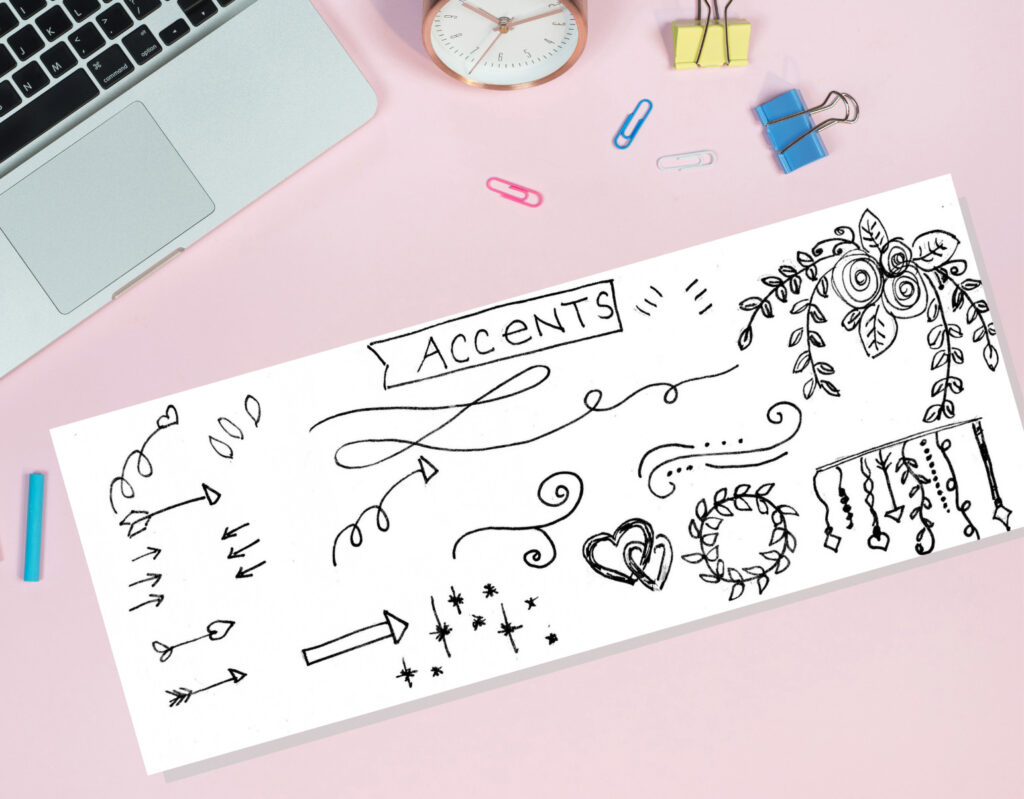
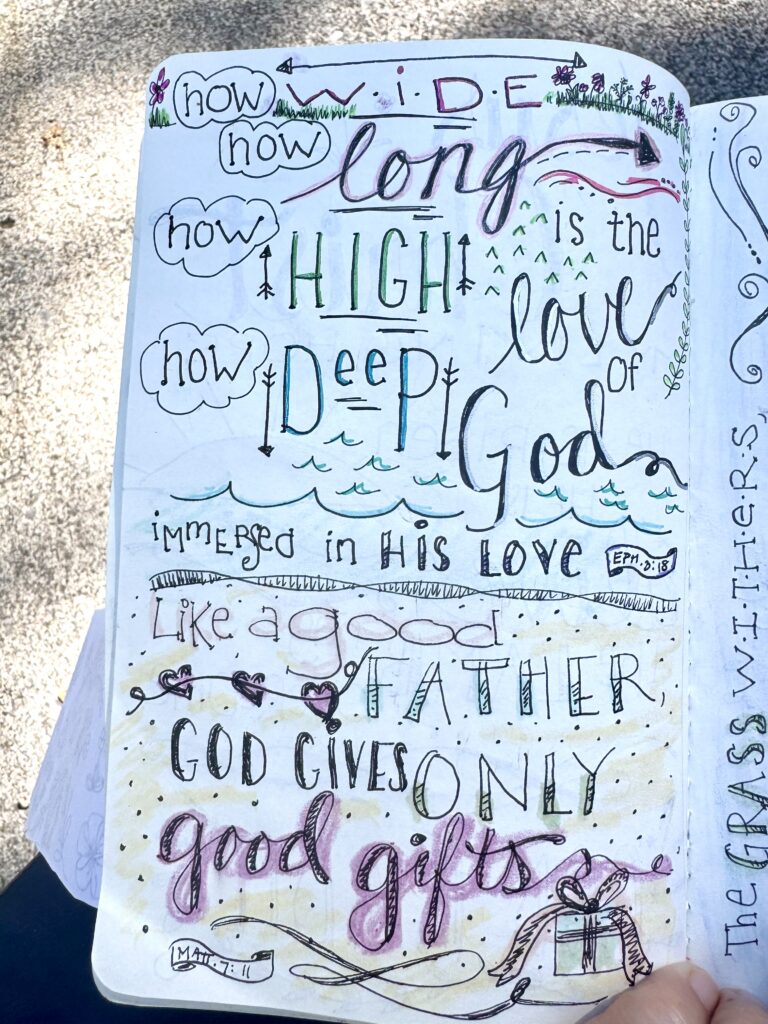
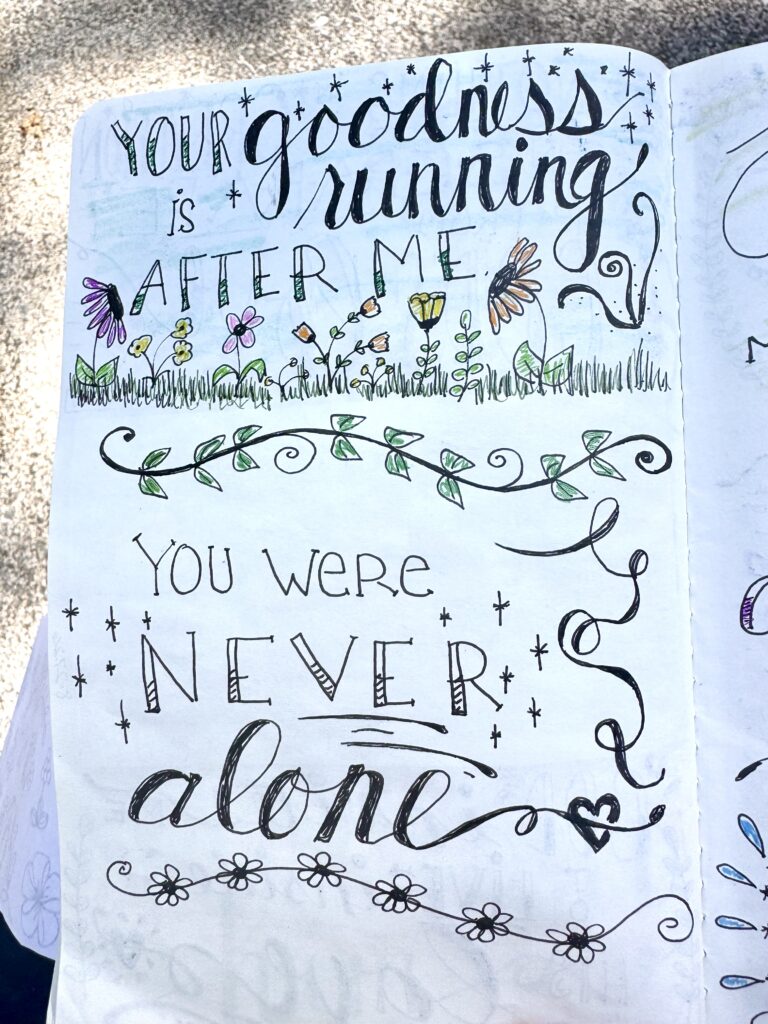
These are just little marks and pictures to bring attention to a specific Bible verse or to add some art to a verse you might be lettering.
Accents can highlight certain words and draw attention to them. I’ve also found them very helpful when I’ve gotten the spacing wrong or just want ‘a little something’ to balance the composition.

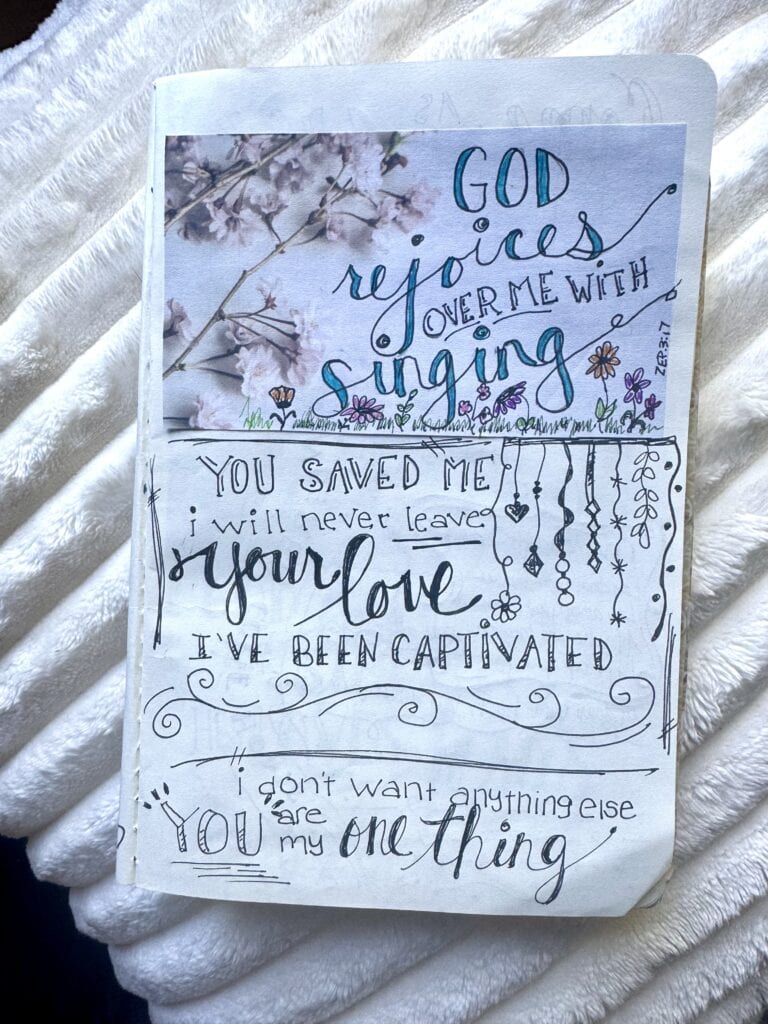
Bible Verse Doodles and Simple Lettering
This is where doodles really take off. As I mentioned in the ‘accents’ section, I’ll usually pair accents with a verse or truth or phrase – or even a lyric from a worship song.
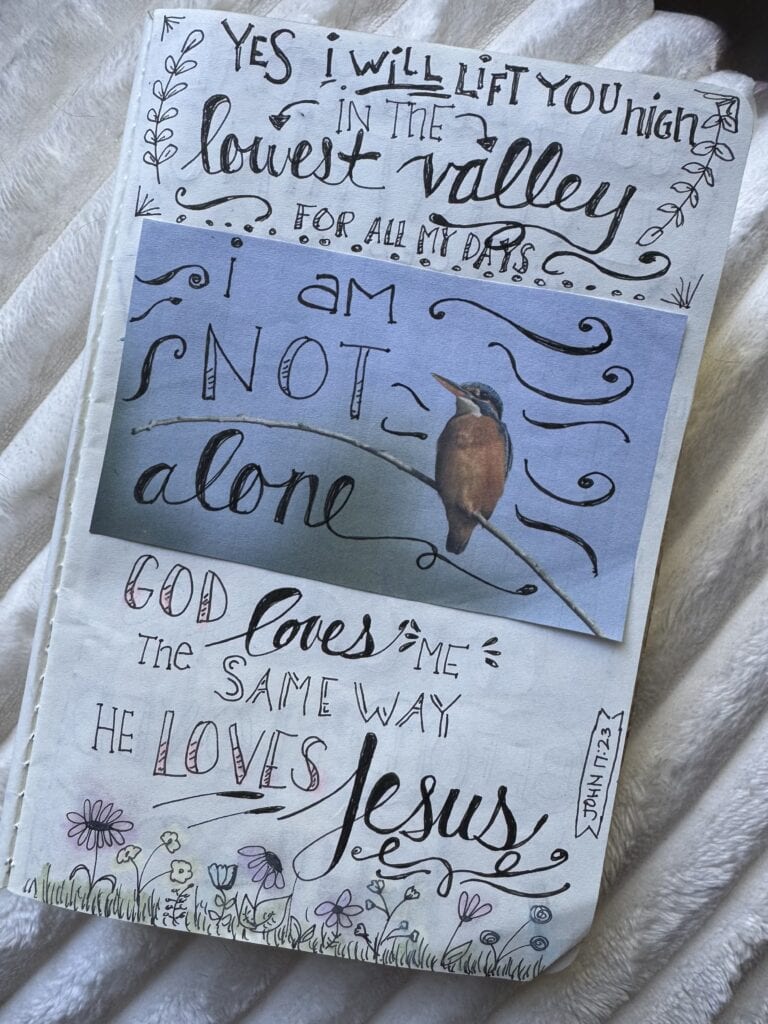
If you feel a little insecure about your lettering skills, you are in good company! The good news is that you don’t need to master pretty lettering.
All you need is to master a few different techniques, which is not hard to do if you keep practicing (yes, practicing!).
Soon, it will feel very fluid, you’ll gain muscle memory, and then you can add more techniques to your lettering toolbox.
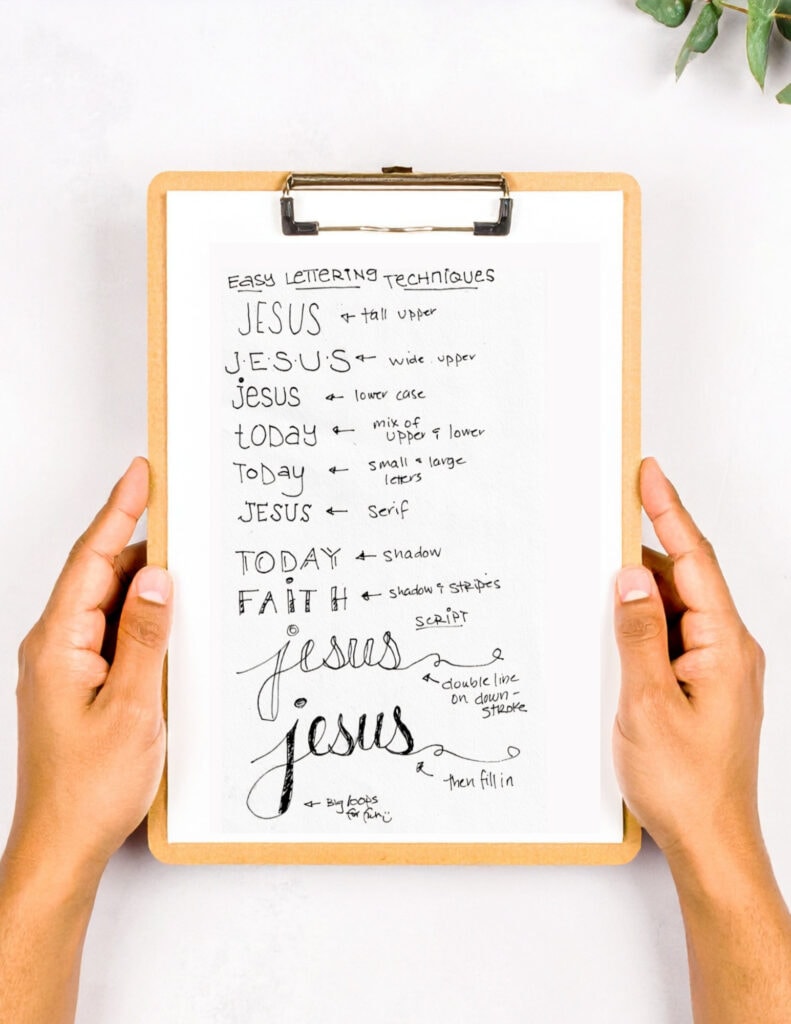
Faux calligraphy basics: Write your word in regular cursive – think ‘elementary school teacher’ cursive. Very basic!
Then go back and add a second line to every downstroke (anywhere your pen moved down) and fill in the space. It looks like brush lettering with zero special tools or skills.
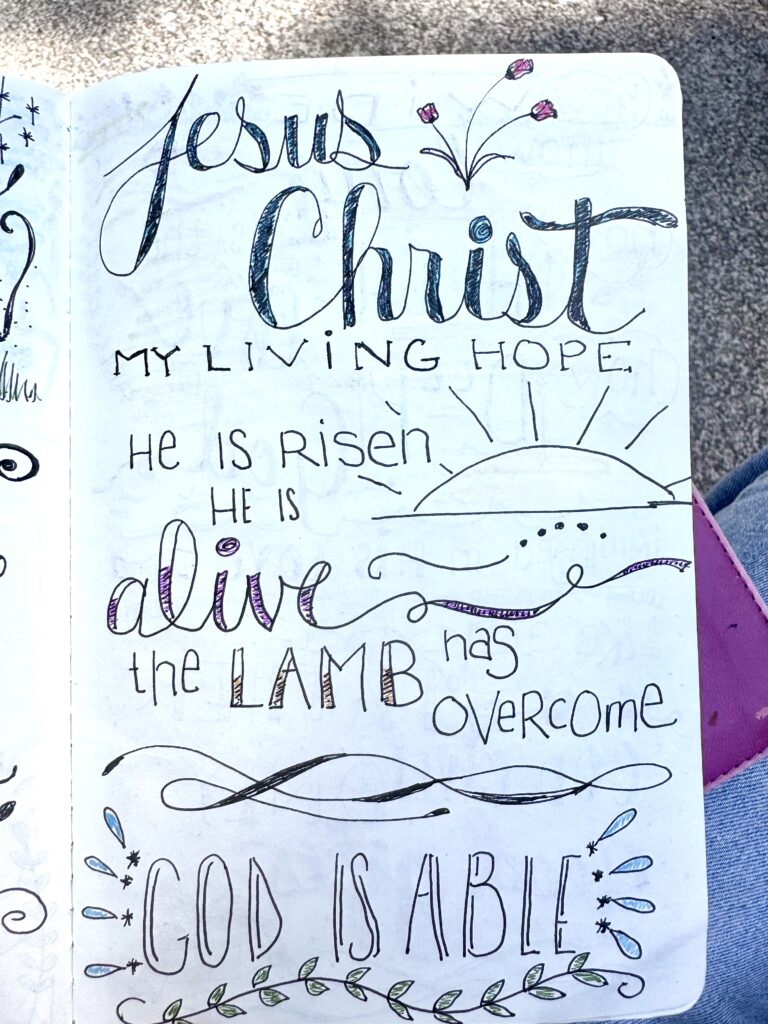
Once you get the hang of it, you can make your loops bigger to add some extra flair!
How I Set Up & Use My Bible Doodle Notebook
As I mentioned before, I have a separate doodle notebook. This is where I practice and also where I’ll put my doodles. This is a little different than my faith art journal, although I will put some doodles in there sometimes as well. But most of them live here.
How I Set It Up
To set it up, I used this kraft notebook. It’s basically what I use for most of my art journaling.
The cover is very simple – just some lettering with white gel pen highlights. The washi tape border actually serves another purpose.

When you open the cover, you’ll see that I have strips of different doodle printables taped in, almost like a flip book. These are ones that I’ve collected from various sites and have used to learn to doodle.
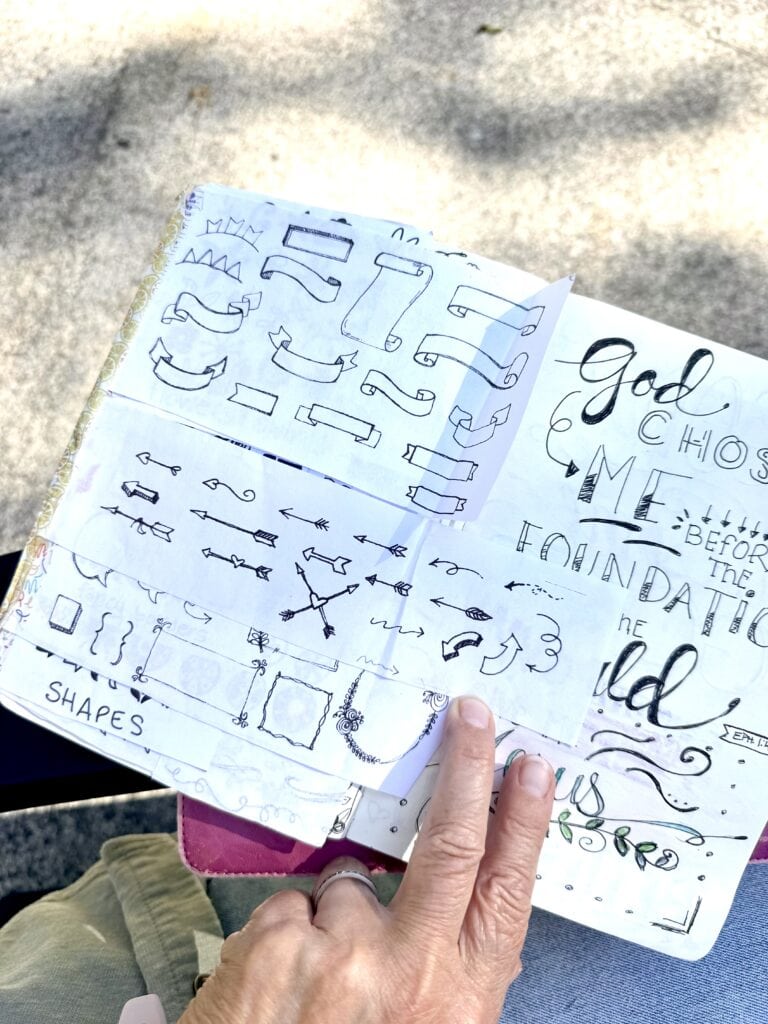
After a while, it got annoying to have a big stack of papers I needed to flip through every time I wanted to try a new design. So I just made shorter sections that I could tape to my front cover and then fold in.
Then, when I’m trying a particular kind of doodle on a certain page, I can unfold so the picture is right next to me
This technique has worked out really well for me in keeping me organized.
The printable I created for you can be cut and used in the same way!
What You Can Doodle
When you’re using a notebook, you have a lot more flexibility.
Obviously, you can letter Bible verses and include accents.
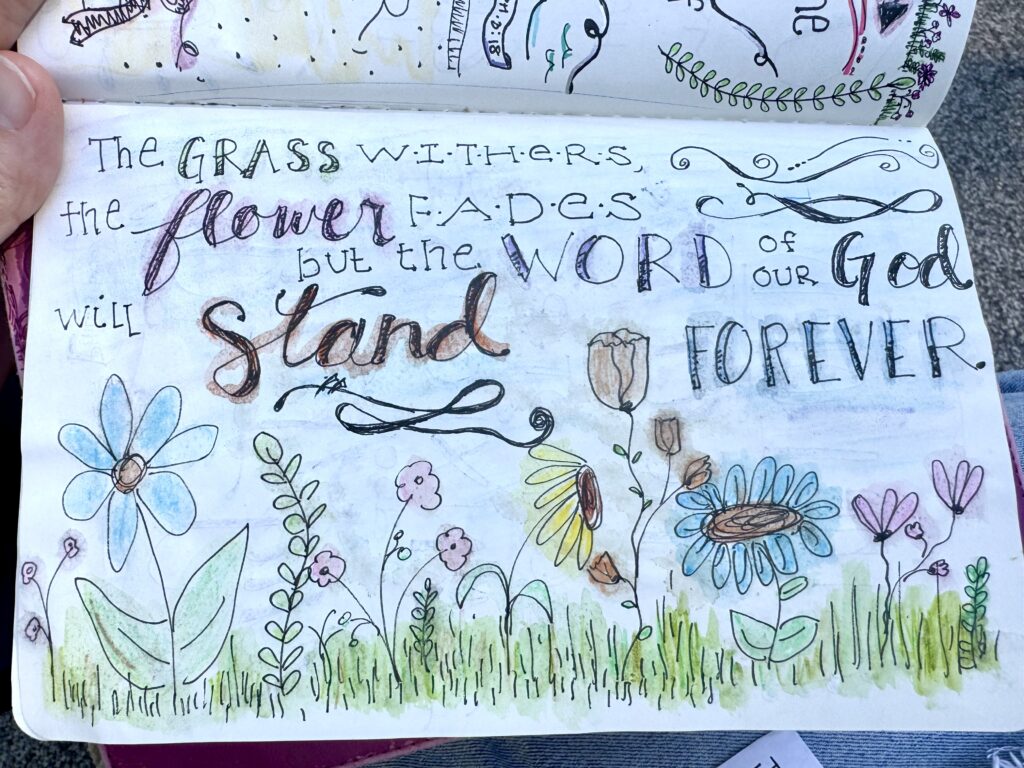
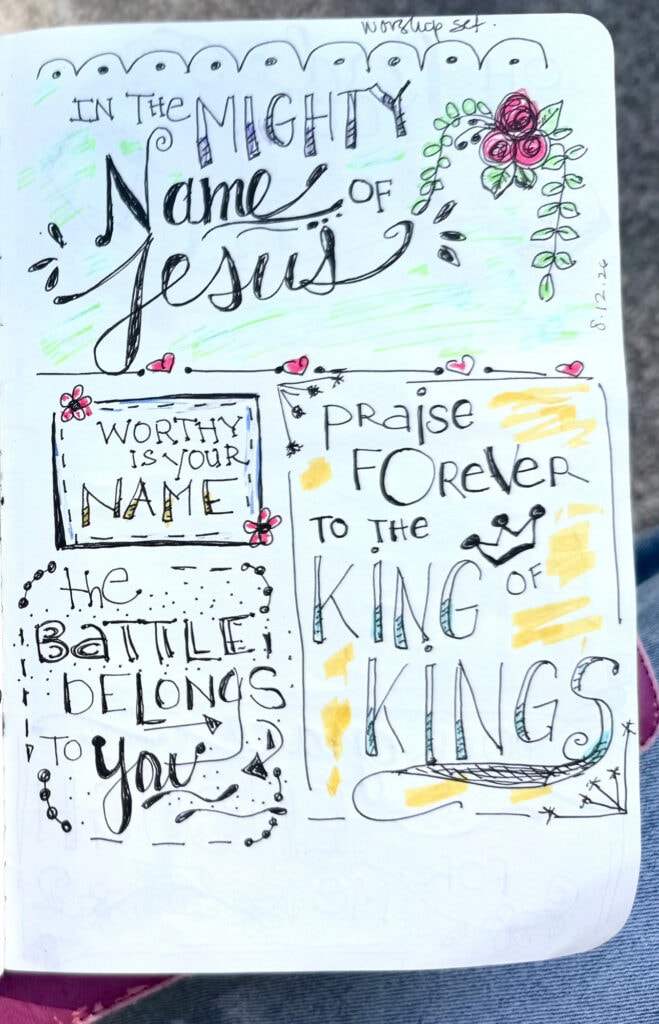
I also like to listen to worship music while I doodle. Often, a certain lyric will really stand out to me, and I will include that in my doodle notebook.
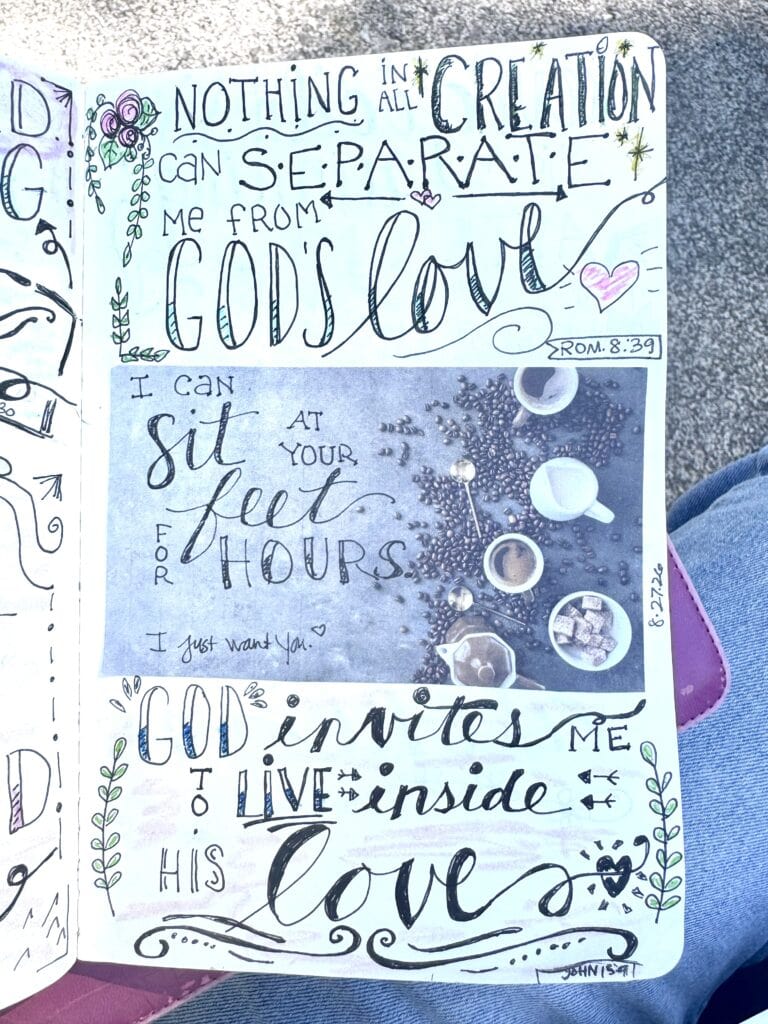
Sometimes it’s a thought or an idea from a book or a quote or something God just puts on my heart.
I also learned this technique from Regina Yoder: print out pretty pictures from your phone (that background photo is hers, not mine), and practice lettering on there.
You also can pray and doodle! Just start writing words and drawing pictures, in an almost stream-of-consciousness kind of way and see where you end up. It’s a very cool way to help unravel some of your thoughts and eventually land on truth and what God says about it all.
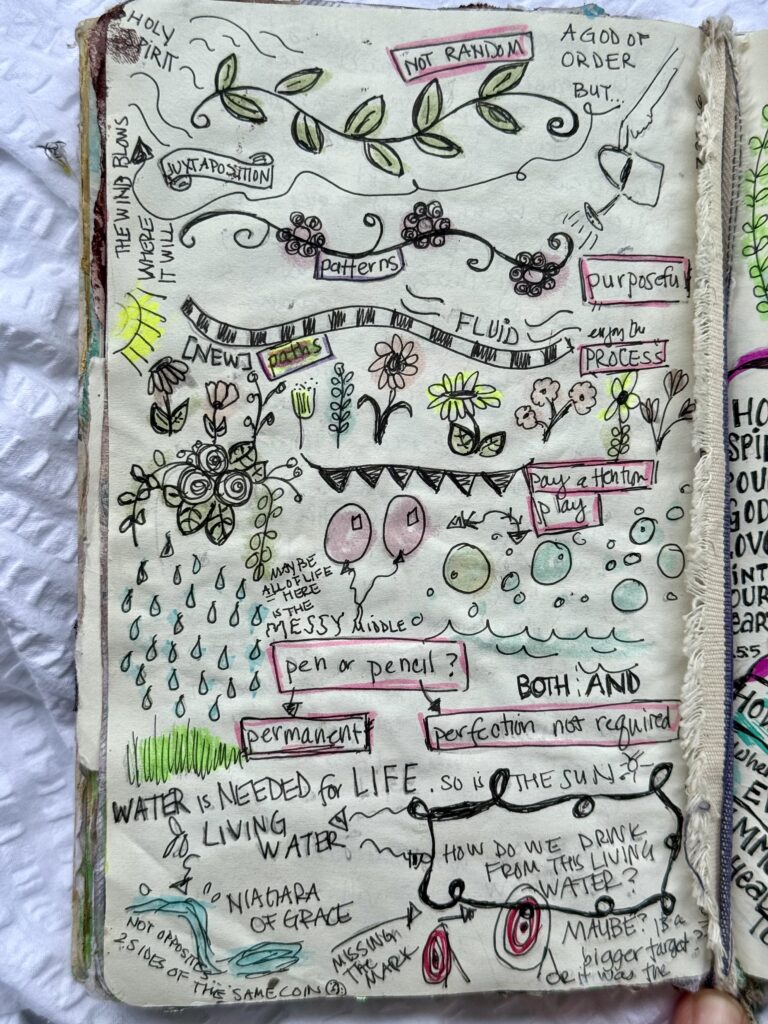
The above idea I got from Meredith Harmer.
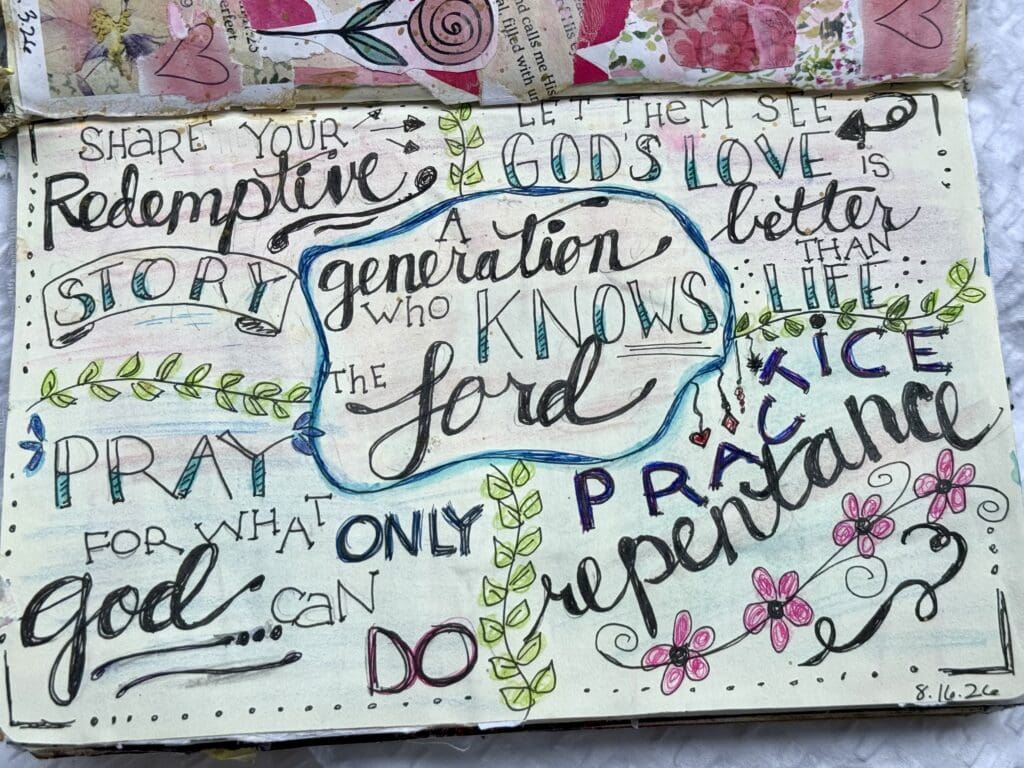
Doodling Your Bible Study and Sermon Notes
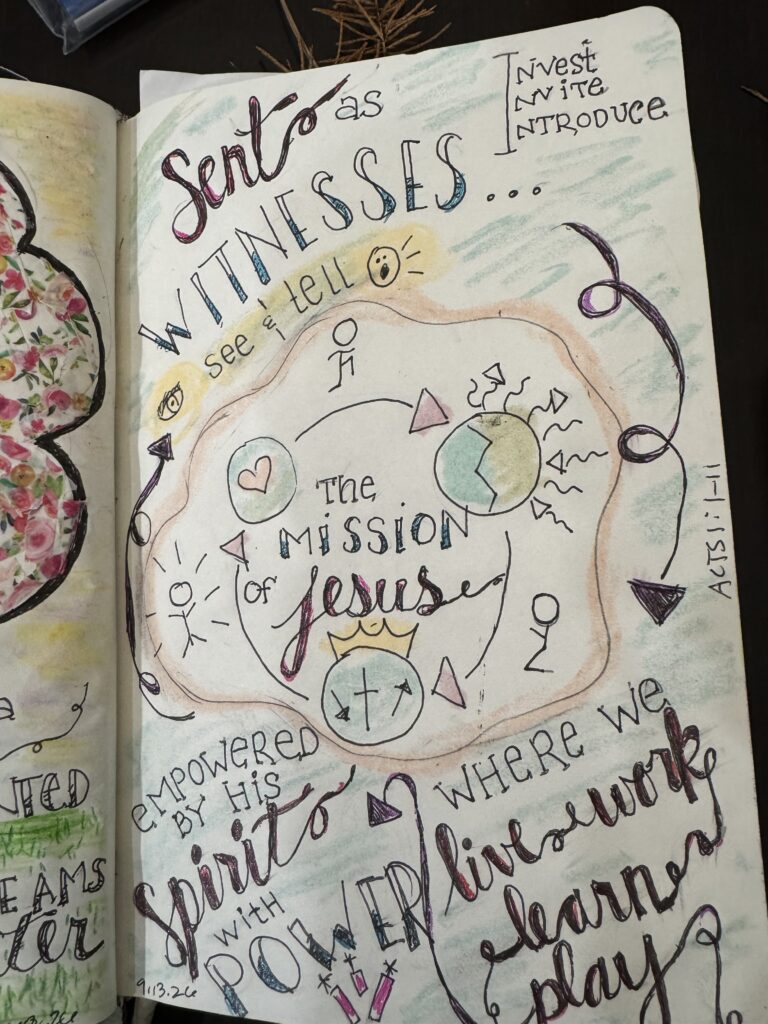
This style of doodling is something I picked up from Create with Christie. She shared how she uses it to doodle a Bible study, with a section for each day or main point.
My studies are usually too long to do that (30 days or more), but I thought it would be a great way to remember sermon notes.
I’ve been doing this now for about 2 months, and it has been amazing!
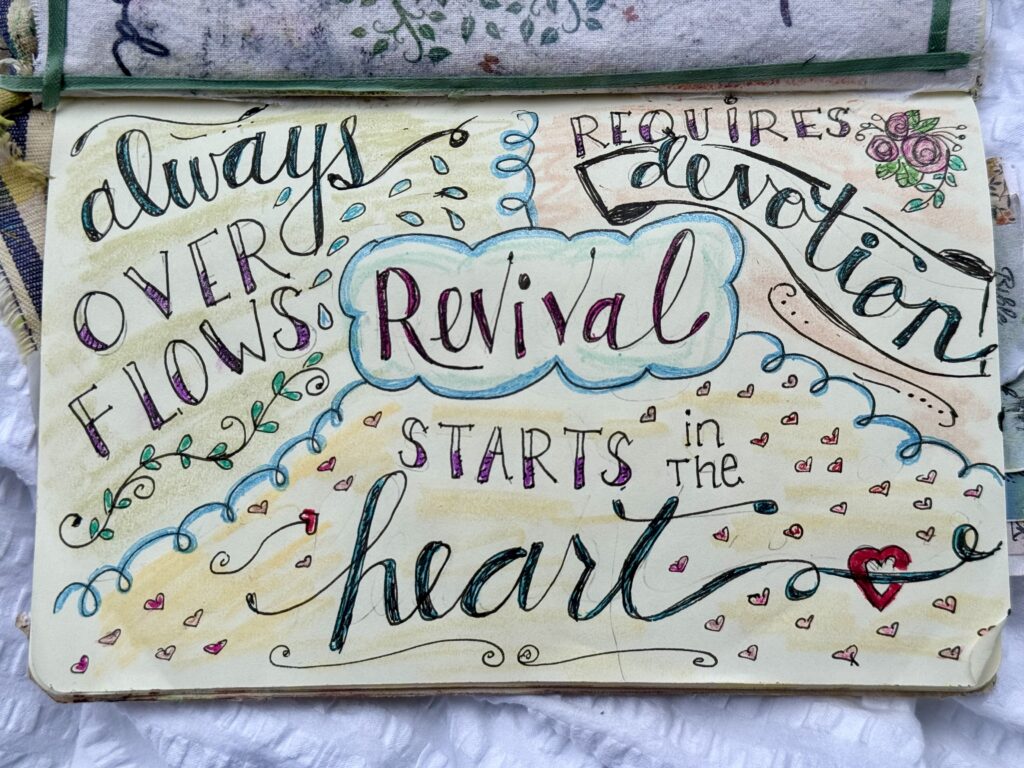
It’s my Sunday Sabbath practice to go through my sermon notes I made in my Bible and then add them to a notebook (I have a separate ‘doodle’ notebook for sermon notes).
In the center is the main text or title or the main theme I took away from it. Then, I add either the sermon notes shared in church and/or my main takeaways. It’s pretty fluid – sometimes I add verses or other phrases from the message. Sometimes I include my own application or interpretation ideas.

But what I really love about this is not only does it help me remember and process the Sunday morning message, but it also is a quick and easy way to review the messages over a period of time. It’s so easy to forget what we hear from one Sunday to the next! This is such a simple and effective way to refresh those truths on a regular basis.
Instead of pages of writing I’ll never reread, when I flip back weeks later, that little picture brings the whole message back.
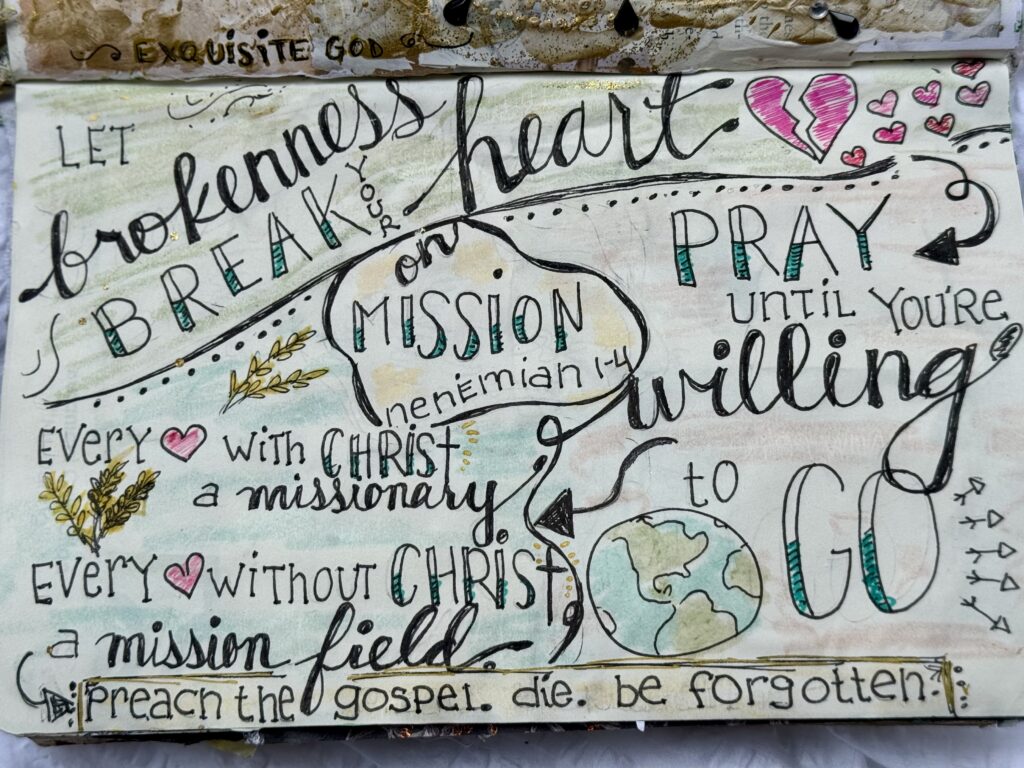
8 Bible Doodling Hacks for Non-Artists
If you’ve ever said “I can’t draw,” this section is for you. These are the hacks I actually use.
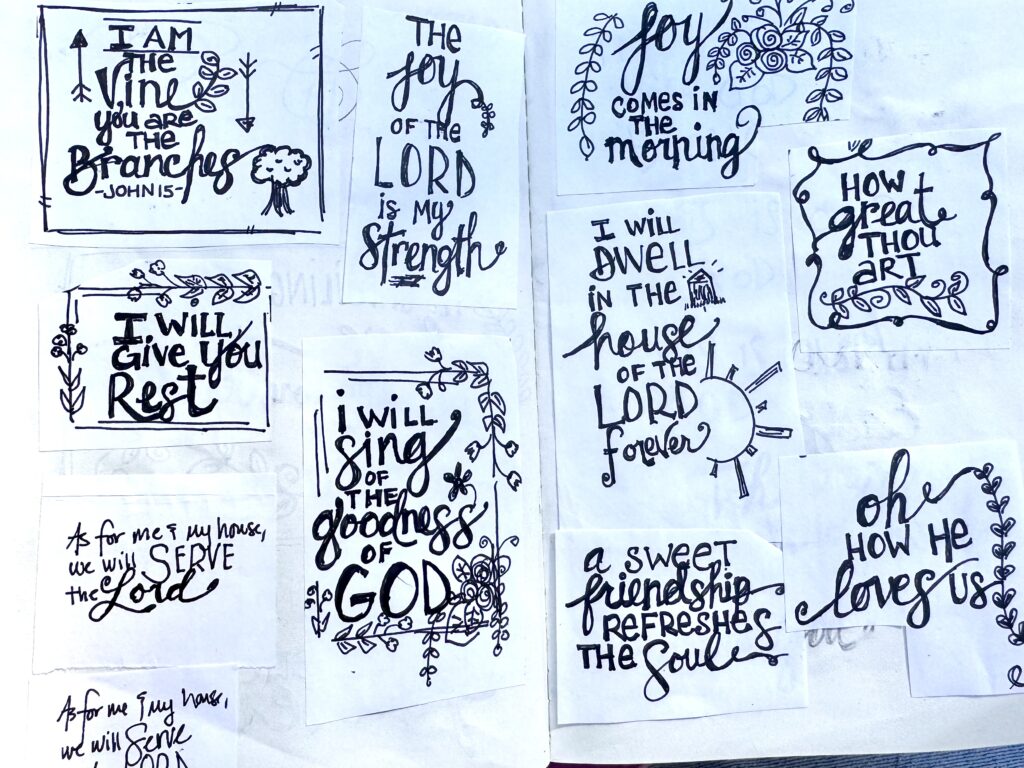
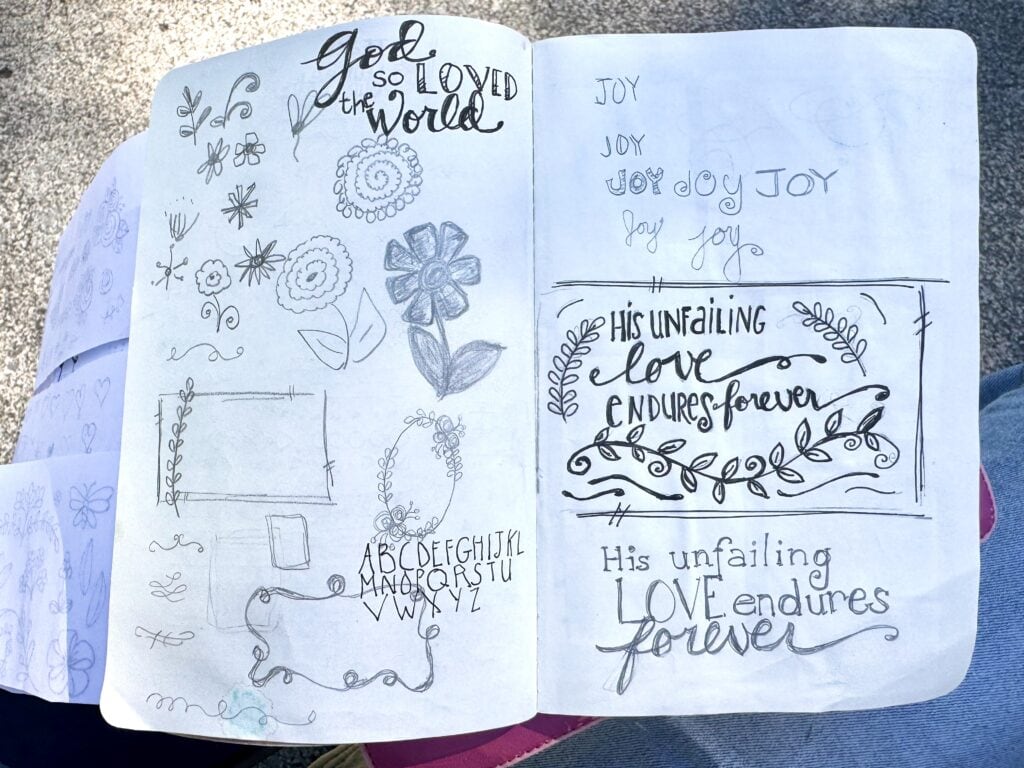
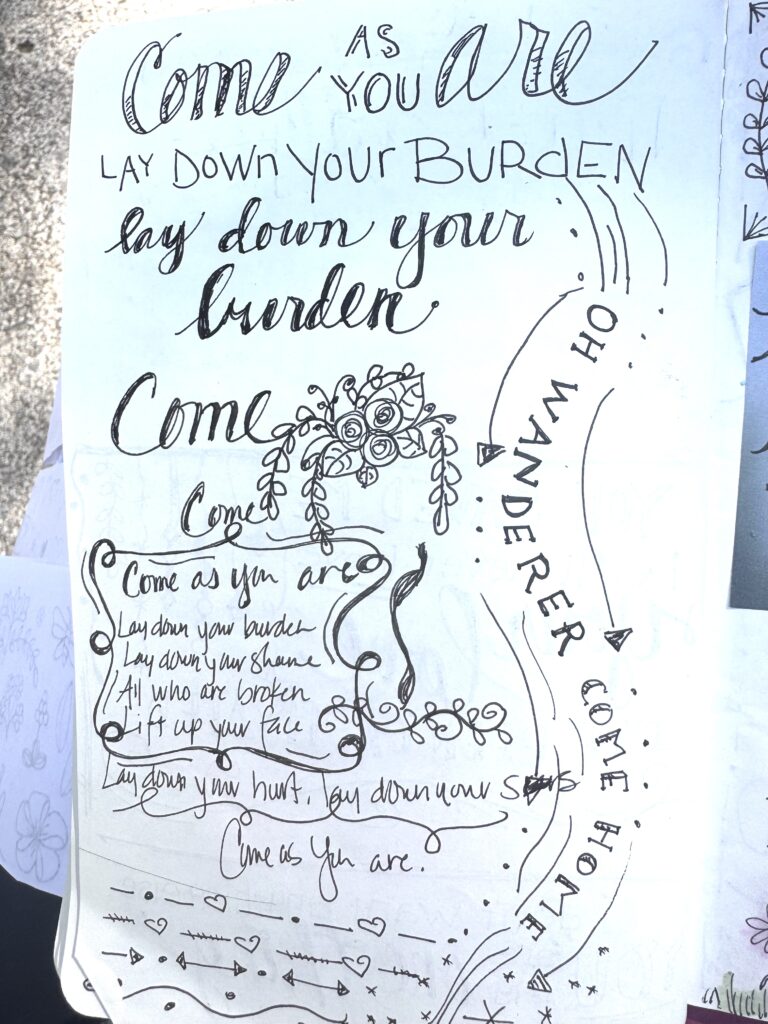
1| Make a cheat sheet in a doodle notebook.
See my notebook above! I learned just about every doodle I use from looking at someone else’s doodles! There’s no shame in copying them and practicing them. Below are some pages where I was just practicing and copying!
2| Use emojis and stick figures
Stick figures are SO easy to draw, and they actually communicate a lot! Emojis are great if you aren’t sure what kind of picture to use to symbolize a verse or certain word! Just look it up on your phone!
3| Use Google
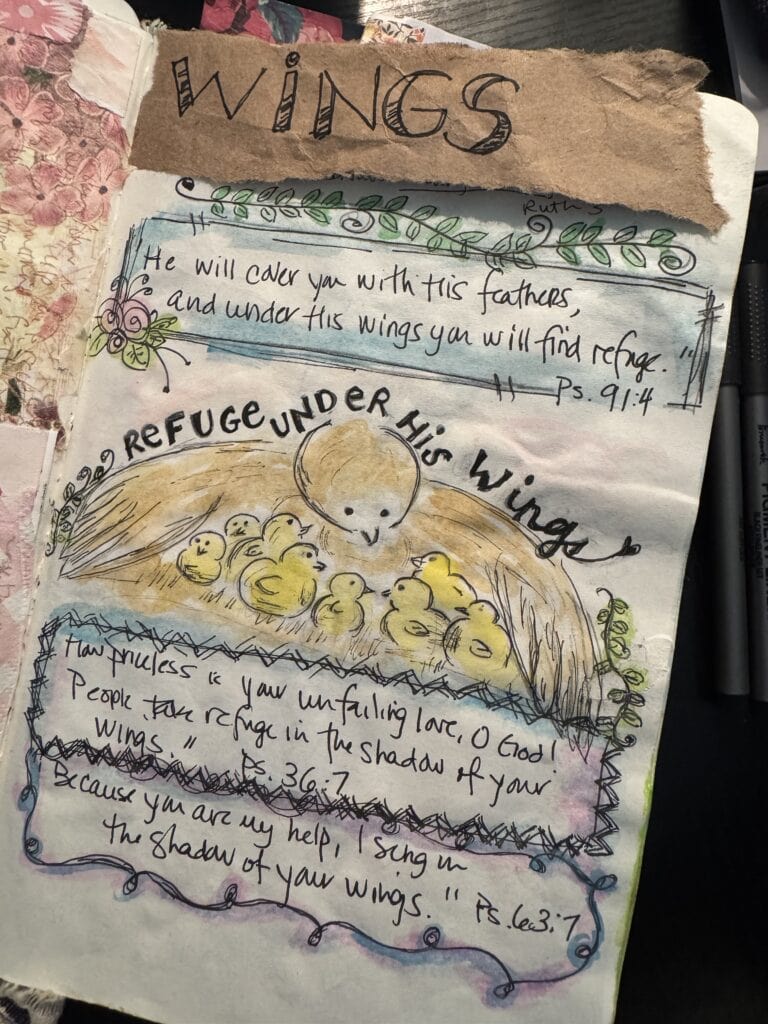
If there’s an image I want to include and can’t visualize it or draw it from scratch, I’ll google an example and copy that. There’s no shame in that! We all aren’t artists, and that’s OK! I did that with the bird drawing you see below.
4| Trace it
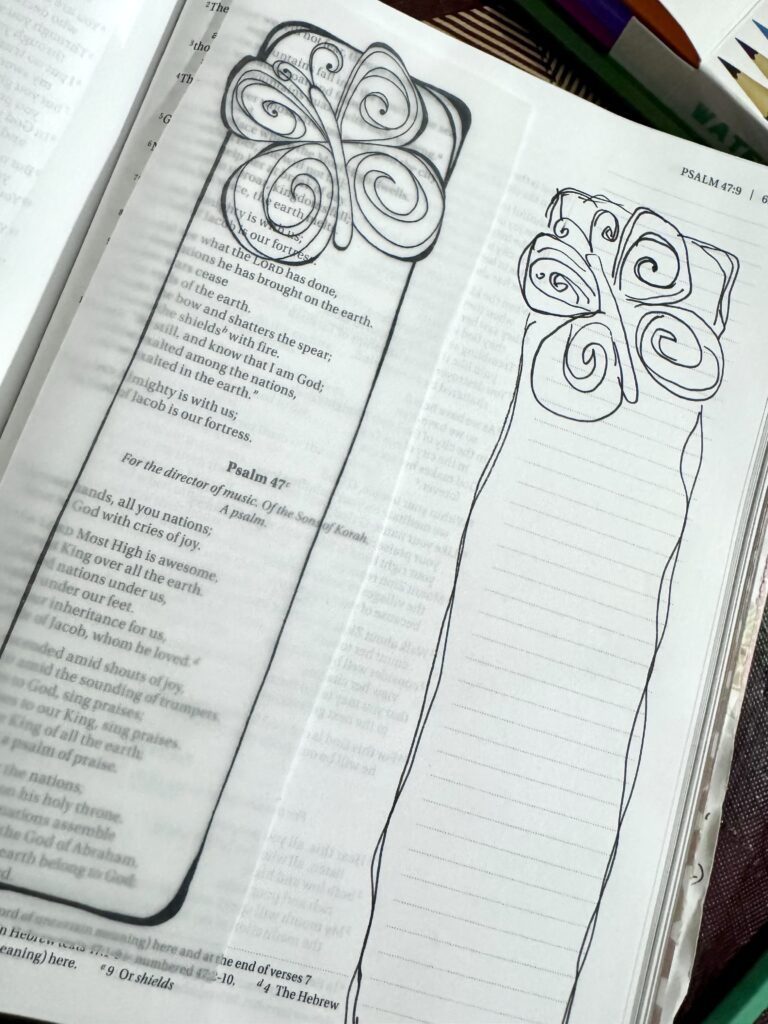
Lay thin paper over a doodle you like and trace it a few times. Your hand learns the shape, muscle memory builds, and soon you’ll draw it on your own.
Or, you can trace it right in your Bible. The pages are thin enough that you can get the basic gist of the image.
5| Practice in pencil first
Draw a doodle in pencil first, then erase after you add the ink! After a while, you might feel confident enough to skip that part! If it’s a small or simple doodle, I go straight to ink. But if it’s something bigger, I’ll use pencil first – or maybe even do a practice run on a separate piece of paper.
6| Lean on borders, boxes, outlines, and dividers
These small embellishments do a lot of the heavy lifting for you! A simple box around a verse with a banner on top looks polished even if you never draw a single picture. A little vine on the side or under a verse or saying is enough!
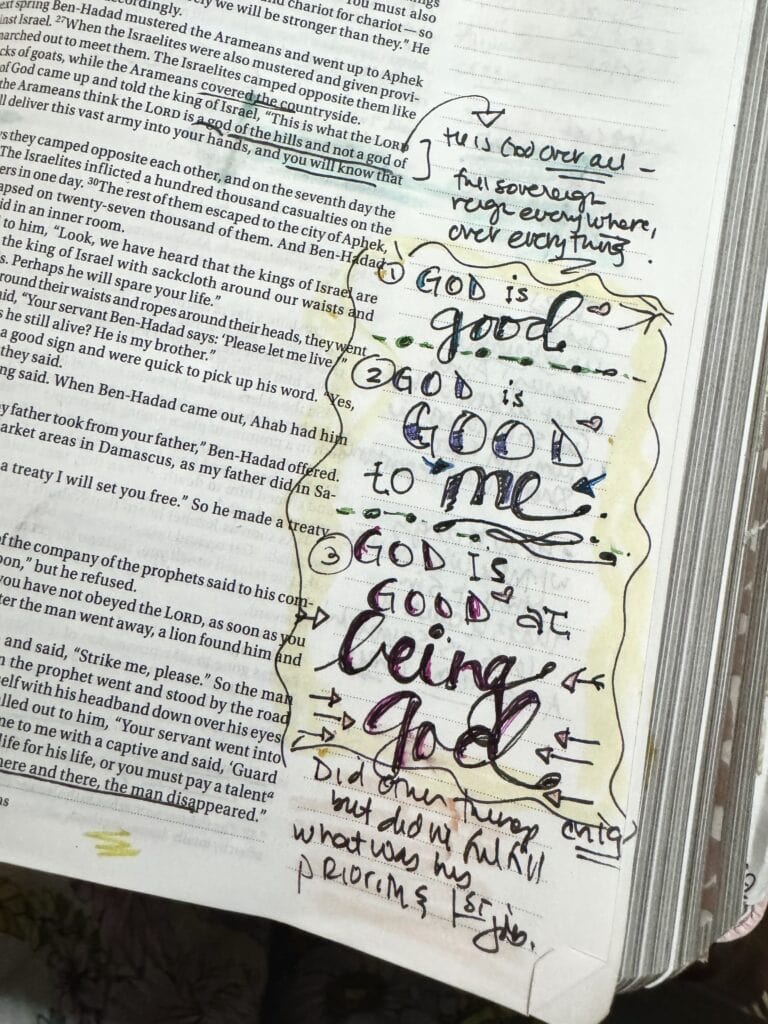
7| Add color
A little color makes even the simplest doodle look finished. Colored pencils are my go-to, as are translucent gel highlighters. They really do level things up and add the finishing touch. In the example below, I used a frame stamp, hand-lettering, and added color! Not much original artwork!
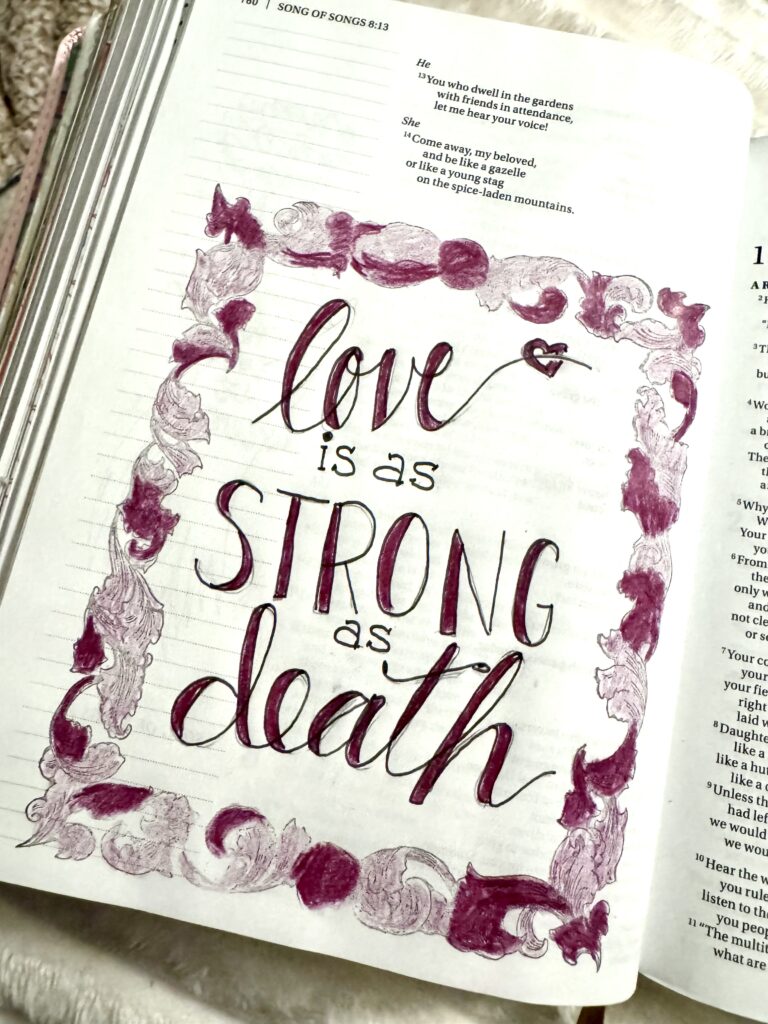
8| Imperfect is perfect
Wobbly lines are part of the charm. I make mistakes and have imperfect pictures all the time! These doodles are a record of your time with God, not a contest or an art show. Just enjoy the process.
Grab Your Free Bible Doodle Cheat Sheet Here!
Fill out the box below to get your 3-page Bible doodle cheat sheet! Feel free to cut it up in sections and tape inside a doodle notebook. After a while, you won’t even need it!
More Bible Journaling Articles
Want more ideas? Check out the rest of my Bible journaling series:
Bible Journaling Aesthetic: 7 Ways to Style Your Bible and Notebook
15 Bible Journal Notebook Ideas You’re Gonna Love
Bible Journaling for Beginners: How I Read, Study, and Journal the Bible
I hope you’ll love this new adventure you’re on with God and His Word. As a person who never really had art in my wheelhouse, this has been such a fun time to explore this creative aspect. And it’s so much better to do it all based on truth from God’s Word and engaging with Him personally in the process.
I hope you find the same will be true for you, too!
Thoughts? I’d love to hear them! Leave a comment below!
Pinterest user? If you found this post helpful, I’d be so grateful if you shared. Every pin supports this site in a major way! Thank you!


