
3 Easy Ways to Make a DIY Farmhouse Poster Hanger Frame
Poster Hanger Frames are such an easy and cheap DIY! They are stylish and trendy, and look amazing with farmhouse decor, all across the spectrum! Today I have 3 simple ways you can make them, including frames where you can swap out pictures, which is even more cost-effective! Lovely for your own home or to give as a gift, and you can frame all SORTS of things! Come see how!

This post contains affiliate links. See Disclosures for details.
Cheap, Easy Farmhouse DIY for the Win
If you like to follow the latest design trends, there’s a good chance you’ve seen these adorable poster hanger frames. By that, I mean the frames that are just a strip of wood on the top, another strip of wood on the bottom, with a string on top and your print in the middle.
It’s a very inexpensive way to hang prints, whether those are posters you buy yourself, posters you create, or smaller printable versions. Personally, I love them when you have a large wall with a lot of real estate to cover.
They aren’t super-expensive to buy, but honestly, they are so cheap and easy to make, you can have them done before the package from Amazon even arrives.
I’ve experimented with a few ways to make them, and all work really well, depending on what your end game is for them.
3 Types of DIY Poster Hanger Frames
Let’s go through each method and the variations for each. Two of them are made in a way that you can swap out the pictures, so they really are the most cost-effective. The last one is for a print you want to keep framed like that forever. The materials vary depending on your style and the size you want to make.
1| Magnetic Frame:
Uses 4 pieces of wood (two on top, two on bottom), with magnetic tape or magnetic stickers on the inside, and the print sandwiched between. You can swap out print in this frame.
Here’s one I made with yardsticks ($1 each at Home Depot) and magnetic tape for a large 24×36″ print:

And you can see how I switched out the print here:
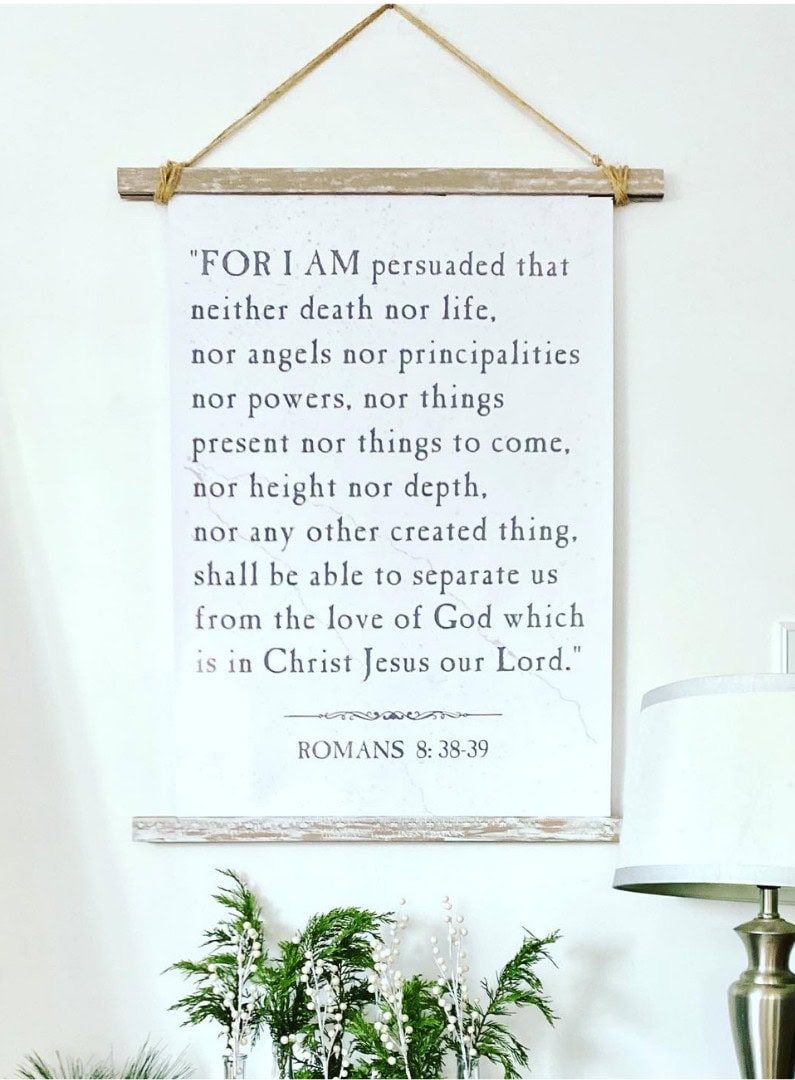
(Both prints are available in my Etsy shop! And if you’re interested, I used Butter Pecan Beige Chalk Paint to paint the yardsticks and then distressed with white chalk paint. I love how the numbers of the yardstick give it so much texture and character!)
2| Velcro Frame:
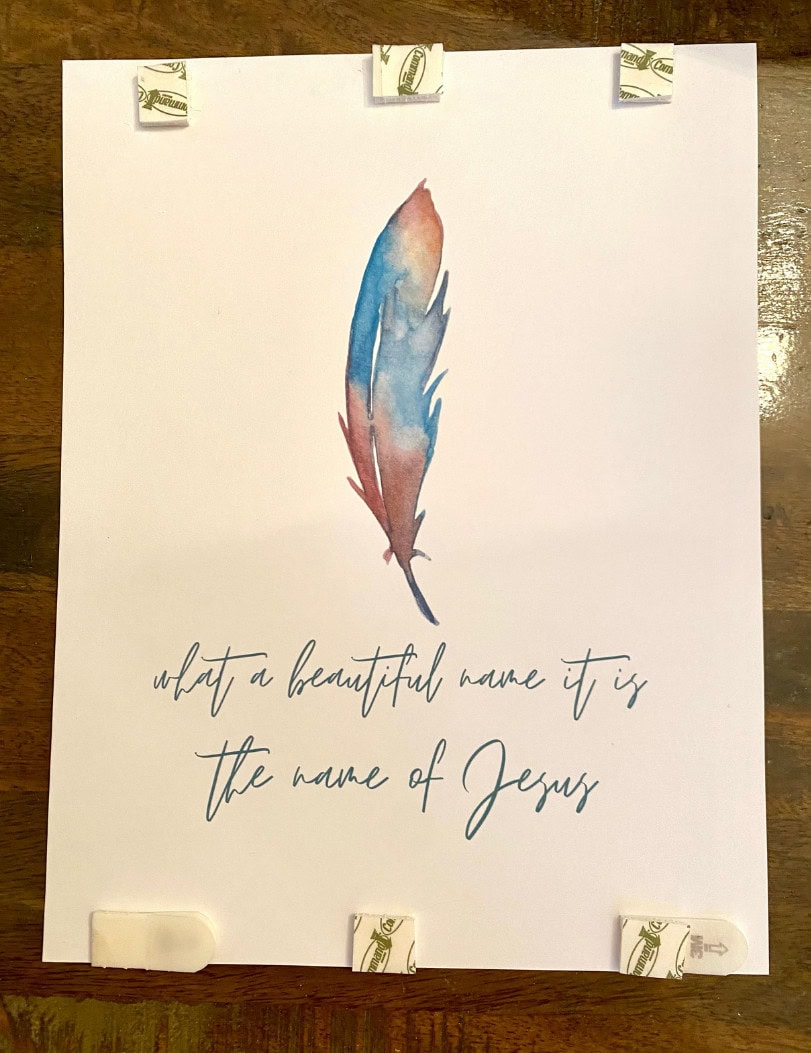
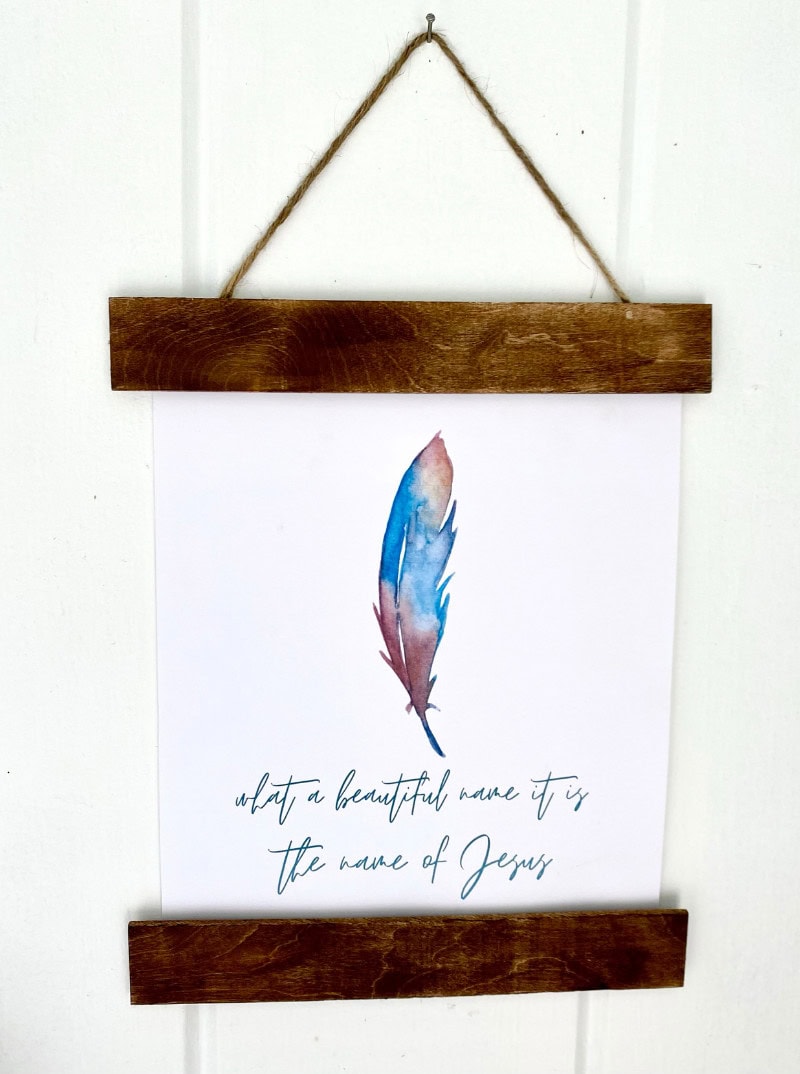
Uses two pieces of wood (one on top, one on bottom), with the printed attached to the frame using Command Picture Hanging Velcro Strips, Velcro Stickers, or Command Poster Hanging Strips. You also can swap out prints with this frame.
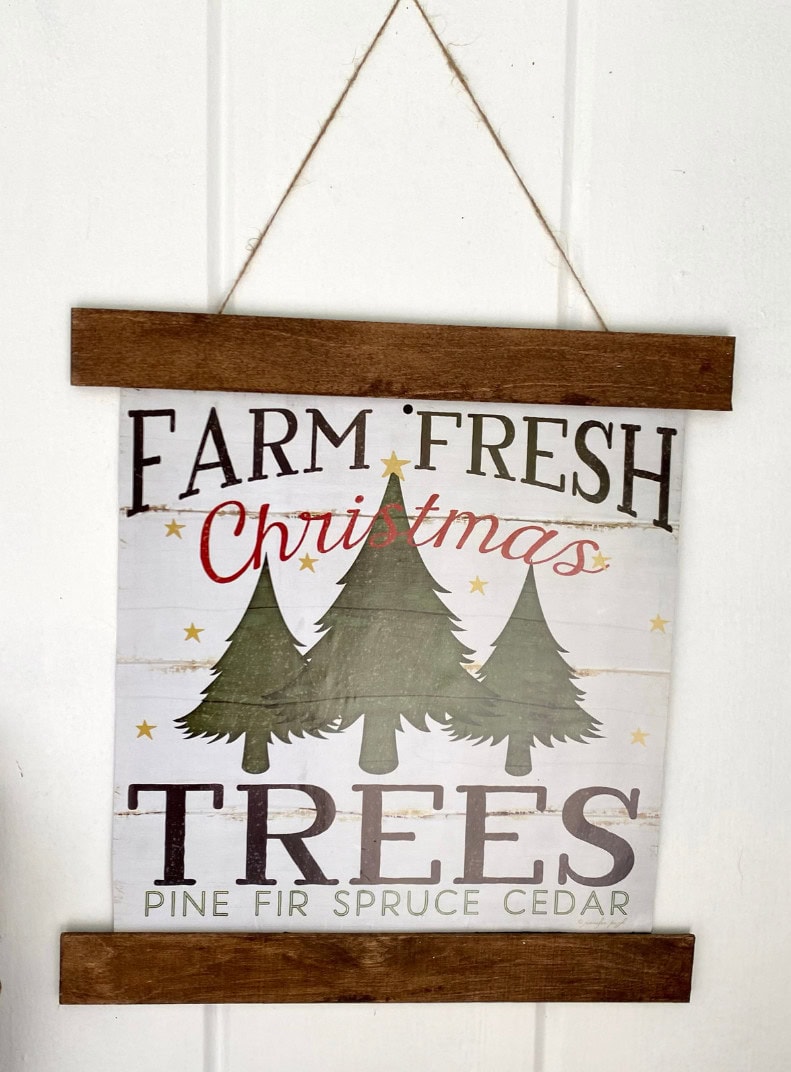
Here’s a Velcro Command Strip frame I made using a printable (which is in my Etsy shop, if you’re interested in more like it!) and 5-gallon paint stir sticks (pack of 3 at Walmart for about $1.50). This is printed from my computer on 8.5×11″ cardstock:
Here’s another variation using Command Poster Strips, which can be removed as well, just with a little more gentleness. This is a Dollar Tree calendar page attached to poster board with a glue stick.
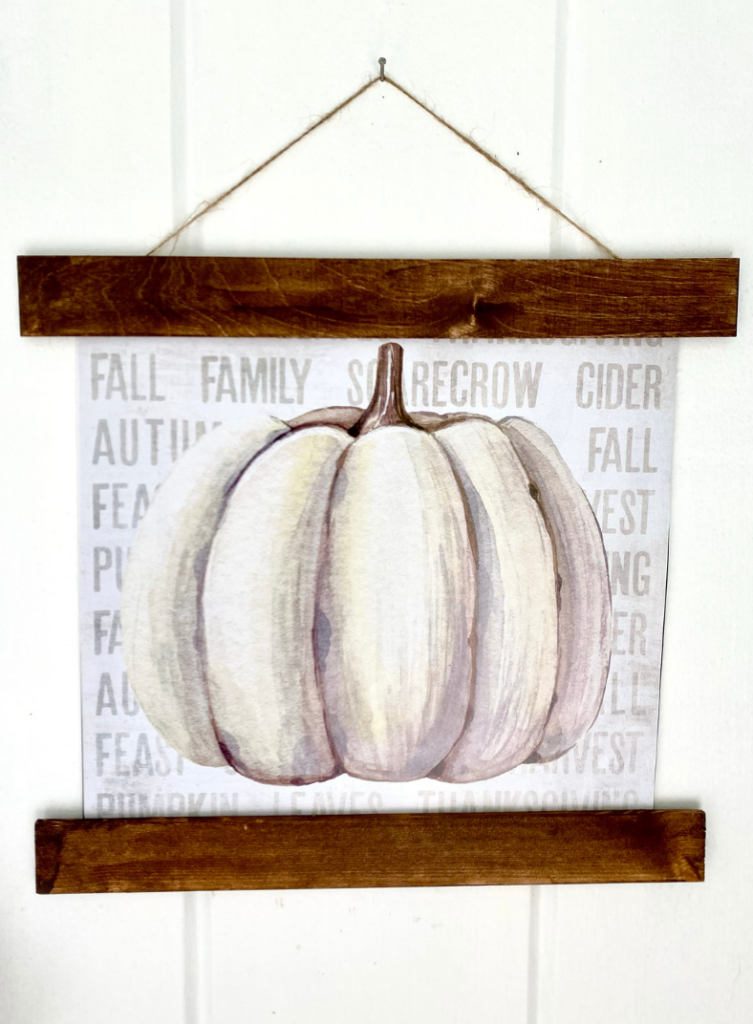
This is another version I made using a printable from my Etsy shop:
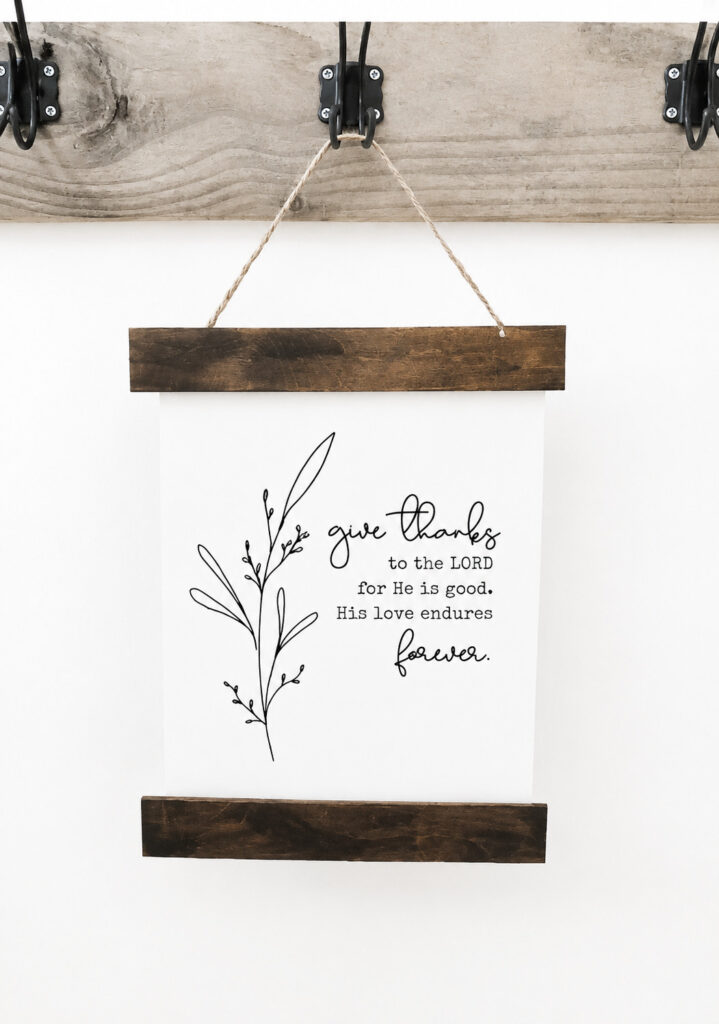
3| Staple/Glue Frame:
Uses two pieces of wood, and the print is stapled or glued to the wood for a permanent frame. The prints are permanently attached to the frame.
Here’s another Dollar Tree calendar page, glued on to poster board with a glue stick, and then stapled to the frame:
What Do I Need to Make a Poster Hanger Frame
No matter which method you use, you’re going to need 2-4 pieces of thin, narrow, flat, wood of the same length. You’re also going to need a method to attach the print to the frame (velcro stickers, staples, magnets, etc.), and a string to hang from the top.
For the wood, you can use:
Flat trim molding
Half round molding
Yard Sticks
5 Gallon Paint Stirrers
The type of wood you use all just depends on the look you’re going for. I’ve used yardsticks and then painted/distressed them for a more rustic, textured look (like the very first picture).
I’ve also used trimmed-down 5-gallon paint stirrers and stained them for a more polished, modern farmhouse look, which you can see in the other samples. You can also paint them in different colors as well.
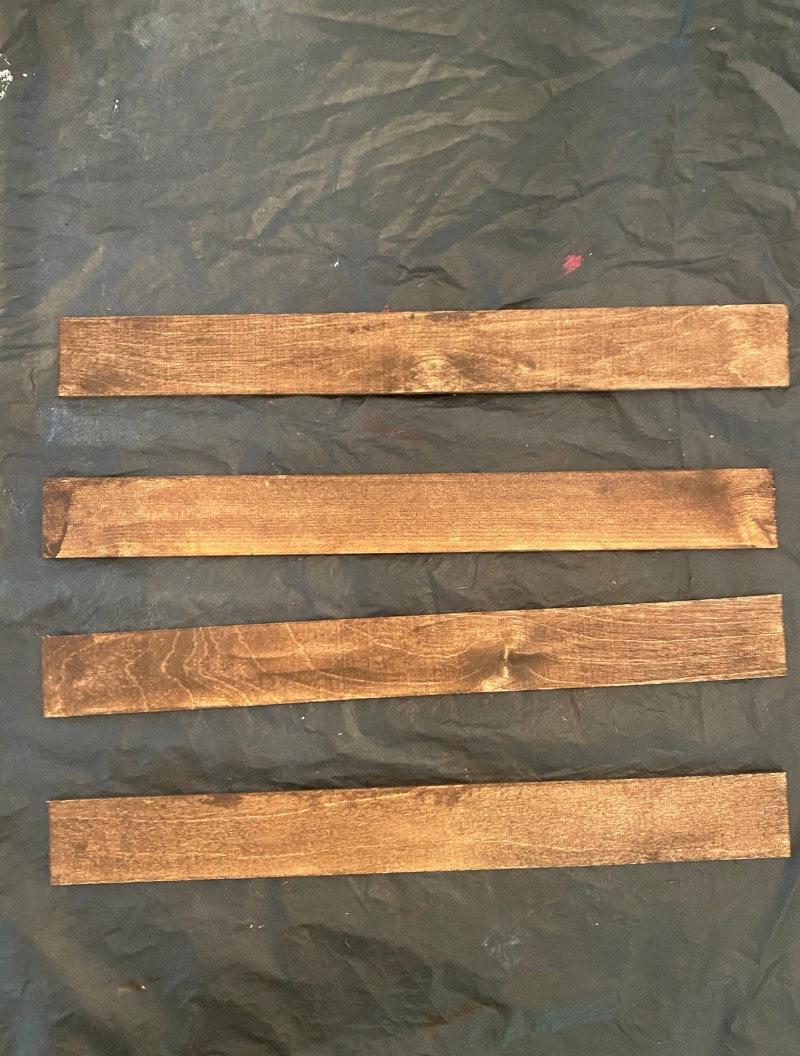
Either way, you’ll probably want to paint or stain the wood pieces, unless you like the natural look.
What Size Should I Make My Frame?
You’ll want to adjust the length of the wood based on the size of your print. I typically like there to be about an extra 1/2″ on each side of the print, for a smaller print like an 8×10″.
For a larger poster size print (24×36″), I like about an inch or so on each side. Totally your preference. You can even keep it the exact same length as your print if you want. So, for an 8×10″ print, I’ll cut the wood down to about 9″, leaving a 1/2″ overhang on each side.
How Do I Decide Which Frame to Make?
Your main concerns when choosing and creating a frame are:
Do I want a permanent frame or one where I can swap out prints?
Will it support my print without tearing?
For prints you can swap out, use choice 1 or 2. A magnetic frame is the safest choice to protect your print and ensure it doesn’t tear, especially for larger prints. You definitely can swap prints for method 2 – you just need to be a little gentle, and the Velcro stickers may need some extra reinforcing with glue.
For smaller prints, 8×10″, 11×14″, etc. any method should work fine; just be sure the paper your print is on is thick enough.
**Note: I haven’t tried every method with every size print.
The ones shown above are the ones I’ve done. For large, yardstick frames, I’d recommend a magnet frame, as I’m certain it can support the weight. A staple/glue frame should work with a yardstick frame if it’s very secure, but I haven’t tested it out, as I like to switch out my prints.
Any method should work for smaller prints.
What Kinds of Prints Can I Put In This Frame?
Basically, you really can hang any type of print in a frame like this: photos, posters, printables, even calendar pages. However, as a general rule, avoid using printer paper or a very thin calendar.
Paper should be at least as thick as cardstock; if not, if you glue it to poster board first with a glue stick (a glue stick leaves the least wrinkles and is easiest to smooth!), you should be fine.
Super Easy DIY Poster Hanger Frames (3 Ways)
OK, let’s look at the specific instructions for each – or just scroll to the type you want to make!
1| Magnetic DIY Poster Hanger Frame
This is the first kind of hanger frame I made, and I still use it for my larger, poster-size prints. This is a good choice for a weightier frame and print.
Magnetic DIY Hanger Frame
Materials
- 4 Pieces of thin wood, the same size (yard sticks, trim, half round trip, 5 gallon paint stirrers, etc).
- Magnetic Squares or Magnetic Tape
- E6000 Glue
- Jute String (or rope, twin, leather, etc.)
- Paint/Stain of your choice
- Saw
Tools
Instructions
- Decide on the length of your frame and trim the wood pieces down, extending anywhere from 1/2" to 2 inches on each side of your print, depending on your taste. If you don't have a saw, purchase your materials at Home Depot and ask them to trim it for you.
- Stain or paint the wood to the color of your choice. Allow to dry.
- Pair up your top wood pieces and stick magnets on one side of the wood. You can use several squares, long strips, or run a piece of magnetic tape across the length of the wood. Longer and heavier wood/prints require more magnets. You may need to reinforce the magnet backing with E6000 glue if they aren't adhering to the wood.
- Put the matching side of the magnet on top of the magnet that is glued down. Unstick the back of the top magnet strip and lay second piece of wood on top, making sure both pieces are aligned. Use extra E6000 glue if it needs more reinforcement. Allow to dry.
- Repeat steps 3 and 4 for the bottom pieces of wood.
- Cut string to the appropriate length for how long you want your print to hang. This will vary depending on the size of your print and how low you want your print to hang.
- Glue (or staple) both ends of the string to the back of the top portion of the hanger frame, the same distance from the outside edges on both sides with E6000 glue. Be sure to secure the string close to the top of the wood piece, so it will lay flat. Allow to dry.
- (You can also tie the string to make a large loop and wrap around the wood on both sides of the print. If you use this method, be sure to put the print in first, to make sure it all fits together appropriately. See the pictures above of the prints in the yardstick frame to see what this looks like! )
- Insert print inside the top and bottom portion of the frame.
- Hang where desired!
Notes
** If print is just computer paper or a picture from a paper calendar, etc., it's a good idea to glue design to poster board with a glue stick before inserting in the frame, This will make it a little more sturdy. A poster print should work just fine, though.
2| Velcro Poster Hanger Frame
This is a good option for interchangeable frames as well. You just want to be sure the Velcro/Command Poster Strips can support the weight of the frame and print. You may need a little extra dab of glue so the back of the Velcro sticks securely to both the wood and the print.
Velcro Hanger Frame
Materials
- 2 Pieces of thin wood, the same size (yard sticks, trim, half round trip, 5 gallon paint stirrers, etc).
- Velcro Stickers or Velcro Command Strips
- Jute String (or rope, twin, leather, etc.)
- E6000 Glue or Stapler
- Paint/Stain of your choice
- (Optional: Poster board and glue stick)
- Saw
Tools
Instructions
- Decide on the length of your frame and trim wood pieces down, extending anywhere from 1/2" to 2 inches on each side of your print, depending on your taste. If you don't have a saw, purchase your materials at Home Depot and ask them to trim it for you.
- Stain or paint the wood to the color of your choice. Allow to dry.
- Cut string to the appropriate length for how long you want your print to hang. This will vary depending on the size of your print and how low you want your print to hang.
- Glue with E6000 glue or staple both ends of the string to the back of the top portion of the hanger frame, the same distance from the outside edges on both sides. Be sure to staple or glue the string close to the top of the wood, so the frame will lay flat. Allow to dry if using glue.
- (You can also tie the string to make a large loop and wrap around the wood on both sides of the print. If you use this method, be sure to attach the print first, to make sure it all fits together appropriately. See pictures above of yardstick frames to see what this looks like!)
- Stick the Velcro stickers together and attach to the top and bottom of the print. The number of stickers will vary, depending on the length of your frame - anywhere from 3 - 6 stickers. Reinforce with a dab of glue if needed.
- Take off the backing of the stickers and place the wood on top, in the desired position. If the Velcro isn't adhering to either the print or the wood, reinforce the sticker back with a little glue.
- (If the frame covers the design, you can use a glue stick and glue the print to poster board. Then, trim the poster board with about an 1-2" margin on top and bottom, and stick Velcro stickers there.)
- Hang where desired!
Notes
** If print is just computer paper or a picture from a paper calendar, etc., it's a good idea to glue design to poster board with a glue stick before inserting in the frame, This will make it a little more sturdy. A poster print should work just fine, though.
*** You can also use Command Poster Strips, but those are a little more permanent. Technically, you should be able to remove the print, but you'll probably need additional poster strips if you reuse the frame. You'd rather the stickers come off wood rather than the print so the print doesn't rip. Either way, remove with care.
3| Staple/Glue Poster Hanger Frame
This is an easy, no-fuss frame that you don’t want to swap out. Just make it and keep forever!
Staple/Glue Hanger Frame
Materials
- 2 Pieces of thin wood, the same size (yard sticks, trim, half round trip, 5 gallon paint stirrers, etc).
- Jute String (or rope, twin, leather, etc.)
- E6000 Glue or Stapler
- Paint/Stain of your choice
- (Optional: Poster board and glue stick)
- Saw
Tools
Instructions
- Decide on the length of your frame and trim wood pieces down, extending anywhere from 1/2" to 2 inches on each side of your print, depending on your taste. If you don't have a saw, purchase your materials at Home Depot and ask them to trim it for you.
- Stain or paint the wood to the color of your choice. Allow to dry.
- Cut string to the appropriate length for how long you want your print to hang. This will vary depending on the size of your print and how low you want your print to hang.
- Glue with E6000 glue or staple both ends of the string to the back of the top portion of the hanger frame, the same distance from the outside edges on both sides. Be sure to staple or glue the string close to the top of the wood, so the frame will lay flat. Allow to dry.
- (You can also tie the string to make a large loop and wrap around the wood on both sides of the print. If you use this method, be sure to attach the print first, to make sure it all fits together appropriately. See pictures above of yardstick frames to see what this looks like.)
- Staple or glue print directly to the top and bottom wood pieces. The thickness of your print should be at least as thick as cardstock. (If it is a paper print, see note at bottom!) Be sure it's nice and secure!
- Also, if the frame covers the design, you can use a glue stick and glue the print to poster board and then trim the poster board with about a 1-2" margin on top and bottom. Then, attach the poster board to the frame, rather than the print, so the entire print is visible.
- Hang where desired!
Notes
** If print is just computer paper or a picture from a paper calendar, etc., it's a good idea to glue design to poster board with a glue stick before inserting in the frame, This will make it a little more sturdy. A poster print should work just fine, though. Just be sure it's nice and secure before you hang it.

More DIY Fun
If you’re looking for more DIY projects, I’ve got loads!
If you want to make frames for prints using repurposed canvas frames, take a look here! The post is for tier tray signs, but it’s the same method for any size!
If you like to make signs but don’t have a Cricut or Silhouette, here are easy ways to make farmhouse signs without a fancy machine!
I love styling these signs in coffee table baskets, which you can learn to make here in this easy DIY for a fraction of the cost!
Like Dollar Tree crafts? Here are 8 easy farmhouse crafts with Dollar Tree supplies you can make in one sitting!
And my most popular DIY post: 30 Ways to Decorate Using Old Windows!
If you make any of these projects, I’d love to see them! Please tag me on Instagram @100affections or leave a comment on Pinterest!
Thoughts? I’d love to hear them! Leave a comment below!




Hello Dear,
Thank you so much for this sharing this excellence content. You have published such a great article. This is the best post I have ever read about writing a perfect blog post. Thanks for sharing this valuable article.
Keep up the good work buddy.
Thank you very much!