Easy Bandana American Flag Art for DIY 4th of July Decor
If you love a quick easy patriotic craft, I’ve got you covered! This simple & vintage-inspired bandana American flag wall art is easy, cheap, and come together in less than an hour!
Budget-Friendly Americana Aesthetic Decor Coming Right Up
I didn’t always decorate for Memorial Day & the 4th of July. However, those 2 holidays are among my husband’s favorites. Therefore, it’s something I’ve taken up – and honestly, I love it!
It is the perfect transition from spring to summer, and you really can leave it up all summer long.
I did my first patriot porch this year and my mantel is next. And today’s craft is the perfect addition for the mantel.
Personally, bandanas are so nostalgic for me – I wore them in my hair all through my 20s (and still wear them!), and for me, it has that vintage Americana boho vibe that is perfect for a patriotic craft.
This flag wall art is budget-friendly, made with just a few materials—most of which you may already have on hand—and comes together very quickly.
Let’s get started!
Materials for Bandana American Flag

- 1 red bandana
- 1 white bandana
- 1 blue bandana
- Picture frame (any size you like!)
- Background cardboard (you can just use your frame backing if you’re not planning to reuse the frame at a later time)
- Mod Podge
- Scissors
- Ruler
- Neutral scrapbook paper and/or white paint (optional but adds charm!)
Instructions for 4th of July DIY Flag
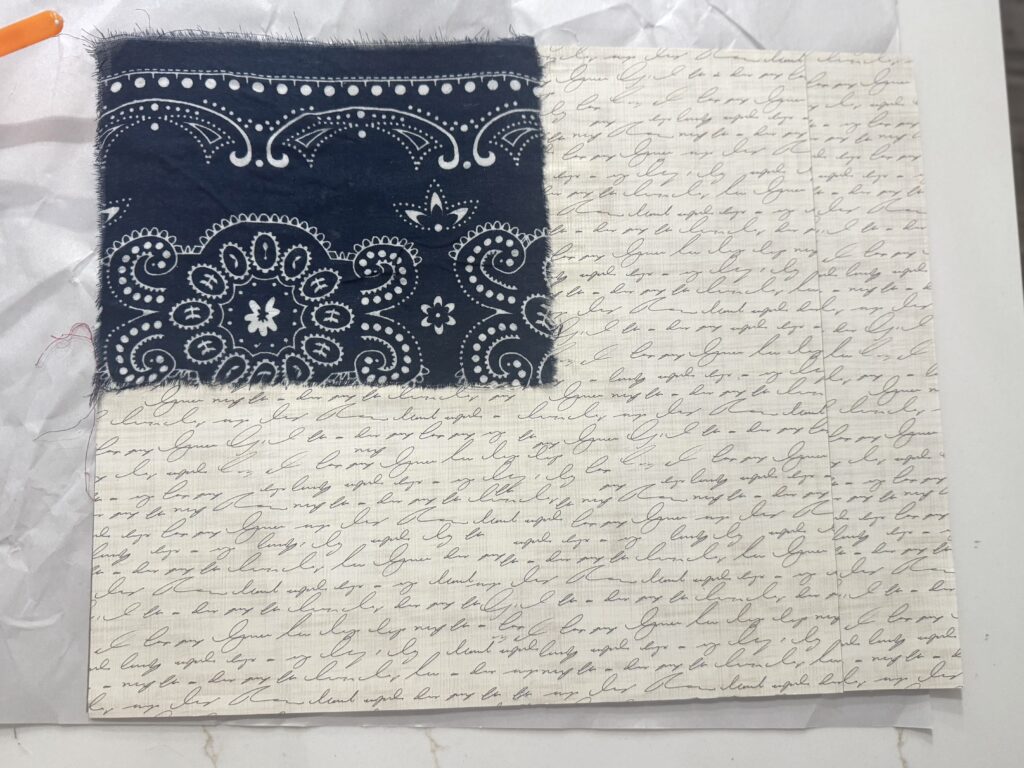
1| Prepare the Blue “Stars” Section
- Measure roughly ¼ of your frame’s size (½ the width and ½ the height) to create the blue rectangle for the upper left-hand corner of your flag. You can make it a little smaller, if you’d like.
- Make a small cut in the blue bandana where you measured.
- Lay the bandana flat, and place your ruler along the edge where you cut.
- Gently tear the bandana by gripping the fabric with your thumb and forefinger and pulling along the ruler’s edge. Hold the ruler down firmly while you do this. This gives it that lovely frayed, rustic edge. (See next step for pictures of this)
- Repeat to create all four sides of your blue rectangle.
2| Create the Red & White Stripes
- Using the same cut-and-tear method, create your stripes from the red and white bandanas.
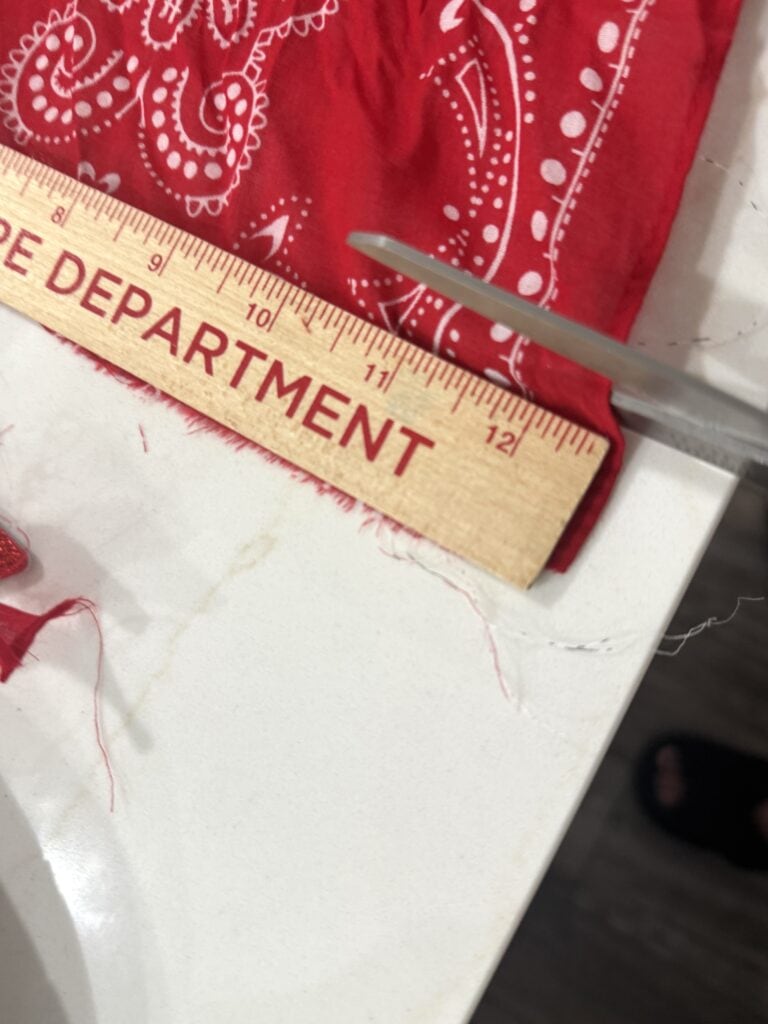

- I made my stripes about 1 inch wide, but the width can vary depending on your frame size.
- You’ll want enough stripes to alternate red and white across the rest of the flag area.
3| Prepare Your Background
- Decide how you want your background to look:
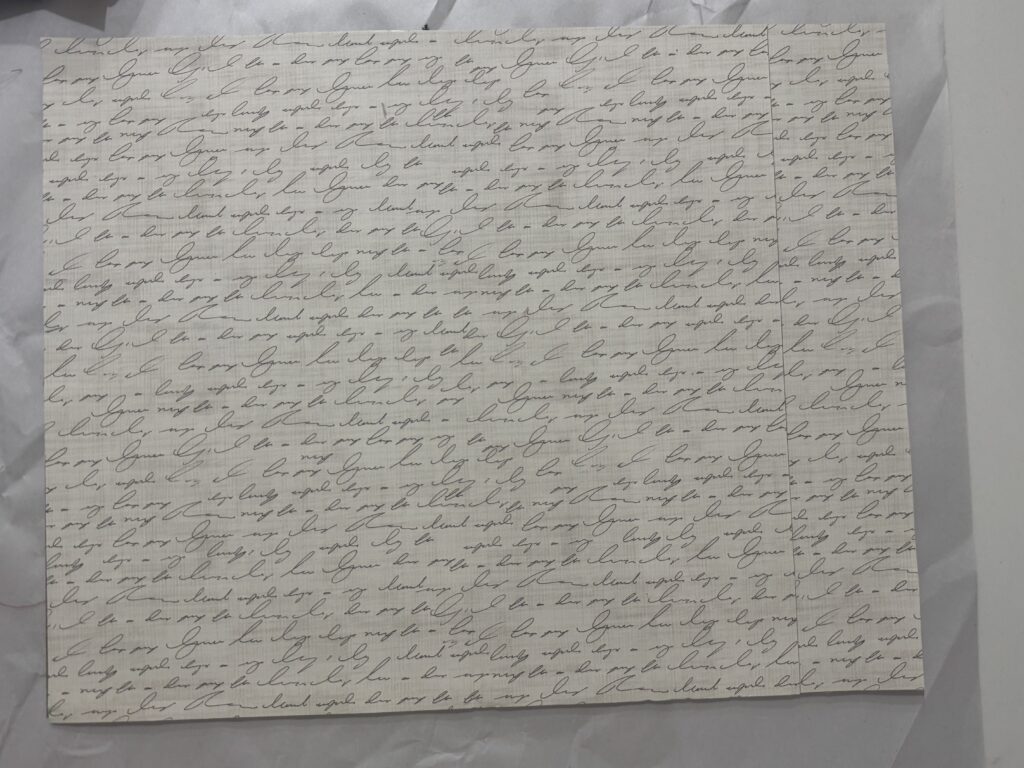
- Option 1: Add a layer of neutral scrapbook paper to your cardboard base for a vintage peek-through look (this is what I did!). This paper is from Hobby Lobby.
-
- Option 2: Paint the background white.
- Option 3: Place your stripes close together so no background shows.
- Whatever you choose, make sure your background is cut to fit snugly into your frame.
4| Layout Your Design
- Before gluing anything down, lay out your flag.
- Start with the blue rectangle in the top left corner, then alternate red and white stripes to the right and below.
- Play with the spacing—especially if you’re letting the background peek through—until it feels just right.
5| Attach with Mod Podge
- Working one section at a time, starting with your blue corner, apply Mod Podge to a small area of your cardboard background.
- Press down the fabric carefully, smoothing out wrinkles and aligning the edges.
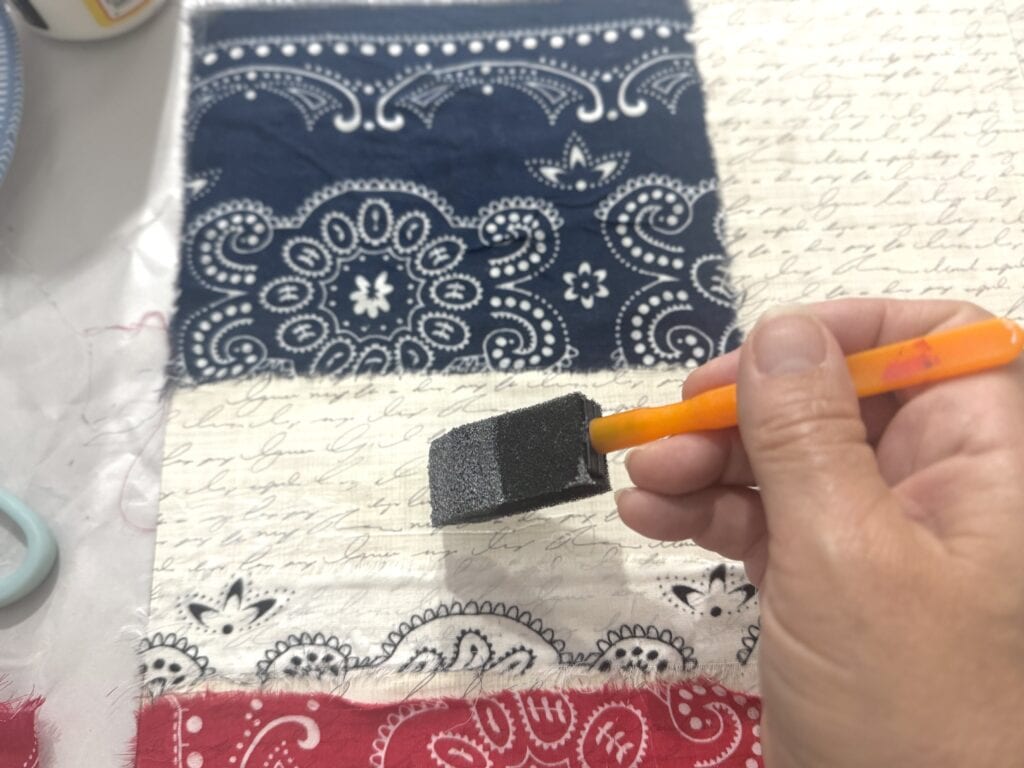
- Then add the stripes one by one. I didn’t press down the very edges of the stripes – the frayed part. I kind of wanted that to remain a little loose.
- You may need to trim a stripe or two so the top and bottom stripes match the widths of the middle ones.
- Trim any loose strings.
6| Frame & Display
- Allow Mod Podge to fully dry before framing.
- Once all your pieces are glued down and dry, pop the flag into your frame!

I used an 11×14″ thrifted frame I had on hand—no matting. However, in hindsight, I think a thick white mat would really elevate the look.
So don’t be surprised if I update this post soon with a second version. I’m already planning a thrift store run!
For now, though, this version is just what my mantel needed!

For succinct, printable instructions, you can get them below!

Easy Bandana American Flag Art for DIY 4th of July Decor
Materials
- 1 red bandana
- 1 white bandana
- 1 blue bandana
- Picture frame (Mine was 11x14 but use any size you like!)
- Background cardboard (you can just use your frame backing if you're not planning to reuse the frame at a later time)
- Mod Podge
- Scissors
- Ruler
- Neutral scrapbook paper and/or white paint (optional but adds charm!)
Instructions
1| Prepare the Blue “Stars” Section
Measure roughly ¼ of your frame’s size to create the upper left hand blue corner
Make a small cut in the blue bandana.
Lay the bandana flat, and place your ruler along the edge where you cut.
Gently tear the bandana by gripping the fabric with your thumb and forefinger and pulling along the ruler’s edge. Hold the ruler down firmly while you do this.
Repeat to create all four sides of your blue square.
2| Create the Red & White Stripes
Using the same cut-and-tear method, create your stripes from the red and white bandanas.
Trim any loose strings as needed
3| Prepare Your Background
Option 1: Glue a layer of neutral scrapbook paper to your cardboard base
Option 2: Paint the background white.
Option 3: Place your stripes close together so no background shows.
4| Layout Your Design
Start with the blue square in the top left corner, then alternate red and white stripes to the right and below.
5| Attach with Mod Podge
Working one section at a time, starting with your blue corner, apply Mod Podge to the cardboard background.
Press down the fabric carefully, smoothing out wrinkles and aligning the edges.
Then add the stripes one by one. Trim as needed. Let fully dry.
6| Place in Frame & Display!
More Patriotic Ideas
30 Easy & Patriotic 4th of July Crafts for Seniors
8 Cheap & Easy Ideas for a Patriotic Porch
DIY Patriotic Terra Cotta Pots Centerpiece, 3 Ways!
35+ EASY Patriotic DIY Home Decorations to Celebrate America
30+ Easy No Bake 4th of July Desserts (Red, White & Blue!)
Pin & Share for Later!
Enjoyed this post? Pin it to your 4th of July board or share it with a friend who loves vintage Americana crafts.
If you create this craft, I’d love to see it! Tag me on Instagram@100affections & I’ll share in my stories!
Happy crafting, and Happy Independence Day! We are so blessed by God to live in this country.
Other thoughts? I’d love to hear them! Leave a comment below!