
Easy Rustic Farmhouse DIY Dollar Tree Centerpiece – Any Season!
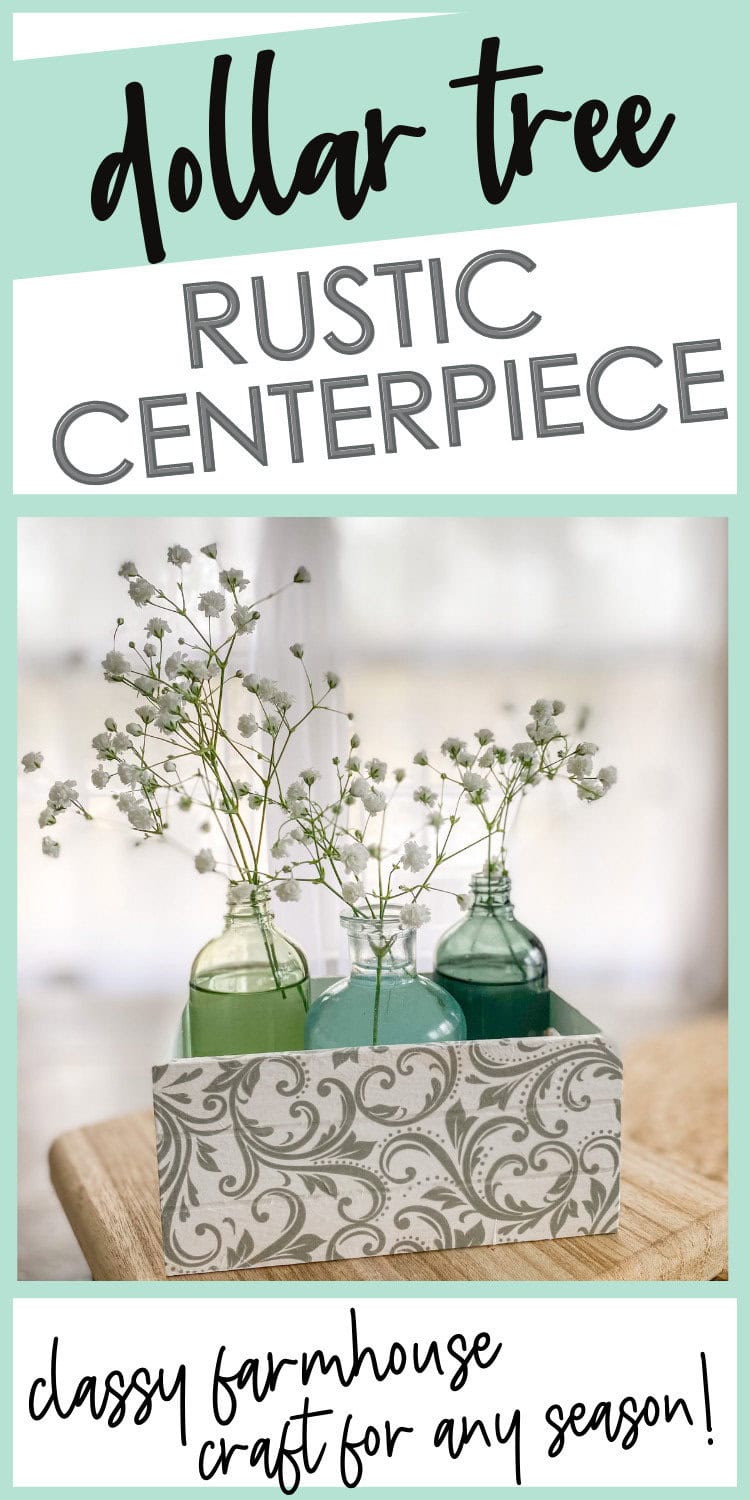
If you are looking for an easy & cheap DIY for spring (or really, this works for any season), keep reading! I created this spring centerpiece of primarily Dollar Tree materials – a wood mini crate and a wood tray, and I just love how they turned out! Especially perfect if you’re a fan of rustic farmhouse style! A fun decoupage craft adaptable for any season!
DIY Centerpiece with Dollar Tree Materials? Yes, Please!
I know Dollar Tree is all the rage these days for craft materials. And I’m a huge fan. A lot of crafters advertise these projects as ‘high end.’ Well, that’s debatable sometimes. But I truly love how this piece turned out, and there are so many ways to adapt it to every single season.
I love centerpieces that are inter-changeable and can be used with all kinds seasonal decor. This DIY definitely fits the bill. You only need a few supplies, and this can be made entirely of Dollar Tree materials, if you choose!
Let’s get started!
Materials for DIY Dollar Tree Centerpiece
This post contains affiliate links. See Disclosures for details.

You’ll only need a few things, but feel free to get your supplies at other places and customize!
Mini Wood Crates, Boxes or Trays
Dollar Tree has a variety of trays and boxes – choose the ones you like!
Tissue Paper or Napkins
Any design you like! I used tissue paper from Dollar Tree for the grey box and eucalyptus napkins from Target for the tray. I recommend a seamless pattern if possible. It’s more forgiving than an image that needs to be lined up perfectly.
Mod Podge
A crafter’s best friend, right? I prefer matte, but you can choose any sheen you like.
Craft Paint
I suggest white, but whatever color you want for the inside of your box or the color that might show through the tissue paper.
Paint Brushes
You’ll need at least 2 – 1 for paint and Mod Podge and a second one to smooth out the paper once applied (foam brush is preferred for this). This is a nice set for a great price, with a variety of brushes!
Craft Knife
You’ll use this Exacto knife (do people still use this term?!? 😂) to delicately trim the excess paper.
Scissors
Filler for Boxes
You can use these mini crate for anything you like -mason jars, small bud vases, etc. if you want to use it as a centerpiece, or you can use it for something more functional, such as a coaster holder, remote control box, makeup tray, etc.
I’ve linked up below the bottles and vases I used for my centerpiece!
Instructions for Mini Wood Crate Centerpiece Craft
1| Paint your box.
First, you’ll want to put a coat or two of paint on your box. Don’t worry too much about the sides of the box since that will be covered with tissue paper or napkins. It’s really just to have a neutral color in case you can see through. You’ll want to take a little extra care for painting the inside of the box (and even the bottom of it), since those are the spots that will be visible and not covered with paper.
Let dry.

2| Trim tissue paper or napkin down to a workable size.
Then, you’ll want to begin by cutting down the piece of tissue paper or napkin so it’s easier to work with. Cut it with a margin of about at least an inch taller than the sides of box. If using tissue paper, it should be able to wrap the entire way around the box without needing to piece it together.
3| Apply Mod Podge to one side of the box and neatly lay tissue paper down.
When you’re doing this, try to lay the paper down as straight and smooth as possible. With your finger, gentle smooth out bubbles. You can do this with a foam brush if you prefer, but I like to use my fingers because the paper is so delicate.

4| Continue the same steps until the paper is around the entire box.
Basically, you’ll do the same exact thing the entire way around the box, working with one side at a time.

5| Trim excess paper on top, bottom and in the side holes if applicable.
Once it is somewhat dry, you can trim the excess tissue paper with your Exacto-knife. For the side holes, poke your knife in and slowly make your way around the edges of the hole to slice out the middle paper. Go slowly and gently.

With your Exacto knife, repeat the process for the bottom edges. You can Mod Podge a neat line underneath the box if you choose, but for the cleanest look, try to cut the paper right at the bottom edge without tucking the paper underneath.
For the top edge, you can either Mod Podge the paper over the top and then slice off the excess. Or, you can slice it right at the top so there is a solid edge going around the top. I’ve done it both ways, and it really just is your preference.

6| Once dry, seal your entire box with 1-2 coats of Mod Podge.
Once you’ve cut your edges and your piece is dry, you’ll want to seal the entire box – inside, outside, and underneath – with Mod Podge for a uniform look and so the whole piece is protected.
7| Add filler as desired.
Once that is dry, you can fill it with your favorite small mason jar, upcycled food jar (I use Oui Yogurt or pesto jars), bud vases or a mix of any kind of bottles you can wrangle, add your favorite flowers or faux stems, and place on the table!
You can even use these adorable mini bottles that are available at Dollar Tree, making this a true Dollar Tree craft!
This is a small centerpiece, so won’t necessarily take up your entire dining table, but I think it works beautifully for console or coffee tables or just a little nook that needs something pretty.
It would even work wonderfully for a rustic wedding or other banquet event because the piece is low so guests can easily speak to each other over it.

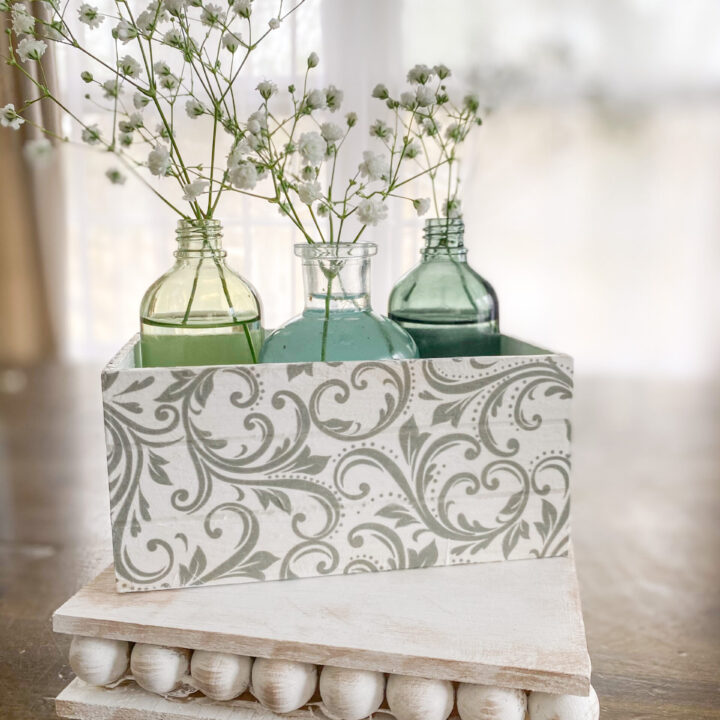
Here’s another one I created using eucalyptus napkins and a small tray from Dollar Tree.

You can see both of these versions side by side in the picture below.

Bud Vases and Glass Bottles
The bottles and bud vases I used in this picture are listed below, many of them repurposed colored glass spray bottles!
Glass Bud Vases (These come with cute apothecary labels and jute!)
Blue Glass Bud Vases from Hearth & Hand
Green Glass Spray Bottles – these are available for in-store purchase at Target, in the Bullseye’s Playground Area!
Repurposed Food Jars (I added a little blue food coloring to the water to give some of them a nice light blue tint!)
Dollar Tree Mini Bottles with Charms
Modifying this Centerpiece for Every Season
The picture I’ve shown is what I used for spring, but clearly, depending on what kind of tissue paper or napkins you use to decoupage, you can create one for any season: summer, fall, Christmas, Valentine’s Day, Easter – endless possibilities. And then, just fill the bottles with appropriate seasonal stems. It’s that easy.
And here’s an updated version for fall, as you can use this for any season, depending on what kind of tissue paper or napkins you use! And those mini bottles with the charms on them and the fall stems are from Dollar Tree also!


Large Centerpiece Idea
If you’d like to take this project a little further, there’s an easy way to do that! You can glue several of the boxes together with wood or hot glue, clamp together to let them dry, and then decoupage the entire box. Now you have a long centerpiece that makes a little more of a statement!
Succinct or Printable Instructions
For succinct or printable instruction, you can grab the card below or watch a short video with the directions (just 1 minute long!).
Rustic Farmhouse DIY Dollar Tree Centerpiece - Any Season!
Materials
- Wood Boxes or Trays from Dollar Tree
- Tissue Paper or Napkins
- Mod Podge
- Craft Paint
- Paint Brushes (2, at least 1 foam brush)
- Exacto-Knife
- Scissors
- Filler for Boxes
Instructions
1| Paint your box & let dry.
2| Trim tissue paper or napkin down to a workable size.
3| Apply Mod Podge to one side of the box and neatly lay tissue paper down. Smooth wrinkles or bubbles with foam brush or finger.
4| Continue the same steps until the paper is around the entire box.
5| Trim excess paper with Exacto-Knife on top, bottom and in the side holes if applicable.
6| Once dry, seal your entire box with 1-2 coats of Mod Podge.
7| Add decorative or functional filler as desired.
Dollar Tree and Other DIY Craft Ideas
If you enjoy cheap easy crafts, here are some more that I’ve put together from Dollar Tree and other inexpensive items:
Easy & Stylish DIY Modern Farmhouse Wooden Bead Tray
8 Easy Dollar Tree Farmhouse DIY Projects (done in 1 sitting!)
DIY Dollar Tree Rope Basket {Gift Basket Idea, Too!}
Dollar Tree Farmhouse DIY Rope Heart Wreath
8 Super Easy Farmhouse Valentine DIY Projects from Dollar Tree
Rustic Embroidery Hoop Style Spring DIY Wreath ($5 to Make!)
2 Easy Ways to Make a Hat with HTV and a Mini Heat Press
If you try this project, I’d love to see it! Please tag me on Instagram @100affections or leave a comment on Pinterest!
Other thoughts? I’d love to hear them! Leave a comment below!


