DIY Dollar Tree Rope Basket {Gift Basket Idea, Too!}
Are you looking for a multi-purpose, easy, & cheap DIY? Try this rope basket made with Dollar Tree materials! It looks fabulous as modern farmhouse or boho home decor, and you can also use it for a gift basket! Keep reading to see how!
DIY Dollar Tree Rope Basket: A Project with a Ton of Uses
When I first came across these plastic buckets at Dollar Tree, I immediately knew they’d make great baskets. And as a somewhat new homeowner with a lot of places to fill, plus a mom of littles who had toys littered everywhere, making these baskets was a no-brainer.
I did my first ‘trial run’ using some fabric I had from Walmart, a grey and white mophead from Dollar Tree, and a bucket.
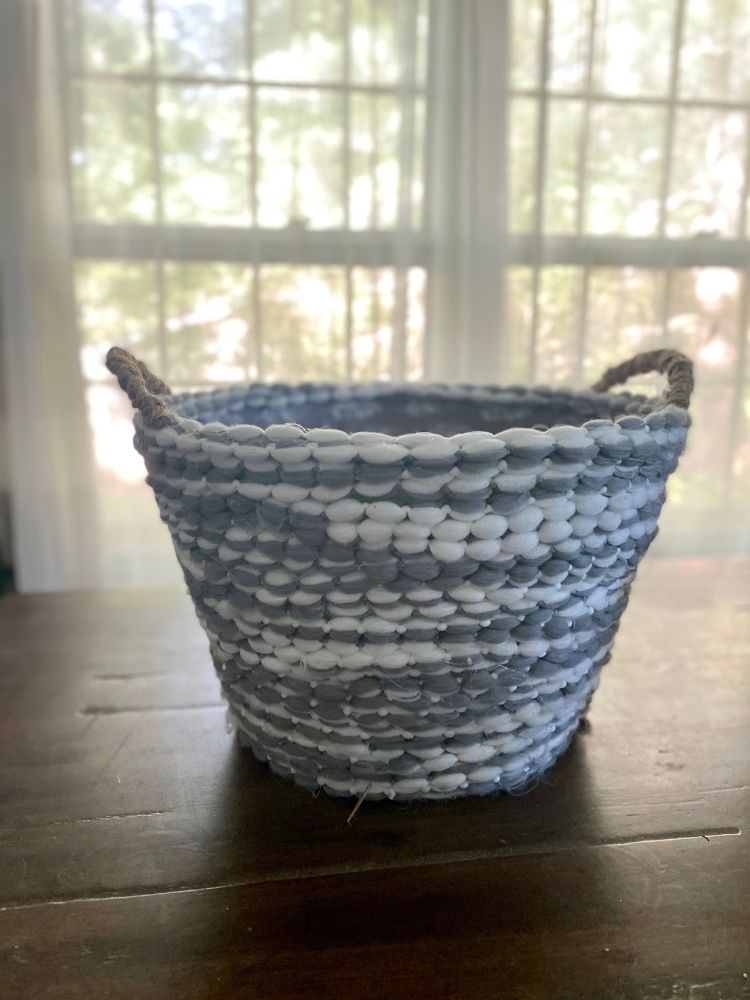
I love how it turned out, but I knew that for my fireplace room, I needed a little less gray and a little more tan.
So, I decided to try it with rope. I wanted to fancy it up just a little, so I added a little boho flair to it, and I really love how it came out. It’s a little more unique than just a plain rope basket, and I think it would also be amazing as a gift basket for a teenage girl – for Easter or a birthday, or even as a DIY gift for a friend or a mom on Mother’s Day.

The process is very similar, with a few caveats. I made a few rookie mistakes as I went through the process, so I’ll share them with you, so you don’t make the same ones!
Materials:
Here’s what you need. Some are optional, depending on how you want to customize it. If you want to make the grey/white one, you just need to buy 1 package of the grey & white mop head. You can get all of this from Dollar Tree:
1 plastic bucket
3 white nautical rope lengths
4-5 brown nautical rope lengths
26″ square fabric (you can use any scrap cloth or clothes. Dollar Tree has T-shirts, pillowcases, etc. that would work fine, too)
1 16” woven rug with tassel
Roll of jute string
***(You can also just buy 1 grey/white mop head if you want to make it like the first picture. It follows the same steps but is MUCH simpler)
Glue Gun and Glue Sticks
Masking Tape
Scissor

Instructions:
(For succinct instructions, you can scroll to the card at the end of the post. However, some tips and tricks are included in this lengthier section!)
1| If you are doing a two-tone basket with the middle row of tassels, you’ll need to do this step. If you aren’t planning to include this and you only want a two-tone rope basket, you can skip it!
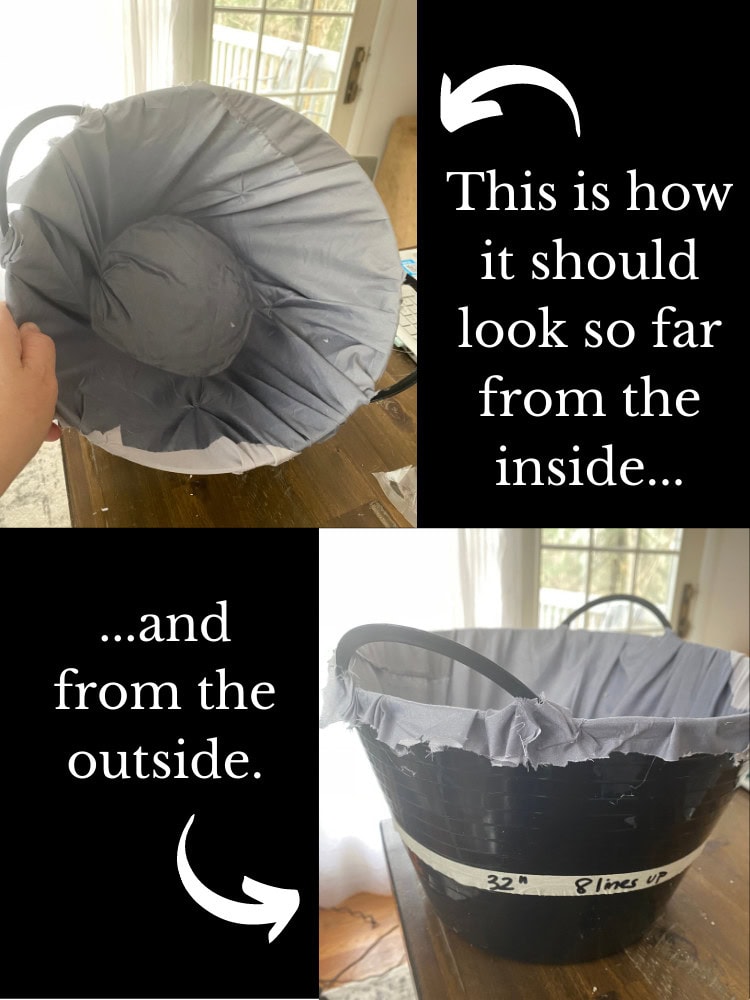
In order to use the edges of the woven rug, you need to measure around the bucket and find out where it is 32″ around. The rug is 16” wide, so using both ends of the rug to form the band, you’ll end up with 32” to use. For me, it was about 8 lines up on the bucket. You’ll want to mark it with masking tape, so you know where to stop your bottom layer of rope and where to place the middle layer of the woven rug.

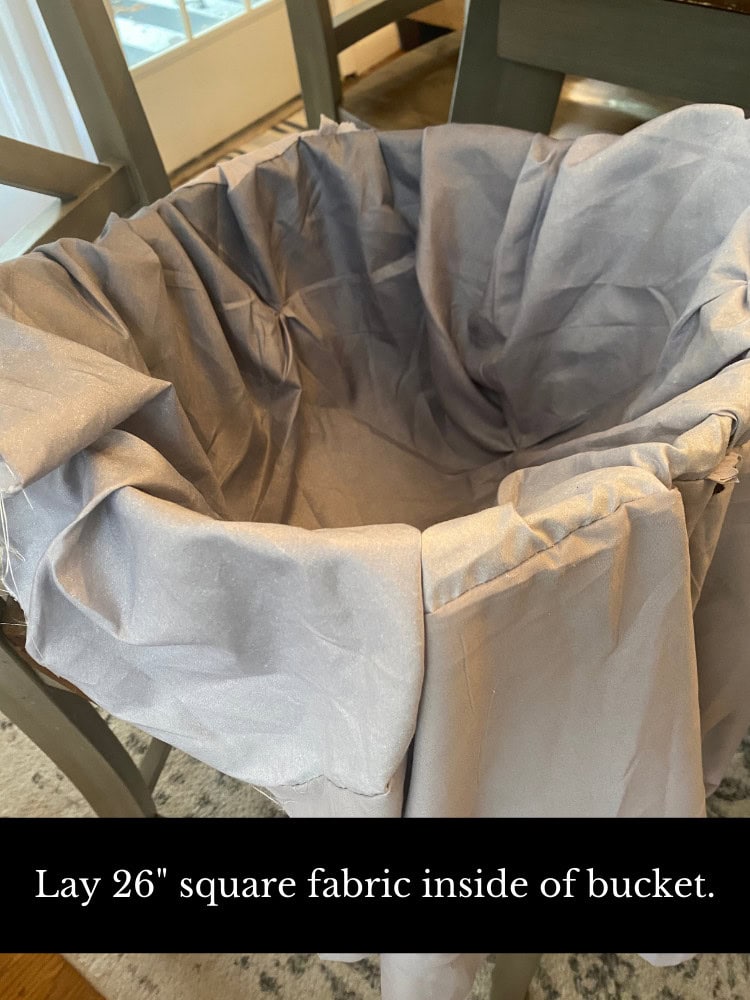
2| Cut a piece of fabric in a 26” square.
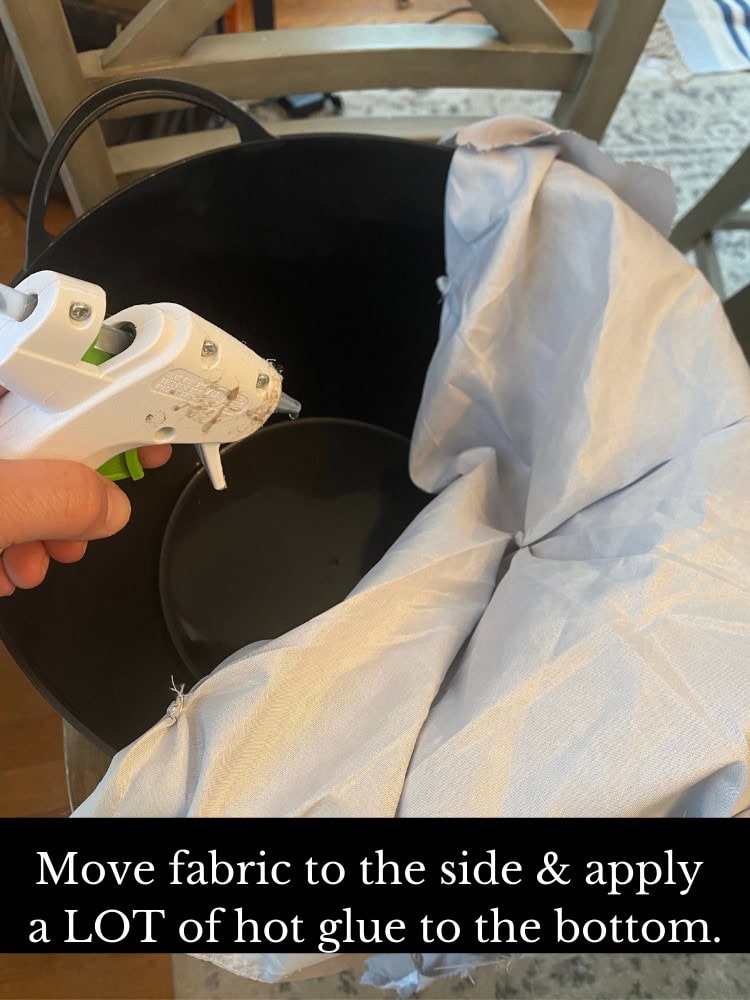
3| Lay your fabric so it is centered in your bucket. Move the fabric to the side and put hot glue on the bottom. Then, quickly and liberally, apply glue the fabric to the bottom and place the fabric down. Because you’re gluing to plastic, you need to set it down quickly. You might get a few more seconds if you put the glue on the bottom of the fabric, but I found that a little unwieldy to do.

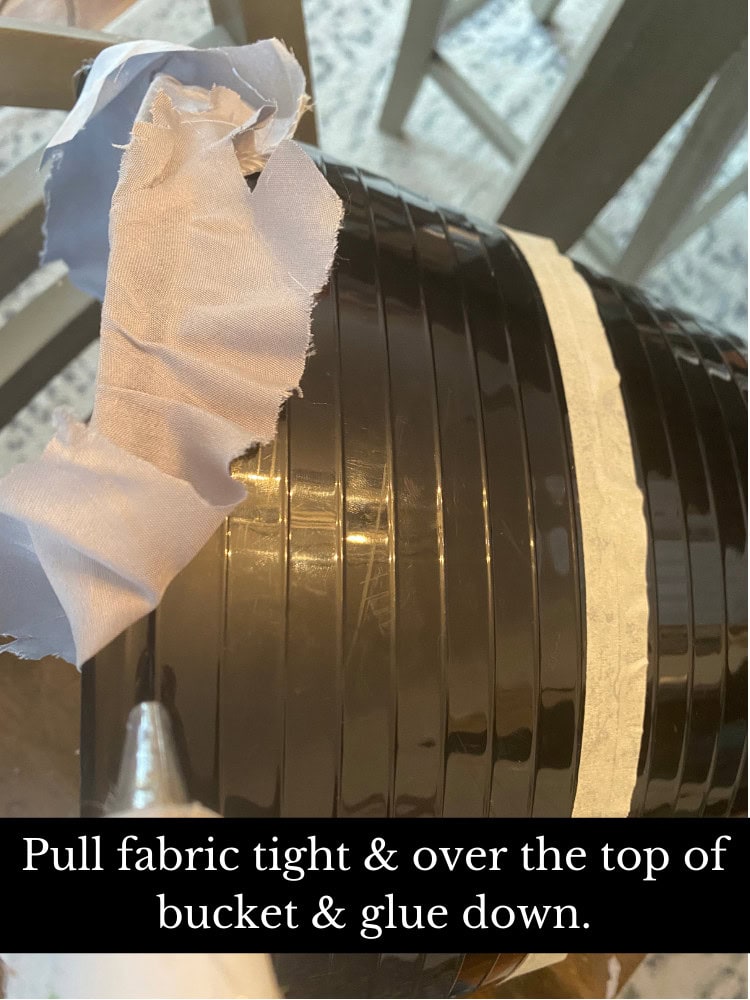
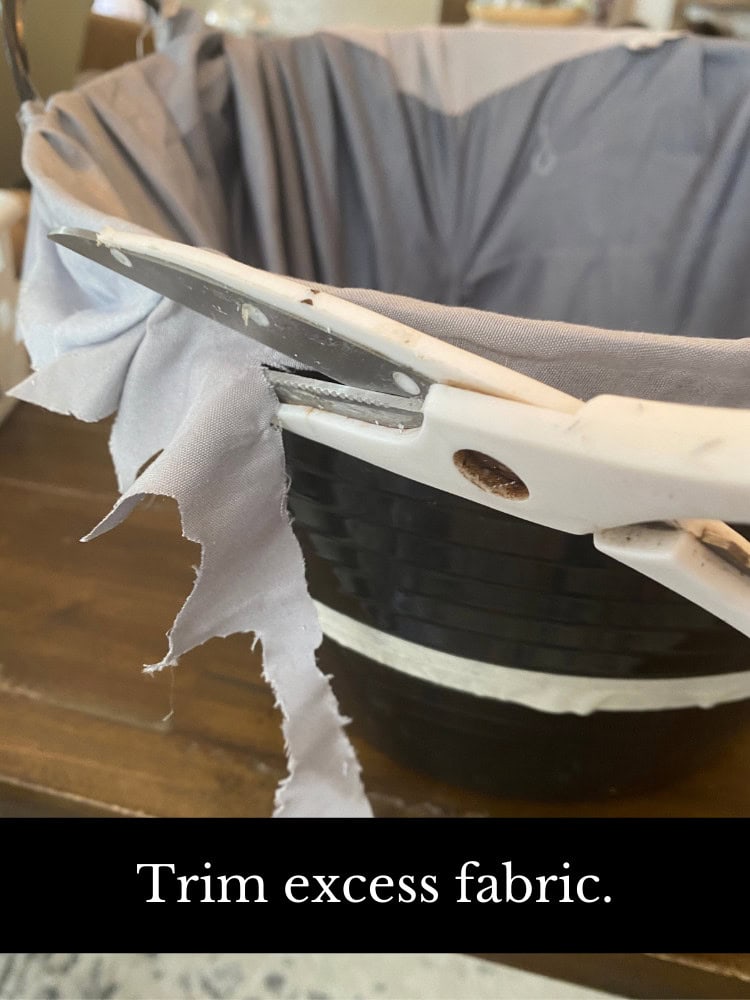
4| Once your bottom is glued, pull the fabric tightly over the top edge of the bucket and glue to the outside. You may need to make small cuts for the fabric to go around the handles. Trim the fabric when finished.
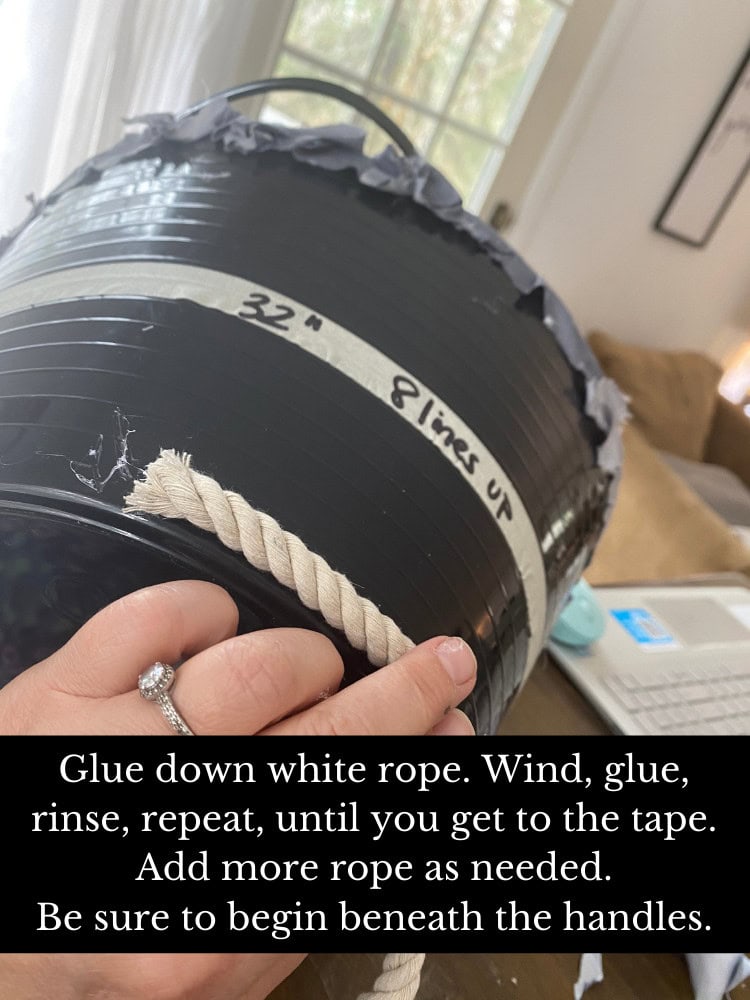
5| Take white nautical rope and glue the end to the side of the bucket, below the handles (so you won’t see the starting seam from the front of the bucket). Begin winding around the bucket and glue as you go. Keep going until you reach the masking tape. Add additional rope as you run out. Once you hit the masking tape, that is where you should begin your accent rug band. Cut your white rope there. Try to cut underneath a handle and not in the center.
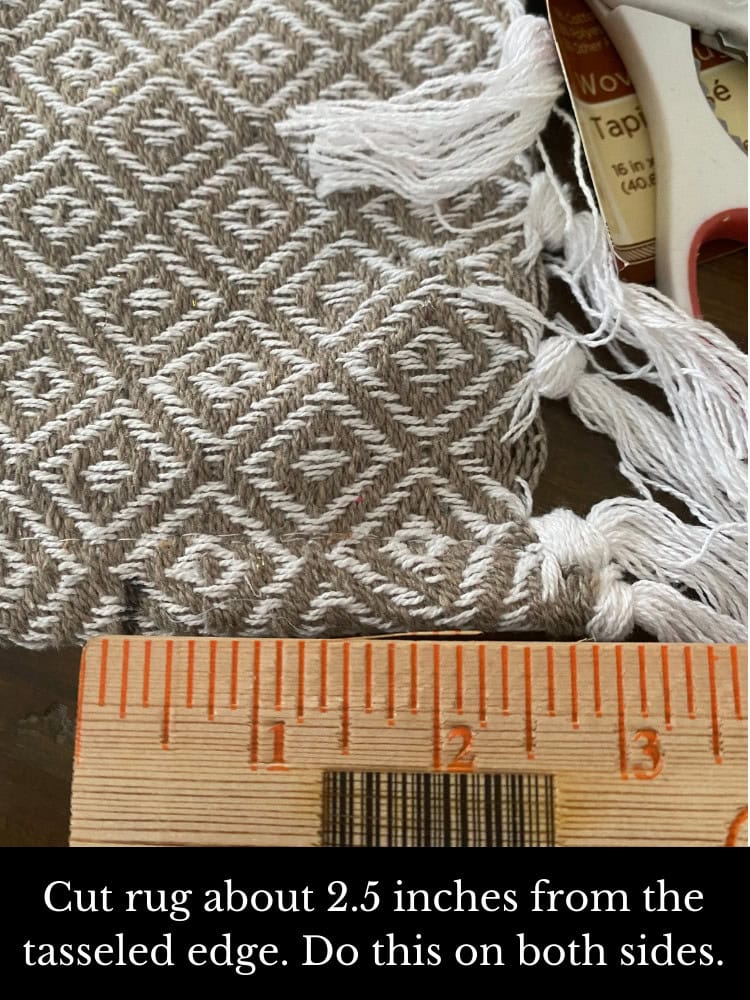
6| Then, take your accent rug and measure about 2” from the tassel edge. Cut both ends of the rug so you have 2 bands, 16” each. Fold over the top edge and glue, so you have a clean edge.
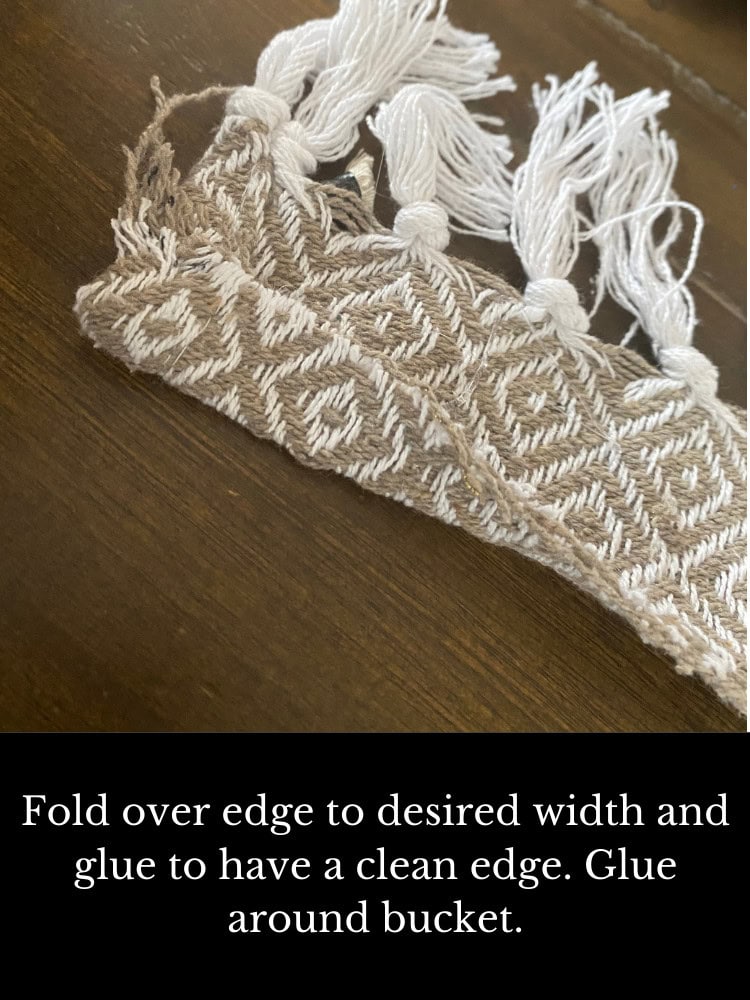
7| Measure both bands around the bucket before you start gluing, to ensure your bands will fit all the way around the bucket. Take your first band and glue it to the bucket. Be sure to begin below the handle so the seam won’t be visible from the front. Glue your second band, ensuring that edges of each touch each other or are as close as possible. The rug should have a little give to it if you need to pull it some.
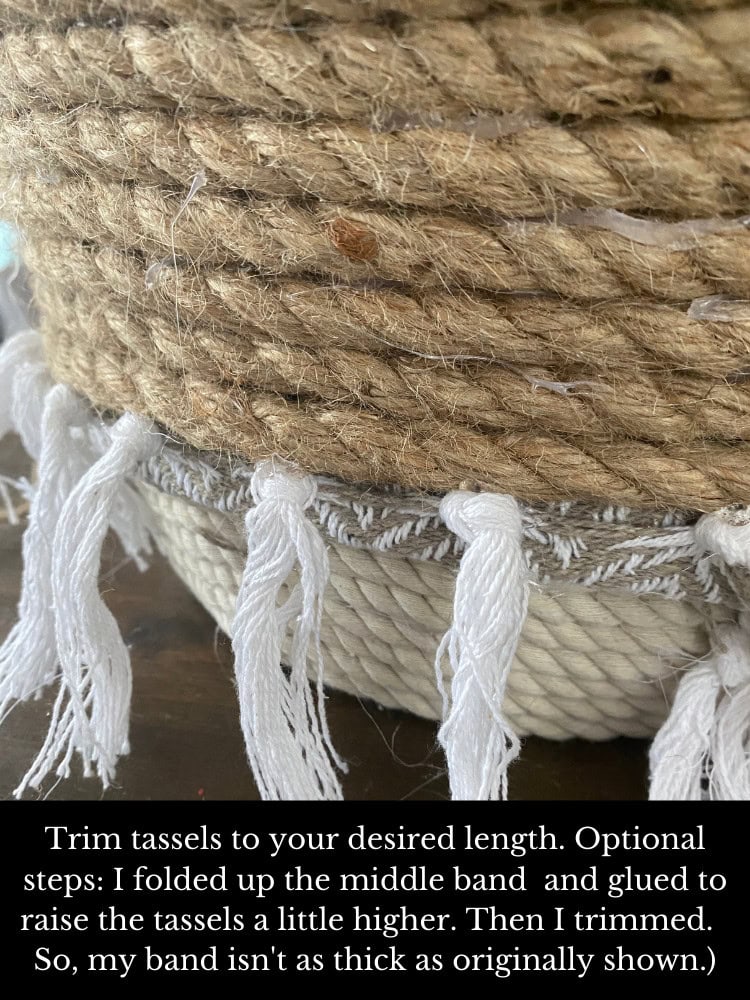
At this point, your tassels might be a little longer than you’d like. At least they were longer than I liked. So I took the band and folded it up and glued it, so it wasn’t so wide. I lost some of the pattern, which was a bummer, but it raise the tassels up a little higher.
I still needed to trim the tassels so they didn’t drag on the ground, but this is your preference.
Once you’ve arranged the middle band as you like it, you can continue to the next step.
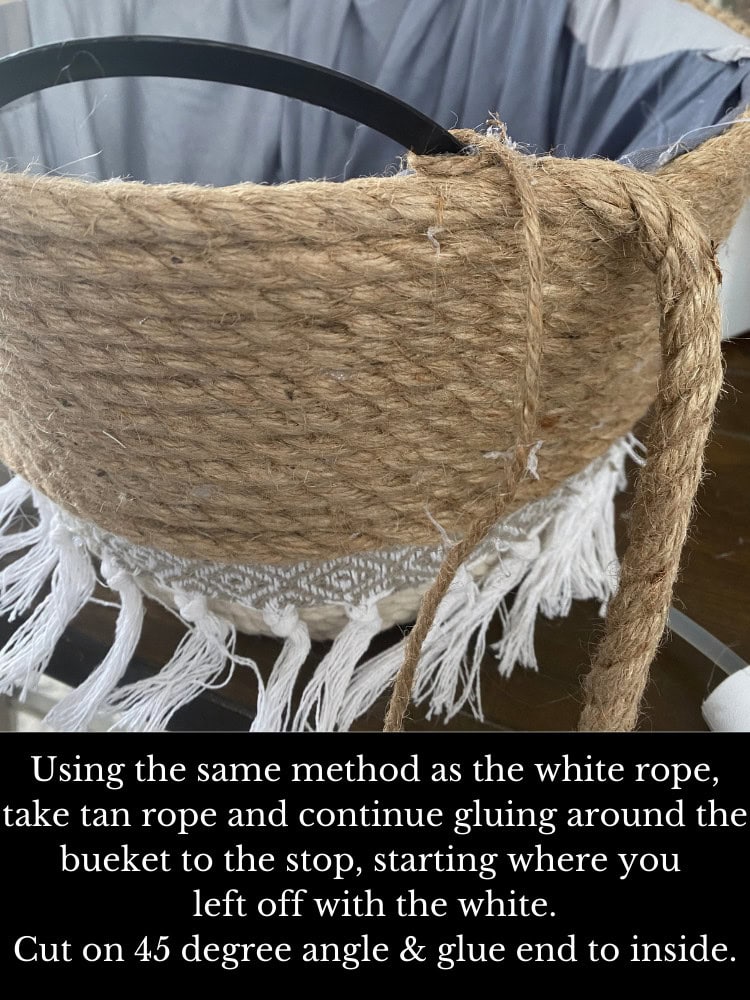
8| Above the rug bands, begin gluing the natural colored rope. Again, be sure to begin underneath the handles, not in the front or back of the bucket. Keep winding and gluing until you reach the top, adding in more lengths of rope as needed.
Glue the rope right on top of the fabric. You can even glue one layer of rope on the inside of the bucket so it hides the fabric. Using a strong pair of scissors or a flat pair of pliers, cut the rope at a 45-degree angle so it blends in.
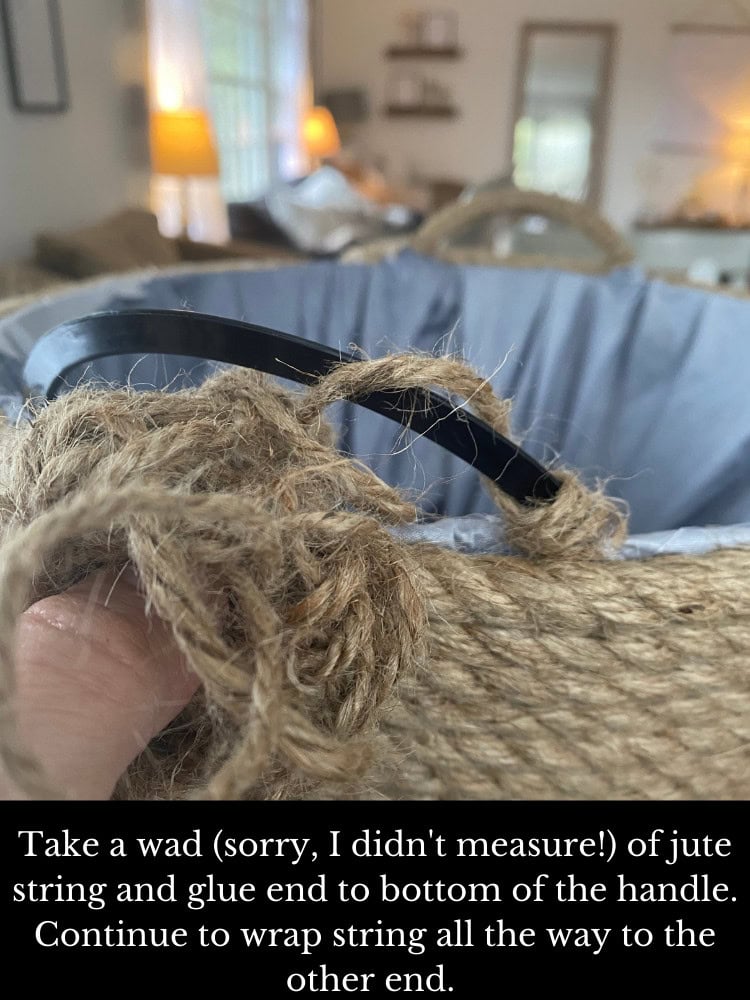
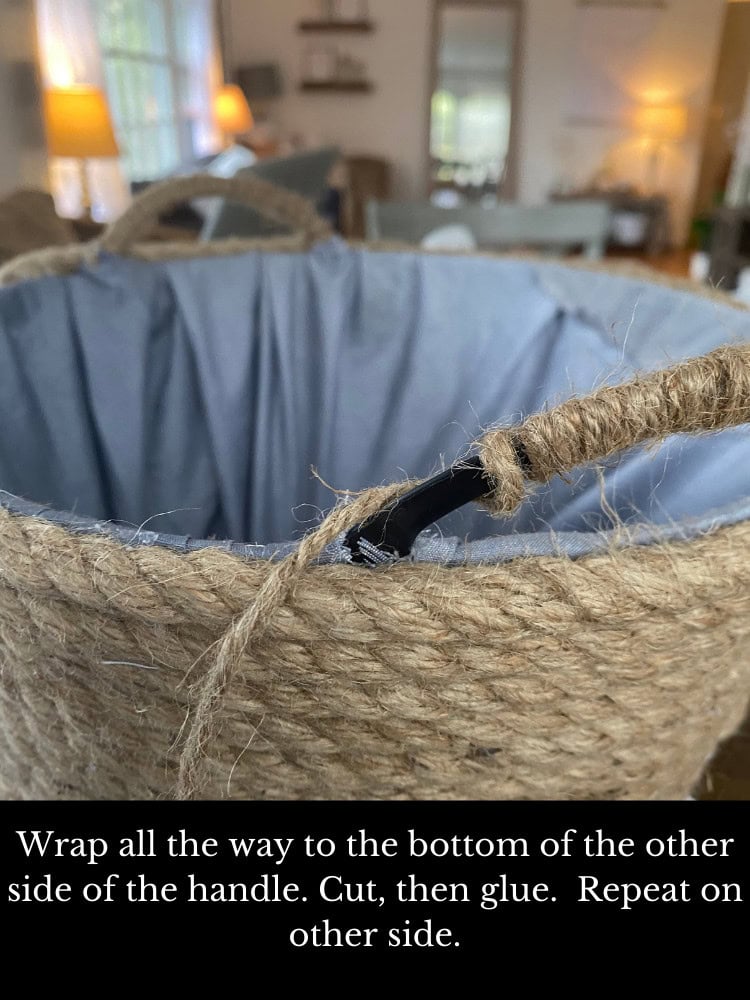
9| Take your jute rope and unwind a long piece (I didn’t measure this! Sorry! Just a good wad of string!). Glue it to the inside of the handles and wind your way around it until it covers the handle. No need to glue it as you go. When finished, cut and glue. Repeat on other handle.
Optional Step:
If you’d like to make a bead tassel, you can follow these instructions. To be honest, I just winged it – following instructions is probably a much better way to go!
Here’s the end result:

DIY Gift Basket Ideas
If you want to really have a little fun, how about giving this as a gift basket? Not only will the items you fill it with be a gift, but also the basket itself is part of the gift! This is a fabulous piece of decor that fits in beautiful with farmhouse, modern farmhouse and boho style homes!
It’s great for a Mother’s Day or birthday gift, bridal shower, Easter basket for a teenage girl, or a friend pick-me-up gift!
If you need some gift basket theme inspiration, take a look at this post with 35+ Unique & Inexpensive DIY gift basket ideas – this basket would work incredibly well with so many of them!
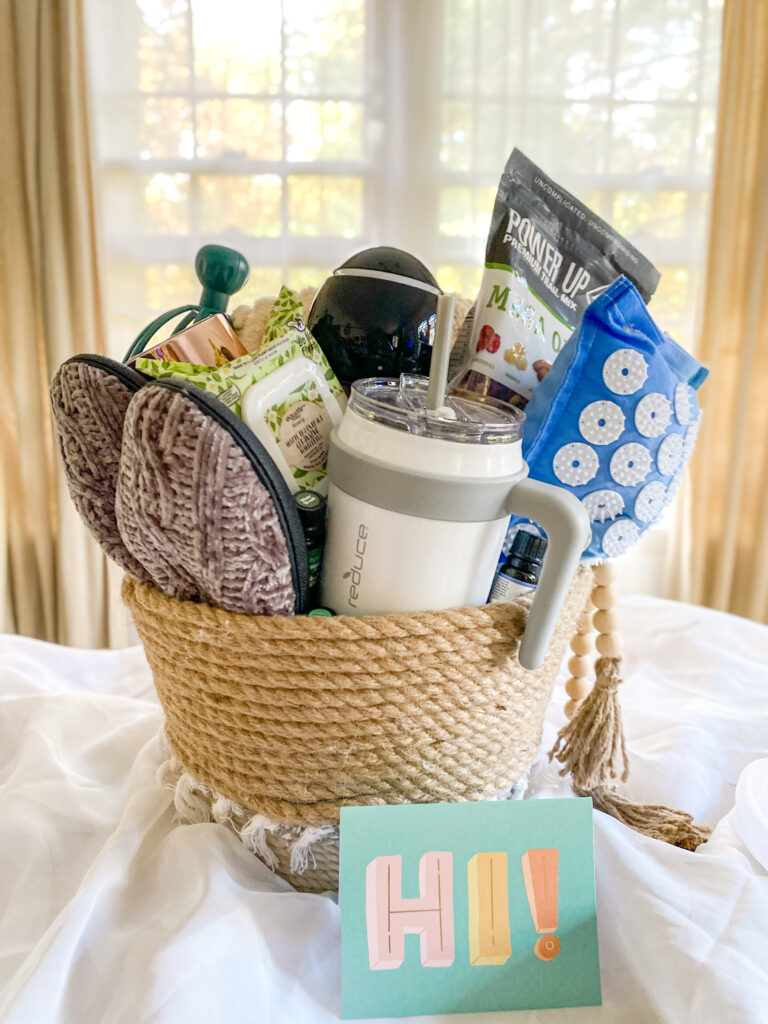
Here’s how I set it up for a beach-themed gift basket! (And the Mother’s Day tags are in my Etsy shop as well! – they come in 4 different designs!)
For a beach theme, you can include a towel (I love this one from Tesalate – sand-free!), flip flops, sunscreen, a beach pillow, snacks, water cup, magazines, ear buds… any beach gear would be amazing!

I also created a DIY health and wellness gift basket with this DIY as well!
Dollar Tree Rope Basket DIY
Materials
- 1 plastic bucket
- 3 white nautical rope lengths
- 4-5 brown nautical rope lengths
- 26" square fabric (you can use any scrap cloth or clothes. Dollar tree has T-shirts, pillowcases, etc. that would work fine, too)
- 1 16” woven rug with tassel
- Roll of jute string
- Glue Gun and Glue Sticks
- Masking Tape
- Scissor/Flat pliers for cutting
Instructions
- If you are doing a two-tone basket with the middle row of tassels, you'll need to do this step. If you aren't planning to include this and you only want a two-tone rope basket, you can skip to #3!
- In order to use the edges of the woven rug, measure around the bucket & find 32" around. The rug is 16” wide, so using both ends of the rug to form the band, you’ll end up with 32” to use. Mark it with masking tape, so you know where to stop your bottom layer of rope and where to place the middle layer of the woven rug.
- Cut a piece of fabric in a 26” square.
- Lay your fabric so it is centered in your bucket. Move the fabric to the side and put hot glue on the bottom. Then, quickly and liberally, apply glue the fabric to the bottom and place the fabric down.
- Once your bottom is glued, pull the fabric tightly over the top edge of the bucket and glue to the outside. Make small cuts for the fabric to go around the handles. Trim the fabric when finished.
- Take white nautical rope and glue the end to the side of the bucket, below the handles. Begin winding around the bucket and glue as you go. Keep going until you reach the masking tape. Add additional rope as you run out. Once you hit the masking tape, that is where you should begin your accent rug band. Cut your white rope there.
- Take rug and measure about 2” from the tassel edge. Cut both ends of the rug so you have 2 bands, 16” each. Fold over the top edge and glue for a clean edge.
- Measure both bands around the bucket before you start gluing, to ensure your bands will fit all the way around the bucket. Take your first band and glue it to the buck. Be sure to begin below the handle so the seam won’t be visible from the front. Glue your second band, ensuring that edges of each touch each other or are as close as possible. The rug should have a little give to it if you need to pull it.
- Here, you may opt to fold rug band up and glue, so tassels don't reach below the bottom of the bucket. You still may need to trim tassels to your preferred length. Once you’ve arranged the middle band as you like it, you can continue to the next step.
- Above the rug bands, begin gluing the natural colored rope underneath the handles. Keep winding and gluing until you reach the top, adding in more lengths of rope as needed.
- Glue the rope right on top of the fabric. You can even glue one layer of rope on the inside of the bucket so it hides the fabric. Using a strong pair of scissors or a flat pair of pliers, cut the rope at a 45-degree angle so it blends in.
- Take your jute rope and unwind a long piece - a good wad of string!). Glue it to the inside of the handles and wind your way around it until it covers the handle. No need to glue it as you go. When finished, cut and glue. Repeat on other handle.
- You may add a tassel bead garland if you'd like!
Optional Step:
If you’d like to make a bead tassel, you can follow these instructions. To be honest, I just winged it - following instructions is probably a much better way to go!
More DIY Projects
If you really like Dollar Tree Crafts in general – here are 8 Dollar Tree crafts that you can make in one sitting! If you happen to like the rope type crafts, here’s a coffee table tray I made with the same rope! This is a cheap and easy modern farmhouse DIY wood bead tray!
If you happen to like making signs as crafts, here are different ways to make farmhouse signs that DO NOT require a vinyl cutting machine like a Silhouette or a Cricut! And if you have a Cricut or Silhouette, try this one: 2 Easy Ways to Make a Hat with HTV and a Mini Heat Press
If you make this DIY basket or any other projects here, I’d love to see them! Tag me on Instagram @100affections or leave a comment on Pinterest!
Thoughts? I’d love to hear them! Leave a comment below!


